Page 2 - Contents
Contents 1 The appliance at a glance............................. 3 1.1 Additional benefits............................................ 3 1.2 Delivered contents........................................... 3 1.3 Appliance and equipment overview.................. 4 1.4 Range of appliance use..............
Page 3 - Additional benefits; The appliance at a glance
11 Disposal.......................................................... 32 11.1 Preparing the appliance for disposal................ 32 11.2 Disposing of the appliance in an environmen- tally friendly manner......................................... 32 Congratulations on the purchase of your new applia...
Page 4 - view; Range of appliance use
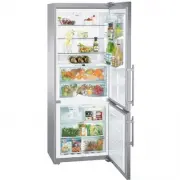
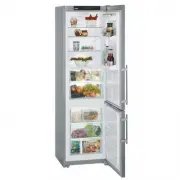
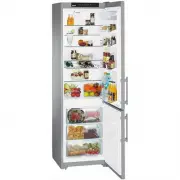
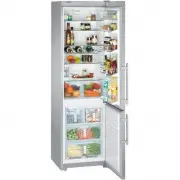
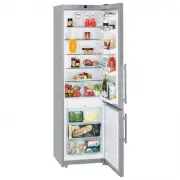
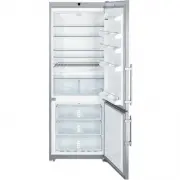
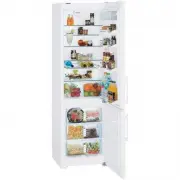
1.3 Appliance and equipment over- view Fig. 1 Example illustration Temperature range (A) Fridge compartment (C) Freezing compartment (B) BioFresh (D) Coldest zone Equipment (1) Control elements (11)Drain hole (2) Fan with FreshAir activated charcoal filter (12)Meat & Dairy safe (3) Stainless ste...
Page 5 - IMPORTANT: The power plug must be easily; General safety instructions
1.5 Conformity The refrigerant circuit has been tested for leaks. When installed, the appliance complies with the relevant safety regulations and the safety standards CAN/CSA-C22.2 No. 60335-1-11, 60335-2-24-06 and UL 60335-1, UL 60335-2-24.BioFresh meets EN ISO 8561 requirements for a chill compart...
Page 7 - Turning on the appliance
ment Canada. Operation is subject to the following two conditions: • This appliance may not cause interference. • This device must accept any interference, including interference that may cause unde- sired operation of the device. IC Radio Frequency Exposure Statement - This appliance is found to co...
Page 8 - Insert the equipment; Food management
Note The manufacturer recommends: u Place the food inside: Wait for around 6 hours until the set temperature is reached. u Store frozen foods at 0 °F (-18 °C) or colder. 3.2 Insert the equipment u Insert the supplied equipment to help you make the most of the appliance. u Install the SmartDevice app...
Page 10 - Energy saving
Guideline storage times for the Fruit & Vegetable- SafeCarrots at 34 °F (1 °C) up to 80 days Garlic at 34 °F (1 °C) up to 160 days Cabbage turnip at 34 °F (1 °C) up to 14 days Iceberg lettuce at 34 °F (1 °C) up to 13 days Herbs at 34 °F (1 °C) up to 13 days Leeks at 34 °F (1 °C) up to 29 days Mu...
Page 11 - Controls and displays; Use
- Energy consumption depends on installation conditions such as the ambient temperature (see 1.4 Range of appliance use) . A warmer ambient temperature can increase the energy consumption. - Avoid opening the appliance door for any longer then necessary - The lower the temperature is set the higher ...
Page 13 - Temperature; SuperCool
u Select the desired setting value by swiping the display. u Tap briefly to confirm. w You hear the confirmation tone. w Status appears briefly in the submenu. w Display switches back to the menu. 6.2.5 Calling up the customer menu The customer menu provides the following settings: Symbol FunctionBi...
Page 14 - SuperFrost; PartyMode; HolidayMode
u Activating/deactivating in the Liebherr SmartDevice- App. The function automatically turns off. The appliance goes back to normal mode. The temperature adjusts itself to the set level. SuperFrost Select this function for the maximum freezing setting, to reach lower freezing temperatures.This funct...
Page 15 - Language
u Activate the function. (see 6.2 Operating logic) -or- u Activate via the Liebherr SmartDevice-App. w It can take up to 24 hours for the first ice cubes to be made. Deactivating the function u Deactivate the function. (see 6.2 Operating logic) -or- u Deactivate the function via the Liebherr SmartDe...
Page 16 - Entry lock
Setting up the WLAN connection Fig. 8 u Activate (see 6.2 Operating logic) . w The connection is set up: Connecting appears. The symbol flashes. w The connection is set up: WiFi appears, the display turns blue. w The connection failed: WiFi Error appears. Disconnecting u Deactivate the setting (see ...
Page 17 - SabbathMode; CleaningMode; Ice cubes
View appliance data u Swipe in the display until Settings appears. u Confirm the display. u Swipe in the display until About appears. u Read the appliance data. SabbathMode This setting meets the religious requirements on the Sabbath and Jewish festivals. Turn on SabbathMode to switch off certain co...
Page 18 - Reminder; Reset
BioFresh B-Value In the delivery condition of the appliance, the value is set to B5. The status indicator on the display shows the appropriate target temperature in the BioFresh.You can change this value slightly if a higher or lower ambient temperature makes it necessary. When setting the value, no...
Page 19 - Equipment
Power failure. This message appears if the freezer temperature rises after a power outage. When the power outage is over, the appliance will continue to operate at the last temperature setting. u Stop alarm: Confirm the message. w Temperature alarm appears (see Temperature alarm) . Temperature alarm...
Page 20 - Space for baking tray
Extension stops secure the shelves against being acci- dentally pulled out Fig. 14 u Lift the shelf and pull to the front. w Side recess to shelf position. u Reposition the shelf: Lift up or lower to the desired height and insert. -or- Fig. 15 u Take out the shelf completely: Pull out to the front. ...
Page 21 - Variable bottle shelf
Fig. 19 Make sure that the following requirements are fulfilled q Max. baking tray dimensions are adhered to (see 9.1 Technical specifications) . q Baking tray has cooled to room temperature. q The bottom door stopper is set at least one position up.When door 90° is open: u Slide the baking tray ont...
Page 23 - Humidity control
u Insert the drawer as shown in the diagram. Drawer on telescopic railsFull extension:* Fig. 32 * u Slide the rails in.* u Place the drawer on the rails.* u Push all the way back.* w Full extension: Latches audibly in place at the back.* Partial pull-out fridge compartment:* Fig. 33 * u Slide the ra...
Page 25 - FreshAir carbon filter; Removing the FreshAir carbon filter; Maintenance
Using the egg rack Fig. 41 u Top section: store hen eggs. u Bottom section: store quail eggs. 7.12.3 Bottle rack Using the bottle rack Fig. 42 u Slide the bottle rack at the edges. w Stops bottles from tipping over. Removing the bottle rack Fig. 43 u Slide the bottle rack all the way to the right ed...
Page 26 - Inserting the FreshAir carbon filter
8.1.2 Inserting the FreshAir carbon filter Fig. 46 u Insert the carbon filter as shown in the diagram Fig. 46 (1) . w The carbon filter clicks into place. If the carbon filter is pointing downwards: u Push the compartment in Fig. 46 (2) . w The carbon filter is now ready for use. 8.2 Water tank The ...
Page 27 - Defrosting the appliance; ment; Cleaning the appliance
8.3.2 Installing the water filter Fig. 49 Make sure that the following conditions are fulfilled q Water pressure is maintained (see Installation Instruc- tions, Water Connection). u Remove the drawer. u Insert the water filter and turn clockwise approx. 90° until it engages. u Make sure the filter d...
Page 28 - Technical specifications; Customer support
Please note: the grease in the tracks is there for lubrica- tion purposes and must not be removed! Clean in the dishwasher up to 140 °F (60 °C):- Door racks - Bottle rack - Shelf - Split shelf - Holder for the split shelf - Drip tray - Egg rack - Butter dish - Ice cube scoop u Disassemble the equipm...
Page 29 - Operating noises
Max. equipment capacityEquipment Appliance width 21-5/8 '' (550 mm) (see installation instruc- tions, appliance dimen- sions) Appliance width 23-5/8 '' (600 mm) (see installation instruc- tions, appliance dimen- sions) Appliance width 27-9/16 '' (700 mm) (see installation instruc- tions, appliance d...
Page 30 - Technical faults
9.3 Technical faults Your appliance is designed and manufactured for reliable operation and a long service life. If a malfunction nonethe- less occurs during operation, please check whether the malfunction is due to an operating error. In this case, you will have to be charged for the costs incurred...
Page 31 - Customer service
9.3.2 Equipment Defect Cause Remedy The IceMaker cannot be switched on. The appliance and therefore the IceMaker are not connected. u Connect the appliance (see Installation Guide). The IceMaker is not making any ice cubes. The IceMaker is not switched on. u Activate the IceMaker. The drawer of the ...
Page 32 - 0 Decommissioning; Preparing the appliance for; Disposing of the appliance in an; Decommissioning
9.5 Rating plate The nameplate is located behind the drawers on the inside of the appliance. Fig. 50 (1) Appliance name (3) Serial no. (2) Service no. u Information from the nameplate. 10 Decommissioning u Empty appliance. u Switch off the IceMaker . u Switch off the appliance (see 6.4 Settings) . u...
Page 33 - Disposal
Page 34 - Built-in combined fridge-freezer with BioFresh
home.liebherr.com/fridge-manuals Built-in combined fridge-freezer with BioFresh Issue date: 20220708 Part number index: 7088266-00 For Service in the U.S.: Liebherr Service Center Toll Free: 1-866-LIEBHER or 1-866-543-2437 [email protected] PlusOne Solutions, Inc. 3501 Quadrangle Blvd, Suite 120 Orl...