Liebherr HC-2090 - Manuals
Liebherr HC-2090 Refrigerator – User Manual in PDF format online.
Manuals:
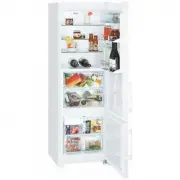
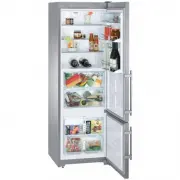
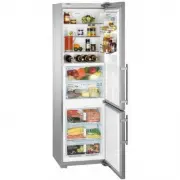
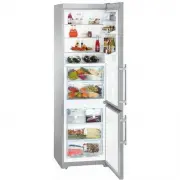
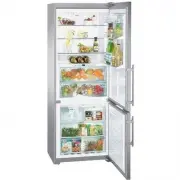
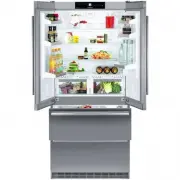
User Manual Liebherr HC-2090


Summary
2 C ongratulations on your purchase. Choosing this appliance means you want all the benefits of state-of- the-art refrigeration technology, guaranteeing you top quality, a long appliance life span and excellent reliabil- ity.The features on your appliance have been designed to ensure maximum conveni...
3 s afeTy Please Read and Follow these Instructions These instructions contain Danger, Warning, and Caution notes. This information is important for safe and efficient instal- lation and operation. Always read and comply with all Danger, Warning, and Caution notes! DANGER! Danger indicates a hazard ...
4 s afeTy Disposal of Packaging Material The packaging is designed to protect the appliance and individual components during transport and is made of recyclable materials. WARNING! Keep packaging materials away from children. Polythene sheets and bags can cause suffocation! If possible, please recyc...
Liebherr Refrigerators Manuals
-
 Liebherr B 2756
User Manual
Liebherr B 2756
User Manual
-
 Liebherr B 2756 Premium BioFresh
User Manual
Liebherr B 2756 Premium BioFresh
User Manual
-
 Liebherr BNes_SBNes ... 6
User Manual
Liebherr BNes_SBNes ... 6
User Manual
-
 Liebherr C 4023
User Manual
Liebherr C 4023
User Manual
-
 Liebherr C5740IM
User Manual
Liebherr C5740IM
User Manual
-
 Liebherr CBesf 4006 BioFresh
User Manual
Liebherr CBesf 4006 BioFresh
User Manual
-
 Liebherr CBN 3656
User Manual
Liebherr CBN 3656
User Manual
-
 Liebherr CBN 3656 Premium
User Manual
Liebherr CBN 3656 Premium
User Manual
-
 Liebherr CBN 3913 Comfort
User Manual
Liebherr CBN 3913 Comfort
User Manual
-
 Liebherr CBN 3956 Premium
User Manual
Liebherr CBN 3956 Premium
User Manual
-
 Liebherr CBNb 3913
User Manual
Liebherr CBNb 3913
User Manual
-
 Liebherr CBNb 3913 Comfort
User Manual
Liebherr CBNb 3913 Comfort
User Manual
-
 Liebherr CBNes 3656
User Manual
Liebherr CBNes 3656
User Manual
-
 Liebherr CBNes 3656 Premium
User Manual
Liebherr CBNes 3656 Premium
User Manual
-
 Liebherr CBNes 3956 Premium
User Manual
Liebherr CBNes 3956 Premium
User Manual
-
 Liebherr CBNes 3957
User Manual
Liebherr CBNes 3957
User Manual
-
 Liebherr CBNes 3957 Premium
User Manual
Liebherr CBNes 3957 Premium
User Manual
-
 Liebherr CBNes 5167
User Manual
Liebherr CBNes 5167
User Manual
-
 Liebherr CBNes 6256 PremiumPlus
User Manual
Liebherr CBNes 6256 PremiumPlus
User Manual
-
 Liebherr CBNES5167RH
User Manual
Liebherr CBNES5167RH
User Manual