Liebherr ECBN 5066 - Manuals
Liebherr ECBN 5066 Refrigerator – User Manual, Manual in PDF format online.
Manuals:
User Manual Liebherr ECBN 5066


Summary
Disposal notes The appliance contains reusable materials and should be disposed of properly - not simply with unsorted household refuse. Appliances which are no longer needed must be disposed of in a professional and appropriate way, in accordance with the current local regulations and laws. When di...
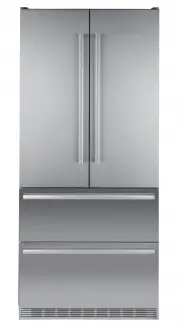
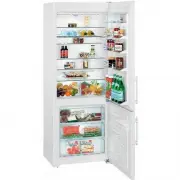
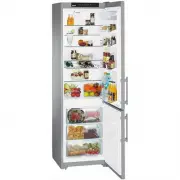
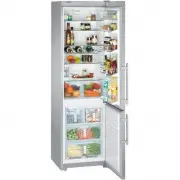
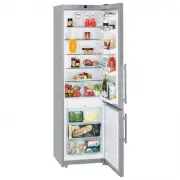
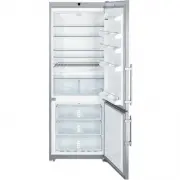
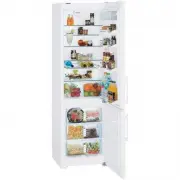
GB Description of the appliance 1 Operating and control elements 2 Adjustable door racks 3 Adjustable storage shelves 4 Bottle racks 5 Type plate (behind the vegetable drawer on the left-hand side) 6 Vegetable drawers 7 Water filter 8 Upper freezer drawer 9 Lower freezer drawer bl IceMaker (in the i...
Replace the filter when the waterdrop symbol appears in the temperature display. Filters can be obtained from your dealer.The drop symbol must be cancelled after the filter has been changed. For detailed instructions see section entitled " Setup mode ". Water filter Before switching on the a...
Manual Liebherr ECBN 5066


Summary
2 Setting up • Avoid positioning the appliance in direct sunlight or near cookers, radiators and similar sources of heat. • The floor on which the appliance stands should be horizontal and level. • The ventilation grilles should not be obstructed. Always ensure that there is good ventilation and tha...
3 Appliance dimensions A = 76 mm B = 2027 mm C = 757 mm D = 610 mm E = 1403 mm F = 943 mm Installation dimensions The location of the socket can within a radius of 2000 mm from the appliance top center. The ice maker is fitted in the freezer compartment of the combined refrigerator-freezer. It must ...
4 Mounting the anti-tipping device WARNING! The supplied anti-tipping bracket must be installed in all cases. This prevents the appliance from tipping over when the fully loaded door is opened. Installation: 1. Mark the centre line of the appliance on the floor. Align the anti-tipping bracket centre...
Liebherr Refrigerators Manuals
-
 Liebherr C 4023
User Manual
Liebherr C 4023
User Manual
-
 Liebherr C5740IM
User Manual
Liebherr C5740IM
User Manual
-
 Liebherr CBN 3656 Premium
User Manual
Liebherr CBN 3656 Premium
User Manual
-
 Liebherr CBNes 5167
User Manual
Liebherr CBNes 5167
User Manual
-
 Liebherr CBNES6256
User Manual
Liebherr CBNES6256
User Manual
-
 Liebherr CBNPes 5167 PremiumPlus
User Manual
Liebherr CBNPes 5167 PremiumPlus
User Manual
-
 Liebherr CBPesf 4033
User Manual
Liebherr CBPesf 4033
User Manual
-
 Liebherr CN 4003 NoFrost
User Manual
Liebherr CN 4003 NoFrost
User Manual
-
 Liebherr CN 5156 Premium NoFrost
User Manual
Liebherr CN 5156 Premium NoFrost
User Manual
-
 Liebherr CNes 4013 Comfort NoFrost
User Manual
Liebherr CNes 4013 Comfort NoFrost
User Manual
-
 Liebherr CNes 4013_CNes 4023
User Manual
Liebherr CNes 4013_CNes 4023
User Manual
-
 Liebherr CNes 4066 Premium NoFrost
User Manual
Liebherr CNes 4066 Premium NoFrost
User Manual
-
 Liebherr CNesf 4003 Comfort NoFrost
User Manual
Liebherr CNesf 4003 Comfort NoFrost
User Manual
-
 Liebherr CNesf 5113 Comfort NoFrost
User Manual
Liebherr CNesf 5113 Comfort NoFrost
User Manual
-
 Liebherr CNP 4056 Premium NoFrost
User Manual
Liebherr CNP 4056 Premium NoFrost
User Manual
-
 Liebherr CNPEF4416
User Manual
Liebherr CNPEF4416
User Manual
-
 Liebherr CPesf 3413_CPesf 3813
User Manual
Liebherr CPesf 3413_CPesf 3813
User Manual
-
 Liebherr CS-1400R
User Manual
Liebherr CS-1400R
User Manual
-
 Liebherr CS-1400R-IM
User Manual
Liebherr CS-1400R-IM
User Manual
-
Liebherr CS-1410-L
User Manual