Liebherr CBN 3656 Premium - Manuals
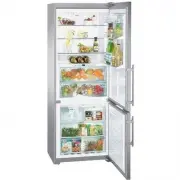
User Manual Liebherr CBN 3656 Premium


Summary
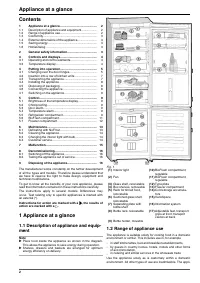
Contents 1 Appliance at a glance............................................ 2 1.1 Description of appliance and equipment.................. 2 1.2 Range of appliance use............................................ 2 1.3 Conformity................................................................ 3 1.4 ...
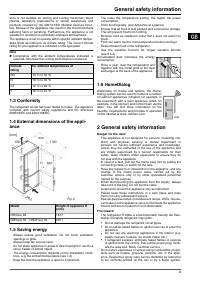
ance is not suitable for storing and cooling medicines, blood plasma, laboratory preparations or similar substances and products covered by the 2007/47/EC Medical Devices Direc- tive. Misuse of the appliance can result in the stored products suffering harm or perishing. Furthermore, the appliance is...
Gases possibly escaping may ignite due to electrical components. - Do not place any burning candles, lamps or other items with naked flames on or in the appliance. - Only store high-percentage alcohol in tightly sealed, upright containers. Alcohol possibly escaping may ignite due to electrical compo...
Liebherr Refrigerators Manuals
-
 Liebherr C 4023
User Manual
Liebherr C 4023
User Manual
-
 Liebherr C5740IM
User Manual
Liebherr C5740IM
User Manual
-
 Liebherr CBNes 5167
User Manual
Liebherr CBNes 5167
User Manual
-
 Liebherr CBNES6256
User Manual
Liebherr CBNES6256
User Manual
-
 Liebherr CBNPes 5167 PremiumPlus
User Manual
Liebherr CBNPes 5167 PremiumPlus
User Manual
-
 Liebherr CBPesf 4033
User Manual
Liebherr CBPesf 4033
User Manual
-
 Liebherr CN 4003 NoFrost
User Manual
Liebherr CN 4003 NoFrost
User Manual
-
 Liebherr CN 5156 Premium NoFrost
User Manual
Liebherr CN 5156 Premium NoFrost
User Manual
-
 Liebherr CNes 4013 Comfort NoFrost
User Manual
Liebherr CNes 4013 Comfort NoFrost
User Manual
-
 Liebherr CNes 4013_CNes 4023
User Manual
Liebherr CNes 4013_CNes 4023
User Manual
-
 Liebherr CNes 4066 Premium NoFrost
User Manual
Liebherr CNes 4066 Premium NoFrost
User Manual
-
 Liebherr CNesf 4003 Comfort NoFrost
User Manual
Liebherr CNesf 4003 Comfort NoFrost
User Manual
-
 Liebherr CNesf 5113 Comfort NoFrost
User Manual
Liebherr CNesf 5113 Comfort NoFrost
User Manual
-
 Liebherr CNP 4056 Premium NoFrost
User Manual
Liebherr CNP 4056 Premium NoFrost
User Manual
-
 Liebherr CNPEF4416
User Manual
Liebherr CNPEF4416
User Manual
-
 Liebherr CPesf 3413_CPesf 3813
User Manual
Liebherr CPesf 3413_CPesf 3813
User Manual
-
 Liebherr CS-1400R
User Manual
Liebherr CS-1400R
User Manual
-
 Liebherr CS-1400R-IM
User Manual
Liebherr CS-1400R-IM
User Manual
-
Liebherr CS-1410-L
User Manual
-
 Liebherr CS-2090
User Manual
Liebherr CS-2090
User Manual