Page 2 - Safety Information; CAUTION
1 Getting Started Getting Started 2 Getting S tar ted 1 Safety Information CAUTION RISK OF ELECTRIC SHOCK DO NOT OPEN CAUTION: TO REDUCE THE RISK OF ELECTRIC SHOCK DO NOT REMOVE COVER (OR BACK) NO USER-SERVICEABLE PARTS INSIDE REFER SERVICING TO QUALIFIED SERVICE PERSONNEL. This lightning flash with...
Page 3 - Copyrights
Getting Started 3 Getting S tar ted 1 This device is equipped with a portable battery or accumulator. Safe way to remove the battery or the battery from the equipment: Remove the old battery pack, follow the steps in reverse order than the assembly. To prevent contamination of the environment and br...
Page 4 - Table of Contents; Getting Started
Table of Contents 4 Table of Contents 1 Getting Started 2 Safety Information 6 Unique Features 6 – USB Direct Recording 6 – Full HD up-scaling 6 Accessories 7 Introduction 7 – Playable Discs 7 – About the & Symbol Display 7 – Symbol Used in this Manual 7 – Regional Codes 8 – Playable file Requir...
Page 5 - Appendix
Table of Contents 5 1 2 3 4 5 6 5 Troubleshooting 31 Troubleshooting 6 Appendix 32 Maintenance32 – Handling the Unit32 – Notes on Discs33 Area Code List34 Language Code List35 Trademarks and Licenses36 Specifications HT306SU-F2_BINDLL_ENG_5716.indd 5 2011-04-26 �� 2:49:05
Page 6 - Unique Features; USB Direct Recording; Accessories
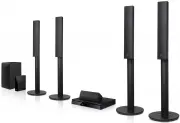
Getting Started 6 Getting S tar ted 1 Unique Features USB Direct Recording Records music from CD to your USB device. Full HD up-scaling Views Full HD picture quality with simple setup. Accessories Please check and identify the supplied accessories. FM Antenna (1) Remote Control (1)/ Battery (1) Vide...
Page 7 - Introduction; Playable Discs; Symbol Used in this Manual; Note; Caution; Regional Codes
Getting Started 7 Getting S tar ted 1 Introduction Playable Discs This unit plays DVD±R/RW and CD-R/RW that contains audio titles, DivX, MP3, WMA and/or JPEG files. Some DVD±RW/DVD±R or CD-RW/CD-R cannot be played on this unit due to the recording quality or physical condition of the disc, or the ch...
Page 8 - Playable file Requirement; MP3/ WMA music file requirement; Photo file requirement; Compatible USB Devices; USB device requirement
Getting Started 8 Getting S tar ted 1 Playable file Requirement MP3/ WMA music file requirement MP3/ WMA file compatibility with this unit is limited as follows : y Sampling frequency : within 32 kHz to 48 kHz (MP3), within 32 kHz to 48 kHz ( WMA) y Bit rate : within 32 kbps to 320 kbps (MP3), 40 kb...
Page 9 - DivX file requirement
Getting Started 9 Getting S tar ted 1 DivX file requirement DivX file compatibility with this unit is limited as follows : y Available resolution: within 720 x 576 ( W x H) pixels. y The file name of the DivX subtitle should be entered within 45 characters. y If there is impossible code to express i...
Page 10 - Front panel
Getting Started 10 Getting S tar ted 1 Front panel 7 1 3 4 6 9 8 2 5 10 11 12 a DVD/CD Disc Drawer b Display window c Open/Close ( B ) d Function (F)Selects the function or input source. e Play/Pause ( d / M ) f Stop ( Z ) g TUNING (-/+)( c/v ), SKIP/SCAN (-/+) You can search chapter/ track/ file by...
Page 11 - Rear panel
Getting Started 11 Getting S tar ted 1 Rear panel 7 1 3 4 6 2 5 a Power cord b Speaker terminal c ANTENNA connector (FM) d MONITOR ( VIDEO OUT ) connector Connect to a TV with video inputs e AUX (L/ R) INPUT connector f HDMI OUT connector g COMPONENT VIDEO (PROGRESSIVE SCAN) OUTPUT (Y P B P R ) Conn...
Page 12 - Battery Installation; Remote control
Getting Started 12 Getting S tar ted 1 1 3 4 2 5 Battery Installation Remove the battery cover on the rear of the Remote Control, and insert one (size AAA) battery with 4 and 5 matched correctly. • • • • • • a • • • • • FUNCTION : Selects the function and input source. SLEEP : Sets the system to tur...
Page 13 - Connecting the; Attaching the speakers to the; Positioning the System
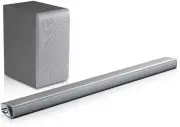
2 Connecting Connecting 13 C onnecting 2 Connecting the speakers Attaching the speakers to the unit To connect the cable to the unit, press each plastic finger pad to open the connection terminals on the unit. Insert the wire and release the finger pad.Connect the black stripe of each wire to the te...
Page 14 - Connections to Your; HDMI OUT Connection
Connecting 14 C onnecting 2 Connections to Your TV Make one of the following connections, depending on the capabilities of your existing equipment. y Depending on your TV and other equipment you wish to connect, there are various ways you could connect the player. Use only one of the connections des...
Page 15 - Resolution Setting; Component Video Connection
Connecting 15 C onnecting 2 Resolution Setting You can change the resolution for component video and HDMI output.Press RESOLUTION repeatedly to select the desired resolution - 480i (or 576i), 480p (or 576p), 720p, 1080i, 1080p The resolution may not be selected depending on the connection or TV.Depe...
Page 16 - Video Connection; Optional Equipment; AUX IN Connection
Connecting 16 C onnecting 2 Video Connection Connect the VIDEO OUT (MONITOR) jack on the unit to the video in jack on the TV using a video cable.You can hear the sound through the system’s speakers. Optional Equipment Connection AUX IN Connection Connect an Output of auxiliary device to the AUX (L/R...
Page 17 - Connection; Antenna Connection
Connecting 17 C onnecting 2 PORT. (Portable) IN Connection Connect an OUTPUT of portable device (MP3 or PMP etc) to the PORT. IN connector. MP3 player, etc... USB Connection Connect the USB port of USB Memory (or MP3 player, etc.) to the USB port on the front of the unit. Removing the USB Device fro...
Page 18 - Adjust the Setup; OSD Initial language settings; To display and exit the Setup
3 System Setting System Setting 18 S ys tem Se tting 3 Adjust the Setup settings By using the Setup menu, you can make various adjustments to items such as picture and sound.You can also set a language for the subtitles and the Setup menu, among other things. For details on each Setup menu item, see...
Page 19 - LANGUAGE; Menu Language; DISPLAY; TV Aspect; Display Mode
System Setting 19 S ys tem Se tting 3 LANGUAGE Menu Language Select a language for the Setup menu and then on screen display. Disc Audio / Disc Subtitle / Disc Menu Select the language you prefer for the audio track (disc audio), subtitles, and the disc menu. [Original] Refers to the original langua...
Page 20 - AUDIO
System Setting 20 S ys tem Se tting 3 AUDIO 5.1 Speaker Setup Make the following settings for the built-in 5.1 channel surrounds decoder.1. Press SETUP . 2. Use WS to select AUDIO menu and then press D . 3. Use WS to select [5.1 Speaker setup] menu and then press D . 4. Press ENTER The [5.1 Speaker ...
Page 21 - Vocal; Semi Karaoke; Initial Setting of the Area Code:; Rating
System Setting 21 S ys tem Se tting 3 DRC (Dynamic Range Control) Make the sound clear when the volume is turned down (Dolby Digital only). Set to [On] for this effect. Vocal Select [On] to mix karaoke channels into normal stereo.This function is effective for multi-channel karaoke DVDs only. HD AV ...
Page 22 - Password; Area Code; OTHERS
4 Operating System Setting 22 S ys tem Se tting 3 Password You can enter or change password.1. Select [Password] on the [Lock] menu and then press D . 2. Input a password and press ENTER . To change the password, press ENTER when the [Change] option is highlighted. Input a password and press ENTER ....
Page 23 - Basic Operations
4 Operating Operating 23 Oper ating 4 Basic Operations 1. Insert the disc by pressing OPEN/CLOSE or connect the USB device to the USB port. 2. Select the DVD/ CD or USB function by pressing FUNCTION . 3. Select a file (or track/ title) you want to play by pressing WSAD . When playing a disc or USB F...
Page 24 - Other Operations; Displaying Disc Information; To display the DVD Menu; To display the DVD Title; Selecting a subtitle language; times speed playback
Operating 24 Oper ating 4 Other Operations Displaying Disc Information on-screen You can display various information about the disc loaded on-screen.1. Press DISPLAY to show various playback information. The displayed items differ depending on the disc type or playing status. 2. You can select an it...
Page 25 - Erasing a file from Program List; Erasing the Complete Program List
Operating 25 Oper ating 4 Starting play from selected time ry To start playing at any chosen time on the file or title.1. Press DISPLAY during playback. 2. Press WS to select the time clock icon and “--:--:--” appears. 3. Input the required start time in hours, minutes, and seconds from left to righ...
Page 27 - Radio Operations
Operating 27 Oper ating 4 Turn off the sound temporarily Press MUTE to mute your unit. You can mute your unit, for example, to answer the telephone, the “MUTE” displayed in the display window. Screen Saver The screen saver appears when you leave the unit in stop mode for about five minutes. System S...
Page 28 - Presetting the Radio Stations; Deleting all the saved stations
Operating 28 Oper ating 4 Presetting the Radio Stations You can preset 50 stations for FM.Before tuning, make sure that you have turned down the volume.1. Press FUNCTION until FM appears in the display window. 2. Select the desired frequency by using TUN. (-/+). 3. Press PROG./MEMO. a preset number ...
Page 29 - Sound adjustment; Setting the surround mode
Operating 29 Oper ating 4 Sound adjustment Setting the surround mode This system has a number of pre-set surround sound fields. You can select a desired sound mode by using EQ/ LG EQ. You can change the EQ/ LG EQ using AD arrow key while the EQ/ LG EQ information is displayed on.The displayed items ...
Page 30 - Advanced Operations; Listening to music from your
5 Troubleshooting 30 Oper ating 4 Operating Advanced Operations Listening to music from your portable player or external device The unit can be used to play the music from many types of portable player or external devices. 1. Connect the portable player to the PORT. IN(PORTABLE IN) connector of the ...
Page 32 - Maintenance; Handling the Unit
6 Appendix Appendix 32 Appendix 6 Maintenance Handling the Unit When shipping the unit Please save the original shipping carton and packing materials. If you need to ship the unit, for maximum protection, re-pack the unit as it was originally packed at the factory.Keeping the exterior surfaces clean...
Page 33 - Area Code List
Appendix 33 Appendix 6 Area Code List Choose an area code from this list. Area Code Area Code Area Code Area Code Afghanistan AF Argentina AR Australia AU Austria AT Belgium BE Bhutan BT Bolivia BO Brazil BR Cambodia KH Canada CA Chile CL China CN Colombia CO Congo CG Costa Rica CR Croatia HR Czech ...
Page 34 - Language Code List
Appendix 34 Appendix 6 Language Code List Use this list to input your desired language for the following initial settings: [Disc Audio], [Disc Subtitle] and [Disc Menu]. Language Code Language Code Language Code Language Code Afar 6565 Afrikaans 6570 Albanian 8381 Ameharic 6577 Arabic 6582 Armenian ...
Page 35 - Trademarks and
Appendix 35 Appendix 6 Trademarks and Licenses HDMI, the HDMI logo and High-Definition Multimedia Interface are trademarks or registered trademarks of HDMI licensing LLC. “DVD Logo” is a trademark of DVD Format/Logo Licensing Corporation. DivX®, DivX Certified® and associaated logos are trademark of...
Page 36 - Specifications
Appendix 36 Appendix 6 Specifications General Power requirements Refer to main label. Power consumption Refer to main label. Dimensions ( W x H x D) Approx. 360 x 62.5 x 313 mm without foot Net Weight (Approx.) 2.9 kg Operating temperature 5 °C to 35 °C (41 °F to 95 °F) Operating humidity 5 % to 90 ...