Page 3 - S A F E T Y I N F O R M AT I O N; General Safety; Customer; Caution: Risk of Leaks and; R E A D A N D S AV E T H E S E
3 S A F E T Y I N F O R M AT I O N • Only use the humidifier as described in this manual. • Place the humidifier and cord so that it will not be knocked over. Do not place near large pieces of furniture or in high-traffic areas. • When not in use, turn the humidifier off and disconnect from power by...
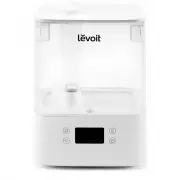
Page 5 - G E T T I N G T O K N O W YO U R S M A R T H U M I D I F I E R; AB
5 G E T T I N G T O K N O W YO U R S M A R T H U M I D I F I E R A. Nozzle B. Water Tank Cover C. Dust Cover D. Mist Tube E. Water Tank F. Night Light G. Base H. Display I. Cleaning Brush J. Max Water Line (Tank) K. Water Tank Handles L. Water Filter M. Power Cord N. Float O. Float Brackets P. Aroma...
Page 7 - C O N T R O L S
7 C O N T R O L S Note: You can also control these functions using the VeSync app, as well as additional functions (see page 13). Power Button • Press to turn the humidifier on/off. • Press and hold for 5 seconds to pair with the VeSync app. See the VeSync in-app instructions for more information. •...
Page 8 - G E T T I N G S TA R T E D; remove all tape
8 G E T T I N G S TA R T E D 1. Remove all packaging. 2. Take the water tank off of the base and remove all tape , including any tape on the float. [ Figure 1.1 ] Figure 1.3 Figure 1.1 Figure 1.4 Figure 1.2 12 in / 30 cm 12 in / 30 cm 3. Clean the water tank and water tank cover before first use. No...
Page 9 - Do not; CAUTION
9 Filling & Refilling 1. Remove the water tank cover by holding the nozzle and pulling upward. [ Figure 1.5 ] Figure 1.5 Figure 1.6 2. Use the handles to remove the tank from the base. Fill the tank with room- temperature water. [ Figure 1.6 ] Do not fill with hot water. Note: • We recommend usi...
Page 11 - V E S Y N C A P P S E T U P
11 Figure 2.1 Note: Due to ongoing updates and improvements, the VeSync app may be slightly different than shown in the manual. In case of any differences, follow the in-app instructions. Note: For Android™ users, choose “Allow” to use VeSync. Note: You must create your own VeSync account to use thi...
Page 12 - U S I N G Y O U R S M A R T H U M I D I F I E R; Controls
12 U S I N G Y O U R S M A R T H U M I D I F I E R 1. Plug in the humidifier. Press to turn your humidifier on. 2. Tap repeatedly to cycle through mist settings: Auto Mode, Low, Medium, and High. [ Figure 3.1 ] 3. Rotate the nozzle to adjust the direction of the mist. [ Figure 3.2 ] 4. Optionally, u...
Page 13 - Remote Control; VeSync App Functions
13 Auto Mode Sleep Mode Auto Mode uses the humidifier’s sensor to automatically adjust the mist level (or turn it off) to maintain a comfortable and healthy level of humidity. • Auto Mode automatically adjusts the mist level to maintain 40–50% relative humidity. You can change the target humidity le...
Page 14 - Important Tips; Never
14 Figure 3.4 Figure 3.5 Figure 3.6 Important Tips Your humidifier must have the correct level of water in the base chamber to work properly. If there is too much water in the base chamber, the humidifier cannot create mist. • Never pour water directly into the base chamber. [ Figure 3.4 ] Only add ...
Page 15 - Using the Aroma Box
15 Using the Aroma Box 1. Push the aroma box at the back of the base and pull it out. [ Figure 3.7 ] Your humidifier can be used for aromatherapy. Figure 3.8 Figure 3.7 2. Put 8–10 drops of essential oil on the aroma pad. [ Figure 3.8 ] 3. Place the aroma box into the humidifier. 4. Turn on the humi...
Page 16 - C A R E & M A I N T E N A N C E; Cleaning
16 Figure 4.1 Figure 4.2 Figure 4.3 Figure 4.4 C A R E & M A I N T E N A N C E Note: • All maintenance should be done on a water-resistant surface, such as a kitchen counter. • Change the water daily to avoid bacteria growth. • Use a tissue or cloth to clean the nozzle regularly. • If not using ...
Page 20 - Cleaning the Aroma Pad
20 Cleaning the Aroma Pad 1. Press the aroma box to release it from the base, and pull it out. [ Figure 4.17 ] Note: Do not pour liquid cleaners or detergents into the aroma pad or box. 2. Remove the aroma pad and rinse under warm, running water. [ Figure 4.18 ] 3. Dry with a clean cloth and place i...
Page 21 - Reassembling; Storing
21 Reassembling 1. Flip the water tank over and place the noise silencer back into the tank. [ Figure 4.20 ] 2. Place the water filter back into the tank and rotate it clockwise to secure it in place. [ Figure 4.21 ] Figure 4.20 Figure 4.21 Figure 4.22 c. Place the larger prong into the open (U-shap...
Page 22 - T R O U B L E S H O O T I N G
22 Problem Possible Solution Humidifier doesn’t turn on, or turns off unexpectedly. Plug in the humidifier and turn it on. Add purified or distilled water to the water tank. Check to see if the humidifier is in Auto Mode. Depending on Auto Mode settings, the humidifier may automatically turn off whe...
Page 23 - Problem
23 If your problem is not listed, please contact Customer Support (see page 27) . TROUBLESHOOTING (CONT.) Problem Possible Solution Humidifier makes a loud or unusual noise. Make sure the water tank is properly in place (see Getting Started , page 8). Set mist level to a lower setting. Empty the bas...
Page 24 - V E S Y N C A P P T R O U B L E S H O O T I N G
24 V E S Y N C A P P T R O U B L E S H O O T I N G Why isn’t my humidifier connecting to the VeSync app? • Make sure your phone has Bluetooth® turned on and is not currently connected to another Bluetooth device. • During the setup process, you must be on a secure 2.4GHz Wi-Fi network. Confirm that ...
Page 26 - W A R R A N T Y I N F O R M AT I O N
26 Terms & Policy Arovast Corporation (“Arovast”) warrants this product to the original purchaser to be free from defects in material and workmanship, under normal use and conditions, for a period of 2 years from the date of original purchase. Arovast agrees, at our option during the warranty pe...
Page 27 - C U S T O M E R S U P P O R T; Distributed by Arovast Corporation; Support Hours; AT T R I B U T I O N S
27 C U S T O M E R S U P P O R T If you have any questions or concerns about your new product, please contact our helpful Customer Support Team. Distributed by Arovast Corporation 1202 N. Miller St., Suite A Anaheim, CA 92806 Email: [email protected] Toll-Free: (888) 726-8520 Mon–Fri, 9:00 am–5:00 p...