Page 2 - CONTENTS
CONTENTS 1.SAFETY INSTRUCTIONS ................................................................................................ 1 1.1. General Safety Warnings .............................................................................................. 1 1.2. Installation Warnings ....................
Page 3 - Drain Pump
8.CLEANING AND MAINTENANCE ................................................................................. 17 8.1. Cleaning the Machine and Filters ................................................................................ 17 8.2. Spray Arms .....................................................
Page 4 - Thank you for choosing this product.; assist you in the operation and maintenance of your appliance.
Thank you for choosing this product. This User Manual contains important information on safety and instructions intended to assist you in the operation and maintenance of your appliance. Please take the time to read this User Manual before using your appliance and keep this book for future reference...
Page 5 - SAFETY INSTRUCTIONS
1. SAFETY INSTRUCTIONS • Read these instructions carefully before using your appliance and keep this manual for future reference. Please check the packaging of your machine before installation and the outer surface of the machine once the packaging has been removed. Do not operate the machine if it ...
Page 8 - RECYCLING; containers for recycling.; PACKAGING AND THE ENVIRONMENT; therefore decreases waste production.; For effective drying, keep the door open for 30 minutes
EN - 4 performed by authorised service company, otherwise the warranty will be void. Before repair work, the machine should be disconnected from the mains. Do not pull the cable to unplug the machine. Switch off the water tap. Operation at a low voltage will cause a decline in performance levels. Fo...
Page 9 - where the product was purchased.
EN - 5 CE Declaration of Conformity We declare that our products meet the applicable European Directives, Decisions and Regulations and the requirements listed in the standards referenced. Disposal of your old machine The symbol on the product or on its packaging indicates that this product may not ...
Page 12 - TECHNICAL SPECIFICATIONS; Super
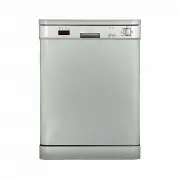
EN - 8 3. TECHNICAL SPECIFICATIONS 13 3.1. General appearance 1. Worktop 2. Upper basket with racks 3. Upper spray arm 4. Lower basket 5. Lower spray arm 6. Filters 7. Rating plate 8. Control panel 9. Detergent and rinse-aid dispenser 10. Cutlery basket 11. Salt dispenser 12. Upper basket track latc...
Page 13 - THE APPLIANCE; Dishwasher for first use
EN - 9 4 . BEFORE USING THE APPLIANCE 4 .1. Preparing your Dishwasher for first use • Make sure the electricity and supply water specifications match the values indicated in the installation instructions for the machine. • Remove all packaging material inside the machine. • Set the water softener le...
Page 14 - . Filling the detergent; . Using combined detergents; is; In order to change the rinse aid level,
EN - 1 0 4. 3 . Filling the detergent Push the latch to open the dispenser and pour in the detergent. Close the lid and press it until it locks in place. The dispenser should be refilled just before the start of each programme. If the dishes are heavily soiled, place additional detergent in the pre-...
Page 15 - The height adjustable racks enable glasses
EN - 1 1 5 . LOADING YOUR DISHWASHER For best results, follow these loading guidelines. Loading the household dishwasher up to the capacity indicated by the manufacturer will contribute to energy and water savings. Manual pre-rinsing of tableware items leads to increased water and energy consumption...
Page 16 - The folding racks are designed so that large
EN - 12 Upper Basket Height adjustment Turn the Rail Stop Clips, at the ends of the rails, to the sides to open them (as shown in the image below), then pull out and remove the basket. Change the position of the wheels, then reinstall the basket to the rail, making sure to close the Rail Stop Clips....
Page 19 - Delaying a Programme
EN - 15 7.. THE CONTR PANEL 5 6 Rotate the Programme Selection Knob ( 4 ) to switch on the machine and select a suitable programme for your dishes. When the Programme Selection Knob is in the 'Off' position, the machine will not operate. Press the Start/Pause button ( 3 ) to start the selected progr...
Page 21 - Filters
EN - 17 8 . CLEANING AND MAINTENANCE Cleaning your dishwasher is important to maintain the machine’s service life Make sure that the water softening setting (If available) is done correctly and correct amount of detergent is used to prevent limescale accumulation. Refill the salt compartment when th...
Page 22 - from the power supply.
EN - 18 8 .3 Drain Pump Large food residues or foreign objects which were not captured by the filters may block the waste water pump. The rinsing water will then be above the filter. Warning Risk of cuts! When cleaning the waste water pump, ensure that you do not injure yourself on pieces of broken ...
Page 24 - AUTOMATIC FAULT WARNINGS AND WHAT TO DO; PRACTICAL INFORMATION; When the machine isn’t in operation:
EN - 20 AUTOMATIC FAULT WARNINGS AND WHAT TO DO TROUBLE CODE POSSIBLE FAULT WHAT TO DO F5 Insufficient water Make sure the water inlet tap is open and water is flowing. Separate the inlet hose from the tap and clean the filter of the hose. Contact for service if the error continues. F3 Continuous wa...