Page 3 - EN; Contents
13 EN Contents Installation instructions ................................................................................................................... 14 Before installation ...........................................................................................................................
Page 4 - Installation instructions; Before installation
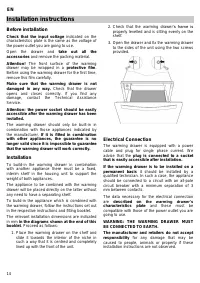
14 EN Installation instructions Before installation Check that the input voltage indicated on the characteristics plate is the same as the voltage of the power outlet you are going to use. Open the drawer and take out all the accessories and remove the packing material. Attention! The front surface ...
Page 5 - Safety Instructions
15 EN Safety Instructions Warning! Before connecting the appliance compare the power data (voltage and frequency) indicated on the characteristics plate with those of the power supply in question. If these data do not match there may be problems. In case of doubt, contact an electrician. Warning! If...
Page 6 - Precautions during use
16 EN Precautions during use This appliance complies with current safety standards. Improper use of the appliance may put the user at risk. Read the operating instructions carefully before using the appliance for the first time. In this way you will avoid the risk of injuring yourself or damaging th...
Page 7 - Appliance Description; Main Components; How the warming drawer works
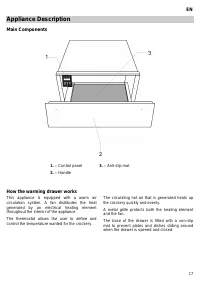
17 EN Appliance Description Main Components 1. – Control panel 3. – Anti-slip mat 2. – Handle How the warming drawer works This appliance is equipped with a warm air circulation system. A fan distributes the heat generated by an electrical heating element throughout the interior of the appliance. Th...
Page 8 - Use; Before using for the first time
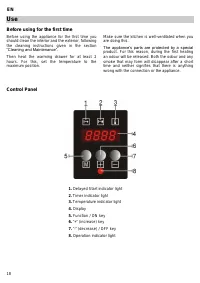
18 EN Use Before using for the first time Before using the appliance for the first time you should clean the interior and the exterior, following the cleaning instructions given in the section “Cleaning and Maintenance”. Then heat the warming drawer for at least 2 hours. For this, set the temperatur...
Page 9 - Operating settings; Heating times
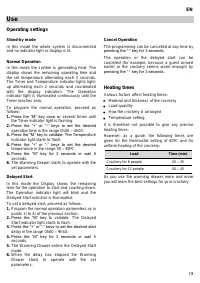
19 EN Use Operating settings Stand-by mode In this mode the whole system is disconnected and no indicator light or display is lit. Normal Operation In this mode the system is generating heat. The display shows the remaining operating time and the set temperature alternating each 2 seconds. The Timer...
Page 10 - Load capacity
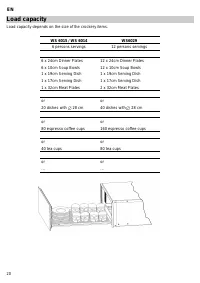
20 EN Load capacity Load capacity depends on the size of the crockery items. WS 6015 / WS 6014 WS6029 6 persons servings 12 persons servings 6 x 24cm Dinner Plates 12 x 24cm Dinner Plates 6 x 10cm Soup Bowls 12 x 10cm Soup Bowls 1 x 19cm Serving Dish 1 x 19cm Serving Dish 1 x 17cm Serving Dish 1 x 1...
Page 11 - Cleaning and Maintenance; Appliance front and control panel; Interior of the warming drawer; Mat with non-slip surface
21 EN Cleaning and Maintenance Cleaning is the only maintenance action that is required normally. Warning! Cleaning must be done with the warming drawer disconnected from the electrical power supply. Remove the plug from the power socket or disconnect the warming drawer power supply circuit. Do not ...
Page 12 - What should I do if the warming drawer
22 EN What should I do if the warming drawer doesn’t work? WARNING! Any type of repair must only be done by a specialised technician. Any repair done by a person not authorised by the manufacturer is dangerous. Before contacting Technical Assistance, check on the following: The crockery doesn’t heat...