Page 3 - BUILT-IN MICROWAVE OVEN SAFETY; Your safety and the safety of others are very important.; DANGER
3 BUILT-IN MICROWAVE OVEN SAFETY You can be killed or seriously injured if you don't immediately You can be killed or seriously injured if you don't follow All safety messages will tell you what the potential hazard is, tell you how to reduce the chance of injury, and tell you what canhappen if the ...
Page 4 - Electrical Requirements; SAVE THESE INSTRUCTIONS; PRECAUTIONS TO AVOID POSSIBLE EXPOSURE TO; GROUNDING INSTRUCTIONS
4 Electrical Requirements Observe all governing codes and ordinances. The microwave oven is connected to both 120 V sides of the 208/240 V circuit required for electrical connections. If the incoming voltage to the microwave oven is less than 120 V, cooking times may be longer. Have a qualified elec...
Page 5 - PARTS AND FEATURES; Turntable
5 PARTS AND FEATURES This manual covers several models. Your model may have some or all of the items listed. Refer to this manual or the Frequently Asked Questions (FAQs) section of our website at www.jennair.com for more detailed instructions. In Canada, refer to the Customer Service Section at www...
Page 6 - MICROWAVE OVEN CONTROL
6 1. From the Microwave Cooking Mode menu, touch TURNTABLE to turn the rotation On or Off. Convection Grid The convection grid provides optimal heat circulation for convection cooking (on some models). It is recommended for convection cooking and for grilling thick pieces of meat such as bone-in chi...
Page 7 - Touch Panel; Main Menu
7 Dedicated Microwave Oven Models Touch Panel The touch panel houses the control menu and function controls. The touch pads are very sensitive and require only a light touch to activate.For more information about the individual controls, see their respective sections in this manual. Welcome Guide Th...
Page 8 - Tools Menu
8 Drop-down Message Demonstration There are some menus that prompt a drop-down message to appear. Once the message is read, you can dismiss the menu by touching the directional arrow and swiping up. Tools Menu Your microwave provides you with the ability to control several of the default settings an...
Page 10 - BUILT-IN MICROWAVE OVEN USE; Food Characteristics
10 BUILT-IN MICROWAVE OVEN USE A magnetron in the oven produces microwaves that reflect off the metal floor, walls, and ceiling and pass through the turntable and appropriate cookware to the food. Microwaves are attracted to and absorbed by fat, sugar, and water molecules in the food, causing them t...
Page 11 - Cookware and Dinnerware; Aluminum Foil and Metal; Microwave Cooking Power
11 Cookware and Dinnerware Cookware and dinnerware must fit on the turntable. Always use oven mitts or pot holders when handling because any dish may become hot from heat transferred from the food. Do not use cookware and dinnerware with gold or silver trim. Use the following chart as a guide, and t...
Page 12 - Cook Sensor; My Creations; Cooking Functions
12 Cook Sensor During the Sensor Cook function, a sensor automatically adjusts for the cook time and power level.The microwave oven display will show the time countdown once the sensor identifies the cooking duration.If the microwave oven door is opened during a sensor function, the microwave oven w...
Page 14 - Auto Convection Conversion; Convect Bake
14 5. Touch START. The display will count down the cook time. When the stop time is reached, the oven will shut off automatically.If enabled, end-of-cycle tones will sound. 6. Touch MICROWAVE CANCEL (CANCEL MICROWAVE on combination oven models), or open the door to clear the display. NOTE: The micro...
Page 15 - Convect Roast; Defrost
15 Convect Roast The Roast function uses the convection element with or without microwave power. The Roast function requires that a time and temperature (and microwaves if desired) be entered. The highest microwave power level that can be used is 30%. ■ Use the convection grid. Place on turntable. ■...
Page 16 - Cook
16 SETTING QUANTITY Poultry Frozen Chicken Tenders 5-20 pieces Chicken breast 0.2-2.0 lb (0.1-0.9 kg) Chicken nuggets 6-24 pieces Chicken pieces - with skin 0.5-2.0 lb (0.2-0.9 kg) Frozen fried chicken 4-8 pieces Turkey breast 3.0 lb (1.4 kg) Whole chicken 3.0-5.5 lb (1.4-2.5 kg) Bone-in chicken pie...
Page 17 - Beverage; Steam
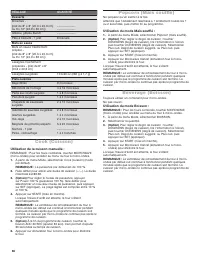
17 Beverage Use a microwave safe container.Do not cover. To Use Beverage Mode: NOTE: For combination units, touch the MICROWAVE to access the microwave menu. 1. From the Mode menu, select BEVERAGE. 2. Select quantity. 3. (Optional) To adjust the doneness, touch DONENESS, read the on-screen informati...
Page 18 - Melt; Reheat; Soften
18 Melt The Melt function may be used to melt your food. Times and cooking powers have been preprogrammed for a number of food types. Use the following chart as a guide. Melt Chart FOOD QUANTITY Manual ----- Butter 1/2 Stick1 Stick1 1 / 2 Sticks 2 Sticks Cheese 8 oz16 oz Chocolate 1–12 oz Margarine ...
Page 19 - Keep Warm; WARNING
19 Boil & Simmer Boil & Simmer is a sensor function, and uses only microwaves to simmer your food. ■ Follow recommended water and food amounts that appear on the display. ■ For best cooking results, do not use plastic wrap as a cover during the Boil & Simmer cycle. ■ Do not remove the li...
Page 20 - Browning Pan
20 Browning Pan The Browning Pan feature uses the crisper pan, the broil element and microwaves to crisp and brown foods. While microwaves heat food from above, they also heat the pan from below to brown and crisp the food.Browning Pan can be used to saute meats and vegetables, pan fry bacon and egg...
Page 21 - BUILT-IN MICROWAVE OVEN CARE; General Cleaning
21 BUILT-IN MICROWAVE OVEN CARE General Cleaning IMPORTANT: Before cleaning, make sure all controls are off and the microwave oven is cool. Always follow label instructions on cleaning products. For additional information, you can visit the Frequently Asked Questions (FAQs) section of our website at...
Page 22 - TROUBLESHOOTING
22 TROUBLESHOOTING First try the solutions suggested here. If you need further assistance or more recommendations that may help you avoid a service call, refer to the warranty, or visit https://jennair.custhelp.com . In Canada, visit http://www.jennair.ca . Contact us by mail with any questions or c...
Page 23 - ASSISTANCE OR SERVICE; In Canada
23 ASSISTANCE OR SERVICE If you need service Please refer to the warranty. If you need replacement parts If you need to order replacement parts, we recommend that you use only factory specified parts. These factory specified parts will fit right and work right because they are made with the same pre...
Page 24 - SÉCURITÉ DU FOUR À MICRO-ONDES ENCASTRÉ; Votre sécurité et celle des autres est très importante.; AVERTISSEMENT; CONSERVEZ CES INSTRUCTIONS
24 SÉCURITÉ DU FOUR À MICRO-ONDES ENCASTRÉ Risque possible de décès ou de blessure grave si vous ne suivez pas immédiatement les instructions. Risque possible de décès ou de blessure grave si vous ne suivez pas les instructions. Tous les messages de sécurité vous diront quel est le danger potentiel ...
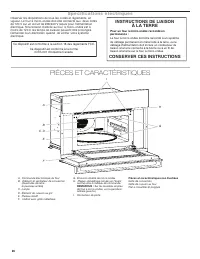
Page 26 - Spécifications électriques; PIÉCES ET CARACTÉRISTIQUES; INSTRUCTIONS DE LIAISON
26 Spécifications électriques Observer les dispositions de tous les codes et règlements en vigueur. Le four à micro-ondes doit être connecté aux deux côtés de 120 V sur un circuit de 208/240 V requis pour l’alimentation électrique. Si la tension d’entrée au four à micro-ondes est à moins de 120 V, l...
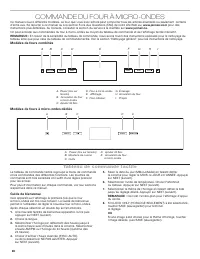
Page 28 - COMMANDE DU FOUR À MICRO-ONDES; Tableau de commande tactile
28 COMMANDE DU FOUR À MICRO-ONDES Ce manuel couvre différents modèles. Le four que vous avez acheté peut comporter tous les articles énumérés ou seulement certains d’entre eux. Se reporter à ce manuel ou à la section Foire Aux Questions (FAQ) de notre site Web sur www.jennair.com pour des instructio...
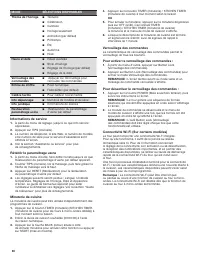
Page 29 - Menu principal; Menu de réglage
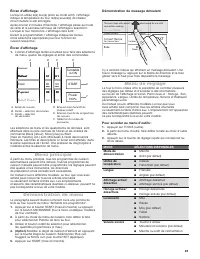
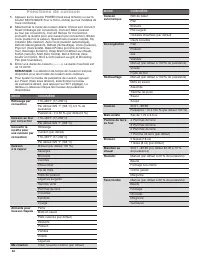
29 Écran d’affichage Lorsqu’on utilise le(s) four(s) (alors au mode actif), l’affichage indique la température du four, la(les) source(s) de chaleur et la minuterie si elle est régléeAprès environ 2 minutes d’inactivité, l’affichage passe au mode de veille et le panneau lumineux de l’affichage s’ass...
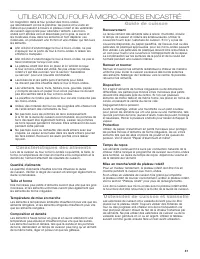
Page 31 - UTILISATION DU FOUR À MICRO-ONDES ENCASTRÉ; Caractéristiques des aliments
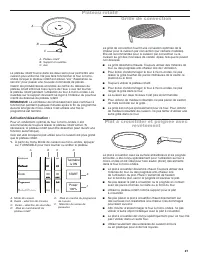
31 UTILISATION DU FOUR À MICRO-ONDES ENCASTRÉ Un magnétron dans le four produit des micro-ondes qui rebondissent contre le plancher, les parois et la voûte en métal et qui passent à travers le plateau rotatif et les ustensiles de cuisson appropriés pour atteindre l’aliment. Les micro- ondes sont att...
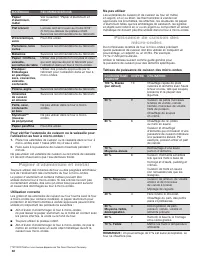
Page 32 - Papier d’aluminium et métal; Puissance de cuisson des
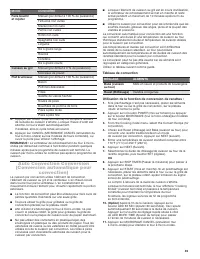
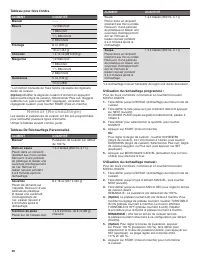
32 MATÉRIAUX RECOMMANDATIONS Papier d’aluminium, métal Voir la section “Papier d’aluminium et métal”. Plat à brunir La base doit se trouver au moins 3/16" (5 mm) au-dessus du plateau rotatif. Suivre les recommandations du fabricant. Vitrocéramique, verre Peut être utilisé. Porcelaine, terre cuit...
Page 33 - Cuisson par détection
33 Cuisson par détection Pendant une cuisson par détection, un détecteur ajuste automatiquement la durée de cuisson et le niveau de puissance.L’afficheur du four à micro-ondes démarre le compte à rebours de la cuisson une fois que le détecteur a identifié la durée de cuisson.Si la porte du four à mi...
Page 34 - Fonctions de cuisson
34 Fonctions de cuisson 1. Appuyer sur le bouton POWER (mise sous tension) ou sur le bouton MICROWAVE (four à micro-ondes) (sur les modèles de fours combinés). 2. Sélectionner le mode de cuisson désiré. Choisir soit Convect Roast (rôtissage par convection), Convect Bake (cuisson au four par convecti...
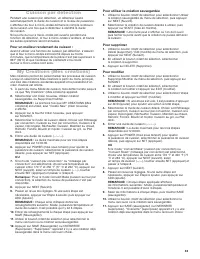
Page 36 - Convect Bake (Cuisson au four par; Convect Roast (Rôtissage par; SpeedCook Foods (Aliments à
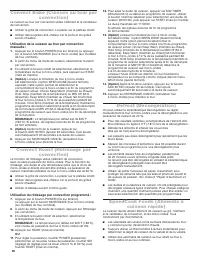
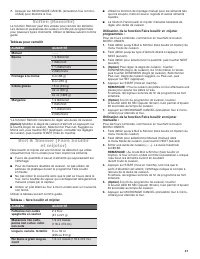
36 Convect Bake (Cuisson au four par convection) La cuisson au four par convection utilise l’élément et le ventilateur de convection. ■ Utiliser la grille de convection. La placer sur le plateau rotatif. ■ Utiliser des poignées anti-chaleur car la porte et les grilles seront chaudes. Utilisation de ...
Page 43 - ENTRETIEN DU FOUR À MICRO-ONDES ENCASTRÉ; Nettoyage général
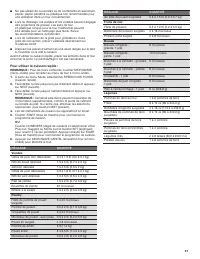
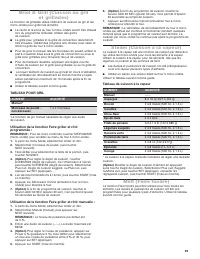
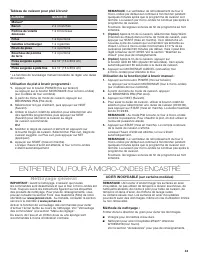
43 Tableau de cuisson pour plat à brunir ALIMENT QUANTITÉ Manuel*Bacon 2 à 4 tranches Poitrine de volaille désossée 1 à 3 morceaux Frites 1 à 3 portions Galettes à hamburger 1 à 4 galettes Roulé de pizza 1 à 4 portions Bouchées de pomme de terre 1 à 4 portions Pizza surgelée à pâte levée 6 à 12"...
Page 45 - DÉPANNAGE
45 DÉPANNAGE Essayer d’abord les solutions suggérées ici. Pour obtenir de l’aide ou des conseils qui permettront peut-être d’éviter une intervention de dépannage, consulter la page de garantie, ou consultez le site internet http://www.jennair.ca . Vous pouvez adresser tous commentaires ou questions ...
Page 46 - ASSISTANCE OU DÉPANNAGE; Au Canada
46 PROBLÈME CAUSES ET/OU SOLUTIONS POSSIBLES Les durées de cuisson semblent trop longues Chauffe-t-on de grosses quantités d’aliments? Les quantités plus grandes d'aliments nécessitent des durées de cuisson plus longues. La tension d’alimentation est-elle inférieure à celle indiquée dans la section ...
Page 47 - Remarque


 JennAir JMC1116AS
User Manual
JennAir JMC1116AS
User Manual
 JennAir JMC3415ES
User Manual
JennAir JMC3415ES
User Manual
 JennAir JMDFS24HM
User Manual
JennAir JMDFS24HM
User Manual
 JennAir JMV8208CS
User Manual
JennAir JMV8208CS
User Manual
 JennAir JMV9196CS
User Manual
JennAir JMV9196CS
User Manual