Page 2 - TABLE OF CONTENTS; WARNING; SAFETY DEFINITIONS
IMPORTANT SAFETY INSTRUCTIONS___________________________________________ INSTALLATION REQUIREMENTS _______________________________________________ Parts Supplied _________________________________________________________ Location Requirements __________________________________________________ Ventila...
Page 3 - IMPORTANT SAFETY INSTRUCTIONS
WARNING: TO REDUCE THE RISK OF FIRE, ELECTRIC SHOCK, OR INJURY TO PERSONS, READ THE FOLLOWING: • Use this unit only in the manner intended by the manufacturer. • Make sure that the voltage indicated on the rating plate of the appliance corresponds to your outlet voltage.• Do not attempt to alter the...
Page 5 - INSTALLATION REQUIREMENTS
INSTALLATION REQUIREMENTS PARTS SUPPLIED: Upper Exhaust Duct Cover x 1 Lower Exhaust Duct Cover x 1 Lower Support Frame x 1 Range Hood x 1 Support Extension Nut x 32 Hood Mounting Bolt x 4 Hood Mounting Nut x 4 Upper Support Frame Bolt x 4 Hex Key x 1 Stainless Steel Baffle Filter x 2 Remote Control...
Page 6 - LOCATION REQUIREMENTS:; PRIOR TO INSTALLATION:
• READ ALL INSTRUCTIONS PRIOR TO INSTALLATION. • Unpack range hood and ensure all listed parts are in the box.• It is recommended for the vent system to be installed before hood is installed. • Before making cutouts, make sure there is proper clearance within the ceiling for the exhaust vent. • It i...
Page 7 - FOR THE MOST EFFICIENT OPERATION:; HEIGHT AND CLEARANCE:
• When installed, the range hood must be positioned at least 28in (71cm) and at most 31in (79cm) above the cooktop. • It is important to install the hood at the proper mounting height. Hoods mounted too low could result in heat damage or a fire hazard; while hoods mounted too high will be hard to re...
Page 8 - ELECTRICAL REQUIREMENTS:
Ensure there is availability of an electrical power socket to power the range hood before fixing to the ceiling.Observe all governing codes and ordinances. Ensure that the electrical installation is adequate and in accordance with the National Electrical Codes, ANSI/NFPA 70 (latest edition), all loc...
Page 9 - INSTALLATION INSTRUCTIONS; CALCULATING VENT SYSTEM
INSTALLATION INSTRUCTIONS • It is recommended for the vent system to be installed before hood is installed. • Before making cutouts, make sure there is proper clearance within the ceiling for the exhaust vent. • Disconnect the power. • A minimum of 6” or 3-1/4 x 10” rectangular duct (both purchased ...
Page 10 - ADVANCED PREPARATION:
• This range hood is factory set for venting through the roof or wall. • Vent work can terminate either through the roof or wall. To vent through a wall, a 90° elbow is needed. 1. Place the range hood on a flat, stable surface. Connect the power cord of the range hood to a designated standard outlet...
Page 11 - INSTALL THE RANGE HOOD:
1. Align upper support frame (Part D) with holes in the ceiling. Mount the upper support frame to the ceiling using four frame screws (Part H) (for sheet rock only). Ensure that the upper support frame is securely fastened to the joist or support in the ceiling. Attach support frame to ceiling using...
Page 13 - Instalation Overview
Instalation Overview H H K L I M M J J J I I K L NOTE: • screws are designed for dry wall. Not to be used with any other types of wall. • A distance of 28” to 31” is recommended* between stove top and the bottom of the range hood. • Always use first and second holes on the support frame extensions t...
Page 14 - RANGE HOOD USE; OPERATING THE RANGE HOOD:
- To Turn the Fan ON press the Power Button and press the “+” button to increase the fan speed: • Press “+” Once - Low (Digital Display shows F1) • Press “+” Twice - Medium/Low (Digital Display shows F2) • Press “+” Three Times - Medium/High (Digital Display shows F3) • Press “+” Four Times - High (...
Page 15 - RANGE HOOD CARE
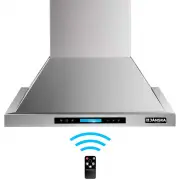
CLEANING & MAINTENANCE: REMOTE CONTROL: WARNING: To reduce the risk of electrical shock, DO NOT clean the hood while it's operating. WARNING: Never put your hands into the area housing the fan when the fan is operating. RANGE HOOD CARE IMPORTANT: Clean the hood, grease tray, and baffle filters f...
Page 17 - TROUBLESHOOTING; PROBLEM
TROUBLESHOOTING If the range hood or LED light does not operate after installation: The range hood vibrates when the blower is on: The blower or fan seems weak: The lights work but the fan is not spinning at all, is stuck or is rattling. The hood is not venting out properly. Check if the range hood ...
Page 18 - SPECIFICATIONS
17 SPECIFICATIONS Power: 120V/60HzDimensions: 20in 29.5in 16in 14.6in 11.1in Weight: Hood - 48.4lbsExhaust Duct Cover - 9lbsBaffle Filter size: 9.2” x 15.2”
Page 20 - S W E D E N; JANSKA USA; If you are not happy with the product for any reason,; Your purchase comes with a 100%; satisfaction guarantee from Janska
S W E D E N JANSKA USA 5175 Commerce Dr, Baldwin Park, CA [email protected] If you are not happy with the product for any reason, please contact us at [email protected] with your feedback or questions, and we will do our best to make things right for you! Your purchase comes with a 100% satisfaction...