Page 2 - Монтаж
R U 2 Монтаж Важно сохранить данное руководство для его последующих консультации . В случае продажи , передачи или переезда проверьте , чтобы данное техническое руководство сопровождало изделие . Внимательно прочитайте инструкции : в них содержатся важные сведения об установке изделия , его эксплуат...
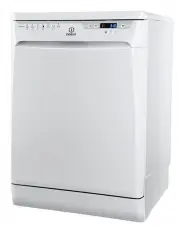
Page 5 - Описание; Панель
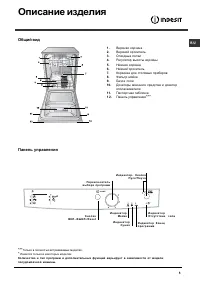
R U 5 Общий вид Описание изделия 1 . Верхняя корзина 2. Верхний ороситель 3. Откидные полки 4. Регулятор высоты корзины 5. Нижняя корзина 6. Нижний ороситель 7. Корзинка для столовых приборов 8. Фильтр мойки 9. Бачок соли 10. Дозаторы моечного средства и дозатор ополаскивателя 11. Паспортная табличк...
Page 6 - Нижняя
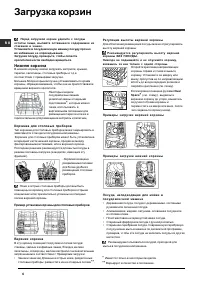
R U 6 Загрузка корзин Перед загрузкой корзин удалите с посуды остатки пищи , вылейте оставшееся содержимое из стаканов и чашек . Установите в посудомоечную машину посуду прочно во избежание ее опрокидывания . Загрузив посуду , проверьте , чтобы лопасти оросителей могли свободно вращаться . Нижняя ко...
Page 7 - Запуск
R U 7 Включение и эксплуатация З а г р у з к а м о ю щ е г о в е щ е с т в а Хороший результат мойки зависит также от правильной дозировки моющего средства , излишек которого не улучшает эффективность мойки , а только загрязняет окружающую среду . Используйте только специальные моющие средства для п...
Page 8 - Программы
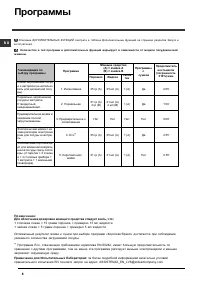
R U 8 Программы * Программа Eco, отвечающая требованиям норматива EN-50242, имеет большую продолжительность по сравнению с другими программами , тем не менее эта программа расходует меньше электроэнергии и меньше загрязняет окружающую среду . Примечание для Испытательных Лабораторий : за более подро...
Page 9 - Заливка; Загрузка
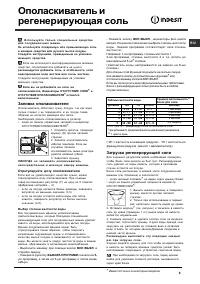
R U 9 Ополаскиватель и регенерирующая соль И с п о л ь з у й т е т о л ь к о с п е ц и а л ь н ы е с р е д с т в а д л я п о с у д о м о е ч н ы х м а ш и н . Не используйте поваренную или промышленную соль и моющие средства для ручного мытья посуды . Следуйте инструкциям , приведенным на упаковке м...
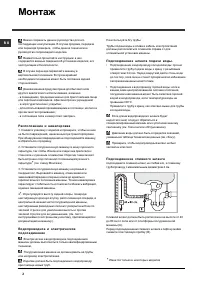
Page 10 - Чистка
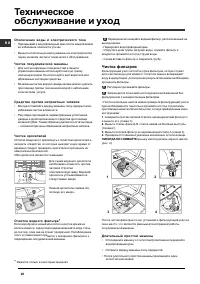
R U 10 Техническое обслуживание и уход Отключение воды и электрического тока • Перекрывайте водопроводный кран после каждой мойки во избежание опасности утечек . • Выньте штепсельную вилку машины из электророзетки перед началом чистки и технического обслуживания . Чистка посудомоечной машины • Для ч...
Page 15 - Operating instructions; Contents
Operating instructions Contents Installation, 16-17 Positioning and levellingConnecting the water and electricity suppliesAdvice regarding the first wash cycleTechnical data Description of the appliance, 18 Overall viewControl panel Loading the racks, 19 Lower rackCutlery basketUpper rack Start-up a...
Page 16 - Installation; Positioning and levelling; Connecting the water and electricity
EN 16 Installation * Only available in selected models. Keep this instruction manual in a safe place for future reference. If the appliance is sold, given away ormoved, please ensure the manual is kept with themachine, so that the new owner may benefit from theadvice contained within it. Please read...
Page 17 - Advice regarding the first wash cycle
EN 17 Anti-condensation strip * After installing the dishwasher, open the door and stick theadhesive transparent strip under the wooden shelf in order toprotect it from any condensation which may form. Advice regarding the first wash cycle After the appliance has been installed, immediately beforeru...
Page 18 - Overall view; Description of the; Control panel
EN 18 Overall view Description of the appliance 1. Upper rack 2. Upper sprayer arm 3. Tip-up compartments 4. Rack height adjuster 5. Lower rack 6. Lower sprayer arm 7. Cutlery basket 8. Washing filter 9. Salt dispenser 10. Detergent and rinse aid dispensers 11. Data plate 12. Control Panel *** *** O...
Page 19 - Loading the racks; Lower rack; Upper rack
EN 19 Loading the racks * Only available in selected models. ** The number and position may vary. Before loading the racks, remove all food residues from the crockery and empty liquids from glasses and cups.Arrange the crockery so that it is held in place firmly anddoes not tip over.After loading th...
Page 20 - Measuring out the detergent; Starting the dishwasher
EN 20 Start-up and use Measuring out the detergent A good wash result also depends on the correctamount of detergent being used; exceeding the statedamount does not result in a more effective wash andincreases environmental pollution. Only use detergent which has been specifically designed for dishw...
Page 21 - Wash cycles
EN 21 Wash cycles If the crockery is only lightly soiled or if it has been rinsed with water before being placed in the dishwasher, reduce the amount of detergent used accordingly. The number and type of wash cycles and options may vary depending on the dishwasher model. Notes: Optimum performance l...
Page 22 - Rinse aid and refined salt; Measuring out the rinse aid; Measuring out the refined salt
EN 22 Rinse aid and refined salt Only use products which have been specifically designed for dishwashers.Do not use table salt or industrial salt, orwashing up liquid.Follow the instructions given on the packaging. If using a multi-functional product it is not necessary to add rinse aid; however, we...
Page 23 - Care and maintenance; Cleaning the filters
EN 23 Care and maintenance Shutting off the water and electricity supplies • Turn off the water tap after every wash cycle to avoid leaks. • Always unplug the appliance when cleaning it and when performing maintenance work. Cleaning the dishwasher • The external surfaces of the machine and the contr...
Page 24 - Precautions and advice; General safety
EN 24 Precautions and advice This appliance was designed and manufactured in compliance with current international safety standards. Thefollowing information has been provided for safety reasonsand should therefore be read carefully. General safety • This appliance is not intended for use by persons...
Page 25 - Troubleshooting
EN 25 Troubleshooting Whenever the appliance fails to work, check for a solution from the following list before calling forAssistance. * Only available in selected models. Problem: Possible causes / Solutions: The dishwasher does not start or cannot be controlled • Switch off the appliance by pressi...
Page 26 - Service
EN 26 Before contacting Assistance: • Check whether the problem can be resolved using the Troubleshooting guide ( see Troubleshooting). • Restart the programme to check whether the problem has ceased to exist.• If the problem persists, contact the Authorised Technical Assistance Service. Never use t...