Page 2 - de su unidad de aire acondicionado.; To avoid permanent damage to unit:; Spanish version of this manual available for download on
Read the following notices and information carefully to ensure proper operation of your air conditioner unit. This manual is solely provided for informational purposes and in no way constitutes a legally binding document between the manufacturer, distributor, and end consumer. Exact appear- ance of ...
Page 3 - ENGLISH; –iii–; TABLE OF CONTENTS
ENGLISH –iii– TABLE OF CONTENTS Introduction ..............................................................................................................................6Getting To Know Your Air Conditioner ..................................................................................7Using Yo...
Page 4 - READ THESE NOTICES CAREFULLY—THEY ARE IMPORTANT!
ENGLISH –4– Plug in power plug completely. Do not start or stop the unit by inserting or pulling out the power plug. Do not damage power cord or replace with a non-original power cord. • Otherwise, it may cause electric shock or fire due to potential short circuit. • It may cause electric shoc...
Page 6 - INTRODUCTION; SAFETY INFORMATION
ENGLISH –6– INTRODUCTION Thank you for purchasing this quality Impecca window air conditioner unit. To ensure the longest life and highest energy efficiency of your unit, please carefully follow these operating instructions. Keep these instructions in a safe place and consult them as needed. Please ...
Page 7 - OPERATING CONDITIONS; GETTING TO KNOW YOUR AIR CONDITIONER
ENGLISH –7– OPERATING CONDITIONS • The air conditioner must be operated within the temperature range of 62°F to 95°F (16°C to 35°C). • A perimeter of 12′′ (30cm) around the air conditioner should be free of all objects.• Keep air inlet and air outlet clean and free of obstructing objects.• During op...
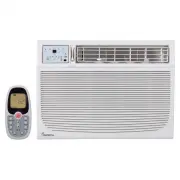
Page 8 - USING YOUR AIR CONDITIONER; OVERVIEW OF CONTROLS FUNCTIONS; Note that your model's control panel may differ slightly.
ENGLISH –8– USING YOUR AIR CONDITIONER OVERVIEW OF CONTROLS FUNCTIONS Before you begin, thoroughly familiarize yourself with the control panels as shown below and all its functions, then follow the symbol for the functions you desire. The unit can be controlled by the unit control panel located on t...
Page 9 - TEMPERATURE ADJUSTMENT
ENGLISH –9– TEMPERATURE ADJUSTMENT Press or hold either Down or Up button until the desired temperature is seen on the display. This temperature will be automatically maintained anywhere between 62° F (17° C) and 86° F (30° C).If you want the display to read the actual room tempera- ture, refer ...
Page 10 - PMTS — FOLLOW ME; Note: Your filter may need to be cleaned much more often in espe-
ENGLISH –10– PMTS — FOLLOW ME P ersonal M apping T emperature S ensor: Your model may be equipped with a special feature that allows the remote control to act as a thermostat. If your unit shows this PMTS LED on the control panel, and you have the accompanying LCD remote control then your unit is eq...
Page 11 - AUTO ON INSTRUCTIONS:; AUTO OFF INSTRUCTIONS:; TIMER
ENGLISH –11– DELAY START/STOP (TIMER) The timer buttons enable two separate functions: one to au- tomatically start the unit within a 24 hour period of time and another to automatically turn off the unit within a 24 hour period of time. These functions are called, respectively, AUTO ON and AUTO OFF....
Page 12 - ADDITIONAL FEATURES AND INFORMATION; FRESH AIR VENT; moving odors from the room during fan mode.; -MINUTE DELAYED START; To toggle between options, press and hold the Up
ENGLISH –12– ADDITIONAL FEATURES AND INFORMATION FRESH AIR VENT When cooling, always leave the vent closed (Fig. A). When operating the unit in fan only mode, you may also open the vent (Fig. B) Another option is opening the vent and exhaust at the same time(Fig. C), which is good for re- moving odo...
Page 13 - PRE-INSTALLATION INSTRUCTIONS; Air conditioning unit
ENGLISH –13– 1 2 3 7 9 8 11 13 12 14 15 16 4 3 5 6 10 PRE-INSTALLATION INSTRUCTIONS REQUIRED TOOLS (NOT INCLUDED) INCLUDED PARTS & ACCESSORIES* 1. Air conditioning unit 2. Flexible window filler panels 3. Upper Rail Angle Bracket (x1) 4. Upper Rail seal (may already be af- fixed to bottom of rai...
Page 14 - UNIT CHASSIS EXPLODED VIEW
ENGLISH –14– UNIT CHASSIS EXPLODED VIEW Window Sash Seal Safety Lock and ¾” (or ½”) length Hex Head Screw Foam Gasket Upper Rail Washer Head Locking Screw Frame Assembly (Left) Frame Assembly (Right) Side Retainer Bottom rail seal ½” length Screw and Locknuts Locknut ¾” Long Flat Head Bolt Sill Angl...
Page 15 - WINDOW REQUIREMENTS; Wooden Windows
ENGLISH –15– WINDOW REQUIREMENTS Your air conditioner is designed to be installed in standard double hung windows with minimum width and height requirements as follows: W : Opening widths of 28 inches (for 15K and 18K models) or 31 inches (25K models). H : Opening height of 18.5 inch- es (for 15K an...
Page 16 - WINDOW INSTALLATION; BEFORE YOU BEGIN; Check for anything that could block airflow; the effectiveness of all functions besides the Fan Only mode.; Make sure you have met the electrical requirements of the unit; other upgrades. Do not use an extension cord with this unit.; STEP 1: REMOVAL OF THE CHASSIS
ENGLISH –16– WINDOW INSTALLATION Use caution when unpacking and installing. Sharp edges can cause injury. Appearance of unit in these diagrams is for illustrative purposes only and may not precisely reflect your unit’s design. BEFORE YOU BEGIN 1. Check for anything that could block airflow : Any s...
Page 18 - STEP 2: INSTALL UPPER RAIL AND SIDE BRACKETS
ENGLISH –18– STEP 2: INSTALL UPPER RAIL AND SIDE BRACKETS 1. Affix foam gasket to bottom of upper rail bracket (if not already affixed). 2. Install upper rail and side retainers to cabinet as shown using a total of 10 5/16” screws, with the screws being inserted from the inside of the cabinet. STEP ...
Page 19 - Add bottom rail seal over screws to window stool.; STEP 5: INSTALL SUPPORT BRACKETS; the bottom of the cabinet as shown in Fig. R.; Measure from
ENGLISH –19– 3. Shift cabinet left or right as needed to line up the center on the line you marked on the window stool. 4. Fasten cabinet to window stool with two screws. (You may wish to drill pilot holes in advance.) 5. Add bottom rail seal over screws to window stool. STEP 5: INSTALL SUPPORT BRAC...
Page 20 - STEP 6: EXTEND WINDOW FILLER PANELS; filler panels slide easily.
ENGLISH –20– 4. Tighten all 6 bolts securely. STEP 6: EXTEND WINDOW FILLER PANELS 1. Carefully raise window sash to expose filler panel locking screws. Loosen screws so filler panels slide easily. 2. Extend panels to fill window opening completely. Tighten locking screws on top. 3. Close window behi...
Page 21 - STEP 7: SECURE WINDOW FILLER PANELS TO WINDOW FRAME
ENGLISH –21– through the already extant hole in the middle of the upper rail into the window frame, and drive one ¾” (or ½”) Hex-Head locking screw through hole in the middle of upper rail into the window frame as shown. STEP 7: SECURE WINDOW FILLER PANELS TO WINDOW FRAME 1. Extend the window filler...
Page 22 - STEP 9: INSTALL CHASSIS INTO CABINET AND REATTACH FRONT PANEL.; Installation of R1 Energy Star Insulation
ENGLISH –22– 2. Attach right-angle safety lock using the ¾” (or ½”) length hex-head screws as shown (Fig. X). STEP 9: INSTALL CHASSIS INTO CABINET AND REATTACH FRONT PANEL. 1. Lift air conditioner chassis and carefully slide into cabinet leaving 6 inches protrud- ing. 2. DO NOT push on controls or f...
Page 23 - STEP 1: SELECT WALL LOCATION; 3⁄8” Min
ENGLISH –23– THROUGH-THE-WALL INSTALLATION Note: Consult local building codes prior to installation, or hire a qualified carpenter. STEP 1: SELECT WALL LOCATION The air conditioner has a slide-out chassis, so that it can be installed through an out- side wall as specified below: • Max. Wall thicknes...
Page 24 - Caulk; Aluminum Flashing Over
ENGLISH –24– 4. Build a wooden frame with the inside dimensions of your model as listed above. (Remember to measure twice, cut once!) Frame depth should be the same as the thickness of the wall. Fill in the space from the opening to the studs with wood spacers as shown. 5. Nail frame to spacers, ens...
Page 25 - STEP 3: PREPARE AND INSTALL CABINET; with sill support angle brackets.
ENGLISH –25– STEP 3: PREPARE AND INSTALL CABINET 1. Slide chassis from cabinet. 2. For detailed instructions, see Step 1, in the Window Mounting section, above. 3. Place cabinet into opening with bottom rail resting firmly on bottom board of wooden frame. 4. Position cabinet to achieve proper slope ...
Page 26 - MASONRY CONSTRUCTION; ensure very good louver clearance on either side of cabinet.
ENGLISH –26– 8. Screw or nail cabinet wooden frame using shims if frame is oversized, to eliminate distortion. See diagram. Remember to maintain proper slop as described in Step 3. 9. Re-insert chassis into cabinet by following all steps in Step 8 of Window Mounting. OPTIONAL: Caulking and installat...
Page 27 - R1 INSTALLATION OF ENERGY STAR INSULATION; included with your air conditioner.
ENGLISH –27– R1 INSTALLATION OF ENERGY STAR INSULATION "R1" is the name given to special additional insulation that applies to current Energy Star certified models. If your model fits this criterion, you will have found a weather stripping foam and additional panels that fit over the side cu...
Page 28 - INSTALL WEATHER STRIPPING; stripping to a proper length and peel off the protective backing.
ENGLISH –28– INSTALL WEATHER STRIPPING Your air conditioner includes whether stripping which can be used to plug any gaps that may cause air leaks between the unit and the window opening. To use, first trim the stripping to a proper length and peel off the protective backing.
Page 29 - CLEANING & MAINTENANCE; SAFETY WARNING; lowing verifications:; • WARNING; damage the compressor.; DISPOSAL INFORMATION; local recycling guidelines.; CLEANING THE OUTER HOUSING AND INTAKE GRILLE
ENGLISH –29– CLEANING & MAINTENANCE SAFETY WARNING To avoid electric shock, fire, damage, or injury while performing maintenance on your unit: • Always turn off and disconnect the air conditioner from electric power.• Never submerge the unit in water or spray liquids directly on the unit.• Never...
Page 30 - with warm, soapy water. Use a soft brush to clean off the grille.; CLEANING THE FILTER; in dusty environments may require more frequent filter cleaning.; TROUBLESHOOTING; from cooling the room to even lower temperatures.; INSUFFICIENT COOLING
ENGLISH –30– or other harder to remove substances is on the unit, use a wrung-out cloth dampened with warm, soapy water. Use a soft brush to clean off the grille. CLEANING THE FILTER For energy efficient operation, your filter should be cleaned at least once a month. Units in dusty environments may ...
Page 31 - • This is often caused by heat expansion in the plastic parts.
ENGLISH –31– trician to troubleshoot and upgrade your electrical circuits if your air conditioner unit exceeds the rated capacity. FOG BLOWS OUT DURING COOLING • In warm, high humidity environments this may naturally occur. Continued cooling will remove excess humidity from the room and the fog will...
Page 32 - CUSTOMER SUPPORT; please be sure to write down the model and; . This will be needed should your unit require servicing in the
ENGLISH –32– CUSTOMER SUPPORT Before contacting customer support, please see the troubleshooting guide above. Upon unpacking your air conditioner, please be sure to write down the model and serial number of your unit . This will be needed should your unit require servicing in the future. The number ...