ILVE XLP90FDT - Manuals
User Manual ILVE XLP90FDT


Summary
2 3 OPEN 24 / 7 ILVE ACCESSORIES ONLINE SHOP For a wide range of coffee machines and other genuine ILVE accessories at the click of a button shop.ilve.com.au
4 5 iWarranty REGISTER YOUR WARRANTY ONLINE NOW GO TO: https://support.eurolinx.com.au/#/form/warrantyregistration As a part of our continued customer service offering, you can now register your ILVE products online at https://support.eurolinx.com.au/#/form/warrantyregistration Just follow our simpl...
07 6 Safety Precautions 8 Operating Instructions 9 Operating - Gas Cooktop 10 Tepanyaki Plate (Fry Top) 12 Electric BBQ (Lava Grill) 14 Ceramic Electric Hot Plate 16 Cooktop Installation Instructions 18 Installation - Gas Supply 20 Installation - Electrical Supply 21 Adaptation to Different Types of...
ILVE Hobs Manuals
-
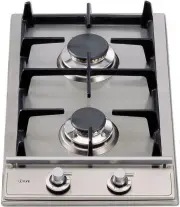
 ILVE H30CVSS
User Manual
ILVE H30CVSS
User Manual
-
 ILVE H30PFVX
User Manual
ILVE H30PFVX
User Manual
-
 ILVE H30PVX
User Manual
ILVE H30PVX
User Manual
-
 ILVE H30VSS
User Manual
ILVE H30VSS
User Manual
-
 ILVE H360CSS
User Manual
ILVE H360CSS
User Manual
-
 ILVE H360CV
User Manual
ILVE H360CV
User Manual
-
 ILVE H39CV/I
User Manual
ILVE H39CV/I
User Manual
-
 ILVE H39PCSS
User Manual
ILVE H39PCSS
User Manual
-
 ILVE H70CVX
User Manual
ILVE H70CVX
User Manual
-
 ILVE H90FCVX
User Manual
ILVE H90FCVX
User Manual
-
 ILVE H90SDV-I
User Manual
ILVE H90SDV-I
User Manual
-
 ILVE HCB70CSS
User Manual
ILVE HCB70CSS
User Manual
-
 ILVE HCB90FCSS
User Manual
ILVE HCB90FCSS
User Manual
-
 ILVE HCB90SDSS
User Manual
ILVE HCB90SDSS
User Manual
-
 ILVE HP1230DT
User Manual
ILVE HP1230DT
User Manual
-
 ILVE HP125FDT
User Manual
ILVE HP125FDT
User Manual
-
 ILVE HP95DT
User Manual
ILVE HP95DT
User Manual
-
 ILVE HP95FCSS
User Manual
ILVE HP95FCSS
User Manual
-
ILVE HP95FDT
User Manual
-
 ILVE HP95PDT
User Manual
ILVE HP95PDT
User Manual