ILVE ILD6E - Manuals
User Manual ILVE ILD6E


Summary
OPEN 24 / 7 ILVE ACCESSORIES ONLINE SHOP For a wide range of coffee machines and other genuine ILVE accessories at the click of a button shop.ilve.com.au
SUMMARY SAFETY ............................................................................................................................................. 4 P RECAUTIONS BEFORE USING ............................................................................................................ 4 U SI...
4 SAFETY Precautions before using • Unpack all the materials. • The installation and connecting of the appliance have to be done by approved specialists. The manufacturer can not be responsible for damage caused by building-in or connecting errors. • To be used, the appliance must be well-equipped a...
ILVE Hobs Manuals
-
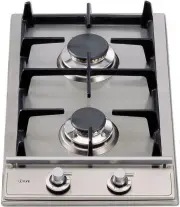
 ILVE H30CVSS
User Manual
ILVE H30CVSS
User Manual
-
 ILVE H30PFVX
User Manual
ILVE H30PFVX
User Manual
-
 ILVE H30PVX
User Manual
ILVE H30PVX
User Manual
-
 ILVE H30VSS
User Manual
ILVE H30VSS
User Manual
-
 ILVE H360CSS
User Manual
ILVE H360CSS
User Manual
-
 ILVE H360CV
User Manual
ILVE H360CV
User Manual
-
 ILVE H39CV/I
User Manual
ILVE H39CV/I
User Manual
-
 ILVE H39PCSS
User Manual
ILVE H39PCSS
User Manual
-
 ILVE H70CVX
User Manual
ILVE H70CVX
User Manual
-
 ILVE H90FCVX
User Manual
ILVE H90FCVX
User Manual
-
 ILVE H90SDV-I
User Manual
ILVE H90SDV-I
User Manual
-
 ILVE HCB70CSS
User Manual
ILVE HCB70CSS
User Manual
-
 ILVE HCB90FCSS
User Manual
ILVE HCB90FCSS
User Manual
-
 ILVE HCB90SDSS
User Manual
ILVE HCB90SDSS
User Manual
-
 ILVE HP1230DT
User Manual
ILVE HP1230DT
User Manual
-
 ILVE HP125FDT
User Manual
ILVE HP125FDT
User Manual
-
 ILVE HP95DT
User Manual
ILVE HP95DT
User Manual
-
 ILVE HP95FCSS
User Manual
ILVE HP95FCSS
User Manual
-
 ILVE HP95FDT
User Manual
ILVE HP95FDT
User Manual
-
 ILVE HP95PDT
User Manual
ILVE HP95PDT
User Manual