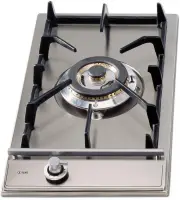
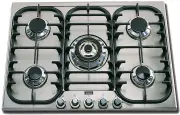
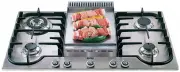
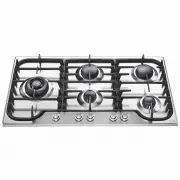
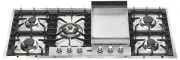
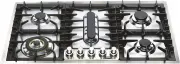
Page 2 - ILVE ACCESSORIES ONLINE SHOP
OPEN 24 / 7 ILVE ACCESSORIES ONLINE SHOP -VYH^PKLYHUNLVMJVɈLLTHJOPULZWVKZHUKV[OLY03=, HJJLZZVYPLZH[[OLJSPJRVMHI\[[VUZOVWPS]LJVTH\
Page 4 - Use Gas burners; User instructions
4 GB Installation All the operations concerned with the installation (electrical and gas connections, adaptation to type of gas, necessary adjustments, etc.) must be carried out by qualified technicians, in terms with the standards in force. For specific instructions, kindly read the part reserved for...
Page 5 - Important; Maintenance Gas/Electrical
5 Important On floors with thermoelectric protection do not keep the ignite button pushed for more than 15 seconds. If the burner has not ignited after 15 seconds, open the door of the room and wait at least one minute before making a further attempt. wok Ø 20-32 *with reduction grid GAS Fig. 1 Maint...
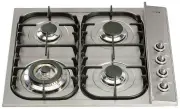
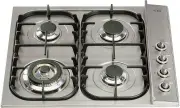
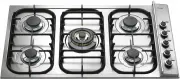
Page 6 - Induction
6 Induction Heating by induction is the most efficient form of cooking available.The heat is generated by an electromagnetic field, directly on the bottom of the pan or pot used. The surface which is free from contact remains virtually cold. When the cooking time is up and the container is removed, ...
Page 7 - Operating principle
7 Operating principle This is based on the electromagnetic properties of most cooking containers. The electronic circuit governs the operation of the coil (inductor), creating a magnetic field. The heat is transmitted by the container to the food. Te cooking process takes place as follows: - minimum...
Page 8 - Use; Pan detection
8 Use First of all, position the pan in the chosen cooking area. The absence of the pan display means the system cannot start. Pan detection A certainty which distinguishes the knowledgeable use of technology in favour of the consumer. After use, switch off the hob element by its control and do not ...
Page 9 - Functions; Switching the Touch Control ON/OFF
9 P P 1 ON/OFF2 + Slider Area3 - Slider Area4 Power Booster (P)5 Timer6 Display Value Set7A Display Timer 7B Display Timer8 Pause indicator light9 Timer indicator lights10 Cooking area decimal point11 Power indicator12 LED Strip light13 Pause Fi...
Page 12 - Residual heat indicator
12 Automatic heat-up function When the automatic heat-up function is activated the wattage of the cooking zone is at 100% for a certain heat-up time which is dependent on the setting selected (continuous).At the end of the heat-up time the electronic control switches back to the preselected simmerin...
Page 13 - Protection against unintended switching ON.
13 • The ON/OFF time of the relays• After switching OFF the cooking zone the respective display shows “H” until the assigned cooling zone temperature is mathematically in an uncritical level. (< 60°C). Automatic switch-off (limited operating time) Maximum operating time is defined for each hob zo...
Page 15 - Setting a timer value; Deactivation of an active timer; Independent timer
15 Setting a timer value – Adjustment by means of the slider area. – The adjustment of the first digit usually occurs first, followed by the adjustment of the second digit. – Within 10 seconds after setting the second digit, the value might reset (the dot on the timer display and when there is a spe...
Page 16 - Programming of the specific hob zone timer; Activation/Deactivation
16 Programming of the specific hob zone timer The power-on of the Touch Control enables the timer setting for dedicated hob zones. – If you activate a cooking area (cooking area level > 0) and then select the timer display (within 10 seconds), you can assign a value of the timer to the cooking ar...
Page 18 - Maintenance
18 during the 3 seconds delay time of reduced power. Note: If there is even a slight crack in the cooking surface, immediately disconnect the power. Maintenance First of all remove stray food bits and grease drops from the cooking surface with the special scraper. Then clean in the cooking area with...
Page 19 - Installation; Installation instructions
19 Installation These instructions are aimed at qualified fitters as a guide to installation, adjustment and maintenance in compliance with the laws and standards in force. The operations must always be carried out with the appliance disconnected from the electricity supply. This appliance is not prov...
Page 21 - Data Label
21 Gas connection (Fig. 11) Connect the appliance to the gas cylinder or to the installation according to the prescribed standards in force, and ensure beforehand, that the appliance matches the type of gas available. Other wise, see ”Adaptation to various types of gas”. Further more, check that the...
Page 22 - Electrical connection
22 Fig. 13 USER CHARACTERISTICS GAS BURNERS FEED TYPE PRESSURE mbar NORM. BURNER Ø INJECTORS 1/100 THERMAL CAPACITY CONSUMPTION Natural gas - 1.00 kPa Wok Dual A - Ø 0.80 inner 4000 17.5 MJ/h B - Ø1.30 outer Universal LPG - 2.75 kPA Wok Dual A - Ø 0. 4 8 inner 4000 16.0 MJ/h B - Ø 0.70 outer Electri...
Page 26 - EUROLINX LIMITED WARRANTY; WARRANTY REGISTRATION
EUROLINX LIMITED WARRANTY Eurolinx Pty Limited A.B.N. 50 001 473 347 Office: 48-50 Moore Street, Leichhardt N.S.W 2040 Post: Locked Bag 3000, Annandale, N.S.W 2038 P: 1300 694 583 WARRANTY REGISTRATION Your ongoing satisfaction with your product is important to us. We ask that you complete the enclo...
Page 27 - WARRANTY REGISTRATION CARD
6. Claiming under the Warranty Customers will bear the cost of claiming under this Warranty unless Eurolinx determines the expenses are reasonable, in which case the customer must claim those expenses by providing written evidence of each expense to Eurolinx at the address on the Warranty Registrati...