Page 3 - TABLE OF CONTENTS
3 TABLE OF CONTENTS Introduction - 4 FeaturesIncludes Overview Headphones - 5 Base - 6 Control Functions - 7 LED Indicator Lights - 7 Setup Base Power - 8 Headphone Charging - 9 Digital Optical Audio - 10 RCA Stereo Audio - 11 Coaxial Audio - 12 Line In - 13 Listening Pairing the Headphones to the B...
Page 4 - INTRODUCTION; Features
4 INTRODUCTION Tr ying to do some around-the-house chores and still want to listen to the T V or your favorite music? These wireless headphones allow freedom of movement while maintaining excellent reception. Features » Digital 2.4GHz wireless connection » Up to 100ft transmission distance without l...
Page 5 - Headphones; OVERVIEW
5 Headphones OVERVIEW 2 4 1 3 5 6 1. LED Indicator 2. Power/Pair Button 3. Volume Control 4. Aux In (3.5mm audio input) 5. Micro-USB DC Charging Port 6. Headphone Charging Contacts
Page 6 - Base
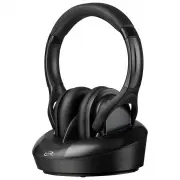
6 7 8 Base OVERVIEW 7. Charging Contacts 8. LED Indicator
Page 8 - Base Power; SETUP
8 Base Power Connect the DC Power Input on the base to a standard power outlet using a DC Power Adapter (included). The base must be connected to a power source and powered ON to transmit audio to the headphones. SETUP
Page 9 - Headphone Charging
9 Headphone Charging There are two ways to charge the headphones. » Place the headphone on the base so that the charging contacts are aligned. » Use a Micro-USB to USB cable (included) to connect the DC Input (Micro-USB) on the headphones to the USB port on a powered on computer or USB power adapter...
Page 10 - CONNECTING AUDIO; Digital Optical Audio
10 CONNECTING AUDIO Digital Optical Audio Requires a media source with an Optical Audio Output and a Digital Optical Audio Cable (included). 1. Using a Digital Optical Audio Cable, connect the Optical Output on your media source (TV, amplifier, etc.) to the Optical Input on the base. 2. On the conne...
Page 11 - RCA Stereo Audio
11 R L RCA Stereo Audio Requires a 3.5mm to RCA stereo audio cable adapter and a 3.5mm audio cable (included). When connecting an RCA stereo audio cable (Red/ White), match the colored plugs to their corresponding ports. 1. Using a 3.5mm to RCA Stereo Audio Cable (included), connect the RCA Stereo O...
Page 12 - Coaxial Audio
12 CONNECTING AUDIO Coaxial Audio Requires a media source with a Coaxial Audio Output and a Coaxial Audio Cable (not included). 1. Using a Coaxial Audio Cable, connect the Coaxial Output on your media source (TV, amplifier, etc.) to the Coaxial Input on the base. 2. On the connected media source (TV...
Page 14 - LISTENING; Pairing the Headphones to the Base
14 LISTENING Pairing the Headphones to the Base Note: After the initial pairing, the headphones will stay paired to the transmitter base. It will not be necessar y to reconnect each time you use the headphones. 1. Press and hold the Power/Pair button to power on the headphones. 2. Press the Power/Pa...
Page 15 - TROUBLESHOOTING; PROBLEM
15 TROUBLESHOOTING PROBLEM POSSIBLE SOLUTION Unit will not power on » Make sure the headphones’ battery is charged. Recharge if needed. Audio distortion » Volume on the headphones or the connected device may be too high. Reduce the volume of one or both of the devices. Headphones won’t play or fails...
Page 16 - CUSTOMER SUPPORT; Protect for Today; Made; Contact Information
16 CUSTOMER SUPPORT Protect for Today Sustain for Tomorrow Made Green Contact Information Website: www.iLiveElectronics.com Email Support: [email protected] Email Parts: [email protected] Phone Support: 1-888-999-4215 Warranty Information For Warranty Information and the most up-to-date version of t...