Page 2 - TABLE OF CONTENTS; CHAPTER 1 BEFORE USING YOUR PHONE
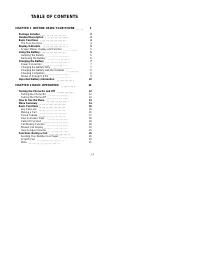
TABLE OF CONTENTS CHAPTER 1 BEFORE USING YOUR PHONE 1 Package Includes 2 Handset Description 3 Basic Functions 4 The Function Keys 4 Display Indicators 5 Screen Status, Display and Function 5 Using the Battery 6 Installing the Battery 6 Removing the Battery 6 Charging the Battery 7 Power Connection ...
Page 4 - CHAPTER 1; BEFORE USING YOUR PHONE; CHAPTER 7 VOICE MAIL AND TEXT MESSAGES; CHAPTER 8 SAFETY
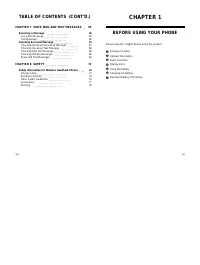
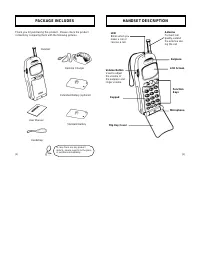
Please read this chapter before using this product. u Package Includes v Handset Description w Basic Functions x Display Icons y Using the Battery z Charging the Battery { Important Battery Information CHAPTER 1 BEFORE USING YOUR PHONE [1] CHAPTER 7 VOICE MAIL AND TEXT MESSAGES 65 Receiving a Messag...
Page 6 - THE FUNCTION KEYS
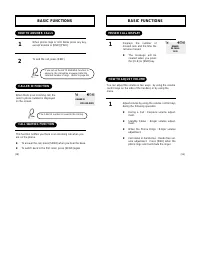
[4] [5] DISPLAY INDICATORS BASIC FUNCTIONS This key is used to make or receive a call. This key is used to terminate a call or exit thecurrent menu. This also activates the KeyLock function when it is pressed and held formore than 3 seconds. This key is used to look up the list of storedphone number...
Page 7 - INSTALLING THE BATTERY
[6] [7] CHARGING THE BATTERY USING THE BATTERY j Insert the bottom of battery into the groove at the bottom of the handset. Then k press in the top of the battery until it snaps. INSTALLING THE BATTERY REMOVING THE BATTERY Push the tab j with one hand and lift the top of the battery k to separate. T...
Page 8 - CHARGING THE BATTERY WITH THE HANDSET
[8] [9] CHARGING THE BATTERY CHARGING THE BATTERY To charge the battery with the handset, insertthe handset into the front slot of the charger. CHARGING THE BATTERY WITH THE HANDSET CHARGING COMPLETION Charging is completed when the green-coloredLED stays on. Charging the battery with the handset on...
Page 9 - CHAPTER 2; BASIC OPERATION; IMPORTANT BATTERY INFORMATION
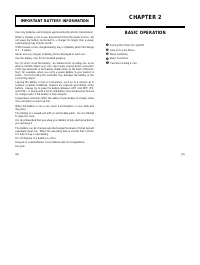
[10] [11] u Turning the Phone On and Off v How to Use the Menu w Menu Summary x Basic Functions y Functions During a Call CHAPTER 2 BASIC OPERATION Use only batteries and chargers approved by the phone manufacturer. When a charger is not in use, disconnect it from the power source. Donot leave the b...
Page 10 - HOW TO USE THE MENU; TURNING THE PHONE ON AND OFF; TURNING THE PHONE ON
[13] [12] HOW TO USE THE MENU In the standby screen, press and hold [ * ] for 1 second to access the menu. In the menu, use scroll keys to view the menuselections. If you press and hold the scrollkeys, the menu scrolls automatically. Use the following to scroll: [ * ∞ ], [# ‚ ], volume [+], volume [...
Page 11 - RECALL MENU; MENU SUMMARY; BILLING
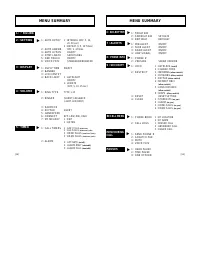
MENU SUMMARY 6 : BIO-RHYTHM 7 : ALERTS 9 : SECURITY RECALL MENU u u u u u MENU DURING CALL u PAUSES u SET DATEBIRTHDAY ON/OFFON/OFFON/OFFON/OFF SW/HW VERSION 1 : AUTOLOCK (on/off) 2 : CHANGE CODE1 : INCOMING (allow, restrict) 2 : OUTGOING (allow, restrict) 3 : KEYPAD (allow, restrict) 4 : MEMORY ONL...
Page 12 - PAUSE FEATURE; BASIC FUNCTIONS; KEY PAD LOCK
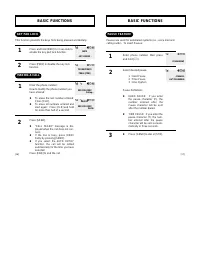
[16] [17] BASIC FUNCTIONS Enter phone number, then press and hold [ * ]. Select desired pause. 1 : Hard Pause2 : Time Pause3 : One Hyphen Pause Definitions l HARD PAUSE: If you enterthe pause character (P). thenumber entered after thePause character will be sentafter the number dialed. l TIME PAUSE:...
Page 13 - MISSED CALL DISPLAY; HOW TO ANSWER CALLS; CALL WAITING FUNCTION
[18] [19] BASIC FUNCTIONS Displays the number ofmissed calls and the time thecall was missed. l The message will becleared when you pressthe [CLR] or [END] key. 1 MISSED CALL DISPLAY Adjust volume by using the volume control keysduring the following operation. l During a Call : Earpiece volume adjus...
Page 14 - MUTE; FUNCTIONS DURING A CALL; SENDING YOUR NUMBER TO A PAGER
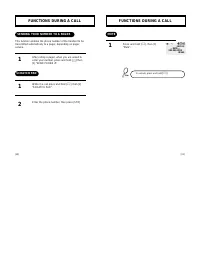
[20] [21] FUNCTIONS DURING A CALL Press and hold [ * ], then [3] “Mute”. 1 MUTE To unmute, press and hold [ * ]. FUNCTIONS DURING A CALL After calling a pager, when you are asked toenter your number, press and hold [ * ] then [1] “SEND PHONE #”. While in a call press and hold [ * ], then [2] “SCRATC...
Page 15 - CHAPTER 3; MEMORY FUNCTION
[23] [22] CHAPTER 3 MEMORY FUNCTION u How to Store a Phone Number v How to Make a Call Using a Stored Phone Number w How to Find Your Call Logs x How to Find Your Phone Book
Page 16 - How to Enter Letters and Characters Using the Dial Buttons; HOW TO STORE A PHONE NUMBER
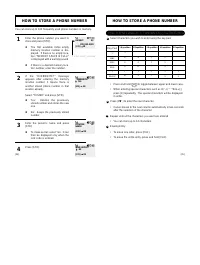
[24] HOW TO STORE A PHONE NUMBER How to Enter Letters and Characters Using the Dial Buttons Key Pad 1 2ABC 3DEF 4GHI : 9WXYZ 1 Repetition 1 A D G : W 2 Repetition B E H : X 3 Repetition C F I : Y 4 Repetition 2 3 4 : 9 5 Repetition : Z Select characters you wish to enter using the key pad. HOW TO ST...
Page 17 - MISSED CALLS; ONE TOUCH/TWO TOUCH DIALING
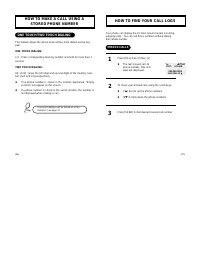
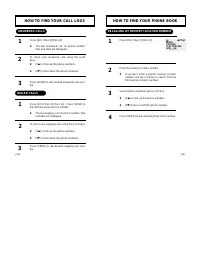
[26] [27] HOW TO MAKE A CALL USING A STORED PHONE NUMBER HOW TO FIND YOUR CALL LOGS Press [RCL] then [2] then [1] l The last missed call, its phone number, time and date are displayed. To check your missed calls using the scroll keys: l [* ∞ ] Scrolls up the phone numbers. l [# ‚ ] Scrolls down the ...
Page 18 - HOW TO FIND YOUR PHONE BOOK; RECALLING BY MEMORY LOCATION NUMBER; HOW TO FIND YOUR CALL LOGS; ANSWERED CALLS
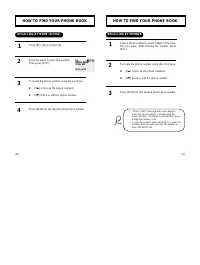
[ 28] [29] HOW TO FIND YOUR PHONE BOOK Press [RCL] then [1] then [1]. Enter the memory location number. l If you don’t enter a specific memory locationnumber, use the scroll key to search from thefirst memory location number. Search phone numbers using scroll key. l [ * ∞ ] scrolls up the phone numb...
Page 19 - RECALLING BY NUMBER
[30] [31] HOW TO FIND YOUR PHONE BOOK Enter a phone number (at least 3 digits of the num-ber) you want. After entering the number, press[RCL]. To locate the phone number using the scroll keys. l [ * ∞ ] scrolls up the phone numbers. l [# ‚ ] Erase or edit the phone number. Press [SEND] to dial desir...
Page 20 - CHAPTER 4; MENU
[33] [32] Please read this chapter before using this product. u Check Billing Feature v Settings w Display x Volume y Timers z Bio-Rhythm { Alerts | Phone Info } Security CHAPTER 4 MENU
Page 21 - SETTINGS; AUTO RETRY; CHECK BILLING FEATURE
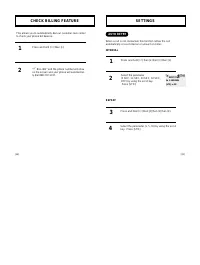
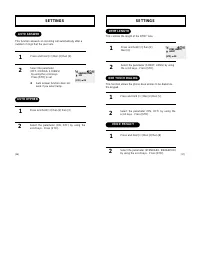
[34] [35] SETTINGS Press and hold [ * ] then [2] then [1] then [1]. Select the parameter (5 SEC, 10 SEC, 20 SEC, 30 SEC,OFF) by using the scroll key. Press [STO]. 1 2 When a call is not connected, this function retries the callautomatically at a set interval or amount or retries. INTERVAL AUTO RETRY...
Page 22 - DTMF LENGTH; AUTO ANSWER
[36] [37] SETTINGS Press and hold [ * ] then [2] then [4]. Select the parameter (SHORT, LONG) by usingthe scroll keys. Press [STO]. 1 2 This controls the length of the DTMF tone. DTMF LENGTH Press and hold [ * ] then [2] then [5] Select the parameter (ON, OFF) by using thescroll keys. Press [STO]. 1...
Page 23 - BACKLIGHT; AUTO LIGHTING FUNCTION; DISPLAY; BANNER
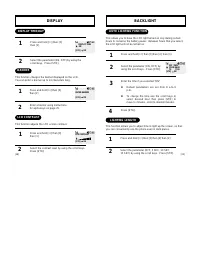
[38] [39] BACKLIGHT Press and hold [ * ] then [3] then [4] then [1]. Select the parameter (ON, OFF) by using the scroll keys. Press [STO]. Enter the time if you selected “ON”. l Default parameters are set from 8 a.m~5p.m. l To change the time use the scroll keys toselect desired hour then press [STO...
Page 24 - VOLUME ADJUSTMENT; VOLUME; RINGER TYPE
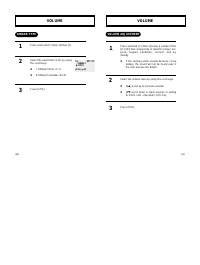
[40] [41] VOLUME Press and hold [ * ] then [4] enter a number (from [2] to [6]) that corresponds to selection (ringer, ear-piece, keypad, handsfree, connect, and mymelody. l If the warning alarm sounds because of lowbattery, the sound will not be heard even ifthe user presses the button. Select the ...
Page 25 - CALL TIMERS; LAST CALL
[42] CALL TIMERS Press and hold [ * ] then [5] then [1] then [1] Press and hold [ * ] then [5] then [1] then [2] Press and hold [ * ] then [5] then [1] then [3] Press and hold [ * ] then [5] then [1] then [4] 1 LAST CALL 1 ALL CALLS HOME CALLS ROAM CALLS 1 1 BIO-RHYTHM Press and hold [ * ] then [6] ...
Page 26 - ROAM ALERT; ALERTS; MINUTE ALERT
[44] [45] ALERTS Press and hold [ * ] then [7] then [3]. Select the parameter (ON, OFF) by using thescroll keys. Press [STO]. 1 2 ROAM ALERT Press and hold [ * ] then [7] then [4] Select the parameter (ON, OFF) by using thescroll keys. Press [STO]. 1 2 LOW SIGNAL This function sounds an alert when t...
Page 27 - CHAPTER 5; SECURITY FEATURES; CHECKING MY NUMBER; PHONE INFO
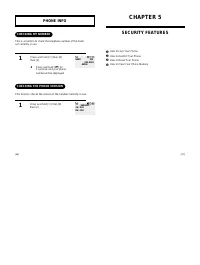
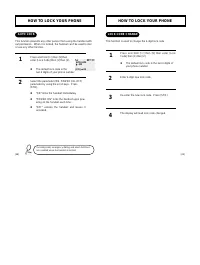
[47] [46] u How to Lock Your Phone v How to Restrict Your Phone w How to Reset Your Phone x How to Clear Your Phone Memory CHAPTER 5 SECURITY FEATURES Press and hold [ * ] then [8] then [1]. l Press and hold [# ‚ ] for 2 seconds and your phone number will be displayed. 1 CHECKING MY NUMBER Press and...
Page 28 - LOCK CODE CHANGE; HOW TO LOCK YOUR PHONE; AUTO LOCK
[48] [49] HOW TO LOCK YOUR PHONE Press and hold [ * ] then [9] then enter [Lock Code] then [1] then [2]. l The default lock code is the last 4 digits ofyour phone number. Enter 4-digit new lock code. Re-enter the new lock code. Press [STO]. The display will read lock code changed. 1 LOCK CODE CHANGE...
Page 29 - RESTRICTING OUTGOING CALLS; HOW TO RESTRICT YOUR PHONE; RESTRICTION FUNCTIONS; TO RESTRICT INCOMING CALLS
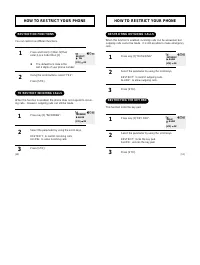
[50] [51] HOW TO RESTRICT YOUR PHONE RESTRICTING OUTGOING CALLS Press key [2] “OUTGOING”. Select the parameter by using the scroll keys. RESTRICT: to restrict outgoing calls.ALLOW: to allow outgoing calls. Press [STO]. 1 When this function is enabled, incoming calls can be answered, butoutgoing call...
Page 30 - RESTRICT CALLS TO 900 NUMBERS; RESTRICTING THE PHONE BOOK; RESTRICTING LONG DISTANCE CALLS
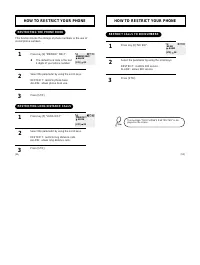
[52] [53] HOW TO RESTRICT YOUR PHONE RESTRICT CALLS TO 900 NUMBERS Press key [6] “NO 900”. Select the parameter by using the scroll keys. RESTRICT: restricts 900 service.ALLOW: allows 900 service. Press [STO]. 1 2 3 The message “THIS PHONE’S RESTRICTED” is dis-played on the screen. HOW TO RESTRICT Y...
Page 31 - HOW TO CLEAR YOUR PHONE MEMORY; CLEARING STORED PHONE NUMBERS; CLEARING ALARM CONTENTS; HOW TO RESET YOUR PHONE
[55] [54] HOW TO CLEAR YOUR PHONE MEMORY Press and hold [ * ] then [9] then enter [Lock Code] then [4] then [1]. The default lock code is the last 4digits of your phone number. Select the parameter (NO, YES) byusing the scroll keys. Press [STO]. 1 2 CLEARING STORED PHONE NUMBERS This function clears...
Page 32 - CHAPTER 6; SUPPLEMENTARY FUNCTIONS; MEMORY CLEARING FUNCTION; CLEARING AIR TIME IN HOME SERVICE AREA; CLEARING AIR TIME IN OTHER SERVICE AREA
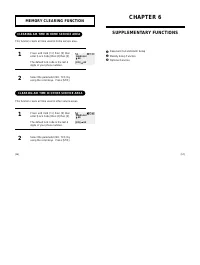
[57] [56] u Reserved Call and Alarm Setup v Melody Setup Function w Optional Services CHAPTER 6 SUPPLEMENTARY FUNCTIONS MEMORY CLEARING FUNCTION Press and hold [ * ] then [9] then enter [Lock Code] then [4] then [3]. The default lock code is the last 4digits of your phone number. Select the paramete...
Page 33 - ENTERING ALARM SETUP; RESERVED CALL AND ALARM SETUP; ALARM SETUP
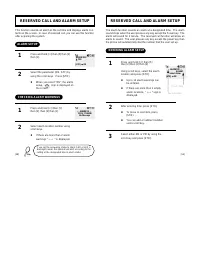
[58] [59] RESERVED CALL AND ALARM SETUP ENTERING ALARM SETUP The alarm function sounds an alarm at a designated time. The alarmsound stops when the user presses any key except the Power key. Thealarm will sound for 1 minute. The reserved call function will allow analarm to sound. The user presses an...
Page 34 - CHECKING ALARM CALL
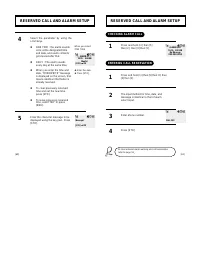
[60] [61] RESERVED CALL AND ALARM SETUP CHECKING ALARM CALL Press and hold [ * ] then [5] then [2] then [3] then [1]. Press and hold [ * ] then [5] then [2] then [3] then [2]. The input method for time, date, andmessage is identical to that of alarmselect input. Enter phone number. Press [STO]. 1 2 ...
Page 35 - TO ENTER MELODY; MELODY SETUP; ENTERING MELODY
[62] [63] MELODY SETUP TO ENTER MELODY LISTENING TO THE MELODY l When you press dial key r , a quarter note is displayed. l The dial keys j , k , l , m , n , o , p , q , r , i , corre- spond to musical notes do, re, mi, fa, sol, ra, ti, do, respec-tively. l Select the length of tone by pressing [ * ...
Page 36 - CHAPTER 7; VOICE MAIL AND TEXT MESSAGES
[64] [65] This chapter describes convenient functions that allow you to checkvoice mail and receive text messages with the handset. u Receiving a Message v Checking Received Voice Mail Message w Checking the Received Text Message CHAPTER 7 VOICE MAIL AND TEXT MESSAGES
Page 37 - CHECKING RECEIVED MESSAGE; CHECKING RECEIVED VOICE MAIL MESSAGE; RECEIVING A MESSAGE; TEXT MESSAGE
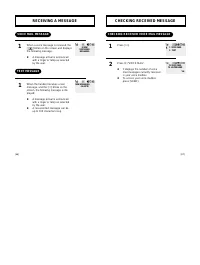
[66] [67] CHECKING RECEIVED MESSAGE Press [ * ]. Press [1] “VOICE MAIL”. l It displays the number of voice mail messages currently received in your voice mailbox. l To access your voice mailbox, press [SEND]. 1 CHECKING RECEIVED VOICE MAIL MESSAGE 2 RECEIVING A MESSAGE When a voice message is receiv...
Page 38 - ERASE OLD TEXT MESSAGES; CHECKING RECEIVED TEXT MESSAGE
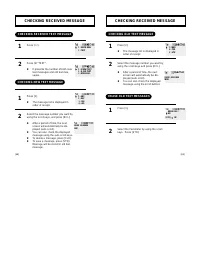
[68] [69] CHECKING RECEIVED MESSAGE Press [2]. l The message list is displayed inorder of receipt. Select the message number you want byusing the scroll keys and press [RCL]. l After a period of time, the nextscreen will automatically be dis-played (auto scroll). l You can also check the displayedme...
Page 39 - CHAPTER 8; SAFETY
Page 40 - DRIVING SAFETY; SAFETY INFORMATION FOR
[72] [73] DRIVING SAFETY EXPOSURE TO RADIO FREQUENCY SIGNALS Your wireless handheld portable telephone is a low power radio trans-mitter and receiver. when it is ON, it receives and also sends out radiofrequency (RF) signals. In August, 1996, the Federal communications Commissions (FCC)adopted RF ex...
Page 41 - ELECTRONIC DEVICES
[74] [75] Other Medical Devices If you use any other personal medical device, consult the manufactur-er of your device to determine if they are adequately shielded fromexternal RF energy Your physician may be able to assist you in obtain-ing this information. Turn your phone OFF in healthcare facili...
Page 42 - PRECAUTIONS; OTHER SAFETY GUIDELINES
[76] [77] Your Handheld Portable Telephone is a high quality piece of equipment.Before operating the equipment, read all instructions and cautionarymarkings on (1) AC Adaptor (2) Battery and (3) Product Using Battery. 1. DO NOT use this equipment in an extreme environment wherehigh temperature or hi...
Page 43 - WARNING; NOTES
[78] The following offenses are punishable by fine, imprisonment, or both: l Using obscene, indecent, or profane language. l Using the unit to give off false distress calls. l Wiretapping or otherwise intercepting a telephone call, unless thatperson has first obtained the consent of the parties part...