Page 2 - Humidex; Table of Contents; IMPORTANT
Humidex 1 Table of Contents Table of Contents ...................................................................................................................... 1 Introduction ...........................................................................................................................
Page 3 - OLED
Humidex 2 S YSTEM S ETTINGS S CREEN ......................................................................................................................... 28 T HE OLED S ETTINGS DISPLAY CONSISTS OF : ......................................................................................... 28 W EA...
Page 4 - Introduction; Please take note the following safety information:; CAUTION; and vapours; safety device and additional approved detectors are required.; warning device, such as a tag to the service panel.; Combustion Appliance Present in Dwelling; may be drawn into the
Humidex 3 Introduction Congratulations on the purchase of your new Humidex system which will provide you with year- round moisture control and improved air quality for a healthy fresh and drier indoor environment. Please take note the following safety information: CAUTION For general ventilating use...
Page 5 - Service and Warranty; For Customer Assistance; the above information before contacting us.; For the Following Inquiries:
Humidex 4 Service and Warranty For Customer Assistance To aid in answering questions if you call for service or warranty purposes, please record below the model and serial number located on the side of the unit. Product Name: Model #: Date of Manufacturing: Date of Purchase: Serial #: Dealer Name (I...
Page 6 - Consumer Limited Warranty
Humidex 5 Consumer Limited Warranty ClairiTech Innovations Inc. warrants to the first consumer that this product, when shipped in its original container, will be free from defective workmanship and materials, and agrees that it will, at its discretion, either repair the defect or replace the defecti...
Page 7 - updates; Refer to Page 4 for Contact Information.; Included Components
Humidex 6 ClairiTech Innovations Inc. offers a one-year limited functionality warranty for myHome system. Liability Limitation: ClairiTech Innovations inc. cannot be held responsible for any changes, modifications, or updates made by third parties (platform s , operator s , etc.) which could alter t...
Page 8 - Tools Required for Installation
Humidex 7 Accessories will vary on which unit was purchased. HCS Basement unit and HCS Crawlspace unit 1x Owner’s Manual 2x Cable Ties 1x Checklist 1x Warranty Card 1x Cover plate 1x Aluminum tape 1x Vinyl Flex 6” x 24” 4x Plastic Anchors 4x Truss screws #8 x1 ¼ 1x Exhaust Vent 6” 4x #8 x 2” Screws ...
Page 9 - se a hammer drill with chiseling ability 1⁄2” x 16”; Key Installation Facts; Outside duct must be no less than 6” and dedicated for the
Humidex 8 - Hammer - Pencil For concrete, cinderblock or brick installation, u se a hammer drill with chiseling ability ½” x 16” long and a chisel bit 1” thick. Key Installation Facts 1) Unit must be installed at floor level – up to 3” off the floor. 2) Unit should be installed as far away as possib...
Page 10 - Ideal location installation locations; Install unit in dampest, coolest, and lowest part of basement.
Humidex 9 Ideal location installation locations For HCS-BS or HCS-CS Air drawn in by Humidex pulls moisture off the surface floors and walls. To maximize the effectiveness; A) Install unit in dampest, coolest, and lowest part of basement. B) If possible, without hindering point “A”, install the Humi...
Page 11 - Replenishment air to Basement from Upstairs; ” (or other grill configuration, having total area of not less than; The replenishment air area must have a minimum size of 100
Humidex 10 Installation HCS-BS / HCS-CS Replenishment air to Basement from Upstairs The damp air exhausted by the Humidex must be replaced by the warmer/drier air from the upper levels. If there is no open stairwell, the airflow is restricted from coming down, then install a passive return grille wi...
Page 12 - Selecting the Duct Location; location is above ground level. Also make sure tha; Ducting
Humidex 11 Selecting the Duct Location Now that you’ve decided where to install the unit, you must select a location for a 6¼” duct hole in the outside wall. This hole is needed to pass a duct through the outside wall. Make sure that the hole’s location is above ground level. Also make sure tha t th...
Page 13 - Preparing the Humidex for Installation; Remember that the units cannot be higher than 3” off the ground.; Brick or Concrete Wall:; There are two ways of going through brick or concrete. The
Humidex 12 Preparing the Humidex for Installation Now that an installation location has been chosen a hole must be made for the vent. Start by measuring the required Unit height and mark the location of the hole. Remember that the units cannot be higher than 3” off the ground. From the inside, drill...
Page 14 - Putting the unit together; ” cut the top of the; Note; 4” extension, remove top cap and straighten the
Humidex 13 Putting the unit together For HCS-BS Only Join the two halves (Bottom section must fit inside Top section) of the HCS-BS casing together, overlapping the two pieces such as the desired height is obtained. Remove screws if necessary. NOTE: If the unit has to be shorter than 85 ” cut the to...
Page 15 - Fasten the unit to the wall; (a few Small 9/16” Screw can be used to affix; Attaching the Flex and Outside Vent; ” pipe with the 1⁄2
Humidex 14 Fasten the unit to the wall With the help of a tie wrap attach the flex pipe to the collar on the back of the unit before attaching the unit to the wall. Insert the other end of the flex pipe inside the hole in the wall. (a few Small 9/16” Screw can be used to affix the flex to the mount)...
Page 16 - Installation HCS-BSF; Typical Installation Diagram
Humidex 15 Installation HCS-BSF 1. To minimize noise propagation, install at least 6 ft. of 6 in. insulated flex between the universal duct boot (connected to the floor register) and the HCS-BSF. 2. To further decrease noise propagation, 6 ft. of insulated flex can be used on the exhaust side of the...
Page 17 - Installing and Wiring the Booster Fan; On the booster fan’s end of the cable
Humidex 16 Installing and Wiring the Booster Fan To allow the booster fan to draw air from the upper levels, a universal boot must be installed. First locate a safe place to cut out a hole to fit the universal boot. Once a safe and adequate area had been found, proceed by cutting the hole. With the ...
Page 18 - Now that the connector has been wired,
Humidex 17 Now that the connector has been wired, insert it into the booster fan unit. Now that the booster fan has been installed and connected to the main exhaust unit, it can be plugged into any 115V outlet. Afterwards, the main exhaust unit can be plugged in. Note: A grounded extension cord with...
Page 19 - doesn’t line up with a stud, electrical wires, or pi; cannot be higher than 3” to 6” off the ground.; through the brick in a circular shape outlining the 6 1⁄4” hole.
Humidex 18 Installation HCS-APT/HCS-APTHC Selecting the Duct Location Now that you’ve decided where to install the unit, you must select a location for a 6¼” duct hole in the outside wall. This hole is needed to pass a duct through the outside wall. Make sure that the hole doesn’t line up with a stu...
Page 20 - Mounting and installing the unit; holding the back piece)
Humidex 19 Mounting and installing the unit Remove the 4 white screws on the side of the unit. (These are along the back edge of the unit and are holding the back piece) Separate the front aluminum piece (Front Cover) from the back galvanized piece (Back Plate). Place the unit at its chosen location...
Page 21 - Before mounting the unit’s back plate to the wall,
Humidex 20 Before mounting the unit’s back plate to the wall, attach the flex pipe to the collar on the back of the unit and insert the other end of the flex pipe inside the hole in the wall.(A 24” cable tie or a few small 9/16 ” screws can be used to affix the flex to the collar) NOTE: For instruct...
Page 22 - Steps for the HCS-APTHC only; Before the wiring can be completed, the; Note: Fitting not included; Once the wire has been run through the
Humidex 21 Steps for the HCS-APTHC only Before the wiring can be completed, the EKO punch must be removed from the back plate An electrical fitting needs to be installed. With the fitting installed the wire can be inserted inside the unit and connected. Note: Fitting not included Once the wire has b...
Page 23 - Attach the vent to the newly formed 6” pipe with the 1⁄2 inch
Humidex 22 Attaching the Flex and Outside Vent Roll the flat metal plate into a cylinder and interlock both ends. Attach the vent to the newly formed 6” pipe with the ½ inch screws provided. From the outside, pull the flex pipe through the 6 ¼” hole onto the 6” pipe and attach it with a 24” cable ti...
Page 24 - Unit Operations; monitoring the system.; The first time running the unit; The HCS myHome are programmed to a default humidity setting of 55%.; Carbon Monoxide; detect CO. During that time the unit will not be able to monitor CO.
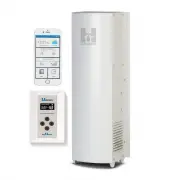
Humidex 23 Unit Operations Note : The unit will operate with all of it’s features without the need to connect it to your home’s Wi-Fi (Internet). Wi-Fi is only necessary when the mobile app is being used for controlling and monitoring the system. The first time running the unit … When the unit is fi...
Page 25 - Vacant Homes; base of the Humidex.; What is the dew point?
Humidex 24 Vacant Homes Performance results are maximized when the building is occupied. If home is vacant for a prolonged period, then the unit should be set to operate at low speed. Maintaining your HCS The HCS Products do not require any internal maintenance. The only maintenance needed for your ...
Page 26 - protocols to reduce possible condensation.; Control Set-up and Location; unit and repeat the pairing process.; DO NOT mount the control to the wall until setup is completed.
Humidex 25 COLD SURFACE FACTS – IMPORTANT Before the Humidex is installed, cold ducts and pipes should be insulated as per proper HVAC protocols to reduce possible condensation. Control Set-up and Location Once the exhaust unit has been mounted and powered, the control will need to be paired. To com...
Page 27 - OLED Display and Control Layout
Humidex 26 OLED Display and Control Layout The following sections of this operating manual refer to the user interface presented below: The user interface consists of: 1- OLED Display 2- Up Arrow Button 3- Ok Button 4- Cancel Button 5- Down Arrow Button
Page 28 - Navigating the OLED Menu; set an override timer.; Conditions Screen; readings are used by the system to optimize its performance. That
Humidex 27 Navigating the OLED Menu The HCS has an OLED screen that allows the unit to display information about its operation and its environment. This information can be accessed by pressing the UP or Down arrow keys on the control which will cycle through the different main screen options. The fo...
Page 29 - System Settings Screen; The OLED Settings display consists of:; Signal Strength and Connection Type; Weather Screen
Humidex 28 1 3 System Settings Screen The System Settings screen allows users to visualize the current settings that the exhaust unit is operating with. On this screen the control will show the desired humidity level, the max fan speed as well as the signal strength of the wireless connection. The s...
Page 30 - Main Menu; humidity setting, maximum operating speed of the unit,
Humidex 29 Main Menu The OLED display also has a menu interface that allows users to change settings such as the desired humidity setting, maximum operating speed of the unit, the unit’s built in override mode , as well as preferences. The menu page can be accessed by pressing the OK button on any o...
Page 31 - Changing Max Fan Speed; “Set; Maximum Operating Speed
Humidex 30 Changing Max Fan Speed The default and recommended setting are set to High for optimal performance. The unit will self- adjust its speed automatically based on real-time conditions. However, if you chose to change the maximum fan speed, simply select “Set Max Fan Speed ” from the main men...
Page 32 - Override Timer Menu; by returning to the main menu. The; Preferences; button. If the wrong setting is entered, repeat this procedure.
Humidex 31 Override Timer Menu The override function allows you to provide maximum ventilation for a predetermined amount of time, regardless of the fan speed chosen by the computerized/sensor control, to alleviate certain conditions such as fumes from new paint, flooring, furniture or excess moistu...
Page 33 - Enable Pairing; press the OK button once the Enable Pairing is selected in the Menu.; System Reboot; appear advising you that a reboot of the exhaust will not occur.
Humidex 32 Enable Pairing The Enable Pairing allows users to turn on the pairing feature to connect to the system. The system has a built-in auto-hide feature for security purpose 6 hours after the initial setup. This feature is used to connect the myHome Mobile application to the exhaust (see page ...
Page 34 - myHome Mobile Application; The unit will operate with all of; Wi-Fi internet connection and mobile application; monitor your home’s air
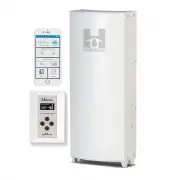
Humidex 33 myHome Mobile Application The myHome Humidex line can be directly controlled from the myHome application available on the Google play store for android devices and the App Store for Apple devices. Once installed, the application will walk you through its different features and show you ho...
Page 35 - Most Common Issues; Mold, Mildew and Musty Smell; please
Humidex 34 Most Common Issues Mold, Mildew and Musty Smell If mold or mildew is present prior to installing a Humidex, please have the contaminated area cleaned. Not doing so could cause the Humidex to spread that mold to other locations in the basement or crawlspace. To avoid Mold, Mildew or Musty ...
Page 36 - Troubleshooting; Problem
Humidex 35 Troubleshooting If the system is not functioning as intended, please follow the instructions below. If a system reboot is required: Power down (Unplug) all components of the system. Proceed with plugging in the components in the following order while waiting roughly 1 minute in between ea...
Page 38 - Specifications; Technical Data; Dimensions; Dimensions
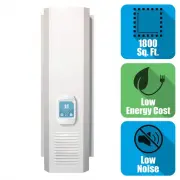
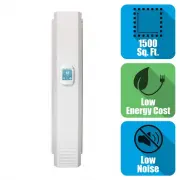
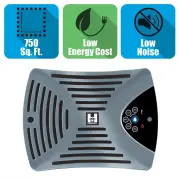
Humidex 37 Specifications HCS-BS myHome/HCS-CS myHome (Basement or Crawls Space) Technical Data Model Amps (A) Watts (W) Airflow (CFM) Capacity (Sq.Ft.) HCS-BS-HDEX myHome 0.30 34 230 2,400 HCS-CS- HDEX myHome 0.30 34 230 3,000 All Units require a 115 VAC electrical outlet Dimensions Model Height (I...
Page 40 - Return and Exchange Policy; Return period of 30 days for unused products and accessories:; Fees
Humidex 39 Return and Exchange Policy Clairitech Innovations Inc. values its relationship with you and offers you the option to return most products you purchase directly from Clairitech Innovations Inc., as set forth in detail below. Policy Return period of 30 days for unused products and accessori...
Page 41 - ClairiTech Innovations Inc.
Humidex 40 1. Before returning a product, you must first obtain a Return Authorization Number from Clairitech Innovations Inc. Customer Service before the end of the applicable return period. Proof of purchase will also be required. To contact Clairitech Innovations Inc. Customer Service, please cal...
Page 42 - For any questions regarding warranty terms please call
Humidex 41 10. For any questions regarding warranty terms please call 1-888-533-1348 or Email Us NO RETURNS ARE POSSIBLE AFTER 30 DAYS FOLLOWING THE DATE OF THE BILLING DATE. CLAIRITECH INNOVATIONS SHALL NOT BE LIABLE FOR, OR ANY CHARGE OF, A CONSUMER ORDER ERROR.