Page 2 - Table of Contents
Humidex 1 Table of Contents Table of Contents 1 Service and Warranty 2 F OR CUSTOMER ASSISTANCE 2 C ONSUMER L IMITED W ARRANTY 3 Before Installing 5 T ECHNICAL DATA 5 R ECOMMENDED TOOLS REQUIRED FOR INSTALLATION 5 I NCLUDED PARTS LIST 5 I DEAL INSTALLATION LOCATION 5 W ARNINGS FOR USE 6 Installation...
Page 3 - Service; Service and Warranty; For customer assistance; purposes, please record below the model and serial number located
Humidex 2 For the following inquiries: - Service - Parts - Accessories - Additional customer information Please contact us by: Phone: 1-888-533-1348 Email: [email protected] Website: www.humidex.com Service and Warranty For customer assistance To aid in answering questions if you call for service or...
Page 4 - Humidex; Consumer Limited Warranty
Humidex 3 Consumer Limited Warranty Clairitech Innovations Inc. warrants to the first consumer that this Humidex product, when shipped in its original container, will be free from defective workmanship and materials, and agrees that it will, at its discretion, either repair the defect or replace the...
Page 6 - Before Installing; Technical data; ” Exhaust Vent; Ideal installation location
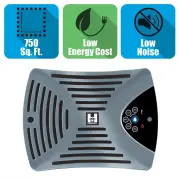
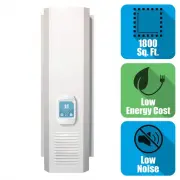
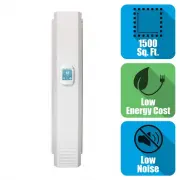
Humidex 5 Before Installing Technical data Voltage: 115VAC Amperage 0.26A Certification: Dimensions: 9” x 6.5” x 4” Capacity: Up to 750 sq. ft. Recommended tools required for installation. - 1/4’’ pilot drill bit of 12 inches or more - Hole saw with a diameter of 4 ½” , reciprocal saw or, jig saw - ...
Page 7 - Warnings for use
Humidex 6 Warnings for use The following warnings will help reduce the risk of fire, electric shock or injury. Please read and save these instructions. 1) Do not operate any unit with a damaged cord or plug. Please contact our service department for examination and/or repair. 2) Do not run cord unde...
Page 8 - Installation
Humidex 7 Installation Please follow these instructions to install your Humidex properly. 1. From the inside, mark where the center of the Humidex will be placed and drill through the wall with a ¼’’x 12’’ pilot bit. The hole should be approximately 12 inches from the floor. Cut a 4 ½’’ hole through...
Page 9 - How to Operate the Humidex; Manufacturer’s suggest
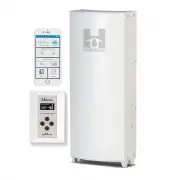
Humidex 8 How to Operate the Humidex After both the Humidex and the exhaust vent are properly installed, you can now plug the Humidex in the closest outlet. The Humidex unit possesses a label illuminated by LEDs that will indicate the set humidity preference, if the unit is powered On and if the uni...
Page 10 - How the CO Sensor Works; nderstand the unit’s pr; Note: The device cannot guaranty that it will be able to
Humidex 9 How the CO Sensor Works The built-in carbon monoxide sensor allows the unit to monitor the garage or shed for any amount of CO in the air. To help the user u nderstand the unit’s pr ocess an indicator light has been added The indicator light will have three (3) different display modes Doub...
Page 11 - Wiring Diagram
Page 12 - Return and Exchange Policy; Return period of 30 days for unused products and accessories:
Humidex 11 Return and Exchange Policy Clairitech Innovations Inc. values its relationship with you and offers you the option to return most products you purchase directly from Clairitech Innovations Inc., as set forth in detail below. Policy Return period of 30 days for unused products and accessori...
Page 13 - Fees
Humidex 12 Fees Unless the product is defective or the return is a direct result of a Clairitech Innovations Inc., the refund or credit does not include any shipping and handling charges shown on your packing slip or invoice; you are responsible for those and for any damages incurred during the retu...
Page 14 - For any questions regarding warranty terms please call
Humidex 13 ClairiTech Innovations Inc. 1095 ch. Ohio Service Rd Boudreau Ouest, NB E4P 6N4 - Canada 8. Upon receipt of your authorized and compliant return, Clairitech Innovations Inc will issue a credit or refund equal to the purchase price paid, less shipping and handling charges, restocking charg...