Hotpoint HDA3600K55BB - Manuals
Hotpoint HDA3600K55BB – User Manual, Installation Manual in PDF format online.
Manuals:
User Manual Hotpoint HDA3600K55BB


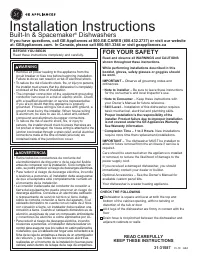
Installation Manual Hotpoint HDA3600K55BB


Summary
PARTS SUPPLIED IN INSTALLATION PACKAGE: • Two 8-18 x 5/8” Phillips-head wood screws • #10 hex head screw and junction box cover • Drain hose (78” long) • Hose clamp • Literature, product samples and/or coupons TOOLS YOU WILL NEED: • Phillips-head screwdriver• 1/4” and 5/16” nutdriver• 6” Adjustable ...
CLEARANCES: • When installed into a corner, allow 2” min. clearance between dishwasher and adjacent cabinet, wall or other appliances. • Allow 27” min. clearance from the front of the dishwasher for door opening. 3 Countertop 27" Dishwasher Clearance for Door Opening 2” Minimum Installation Prep...
Installation Preparation 4 DRAIN REQUIREMENTS • Follow local codes and ordinances.• Do not exceed 10’ distance to drain.• A high drain loop or air gap is required. See below. DETERMINE DRAIN METHOD The type of drain installation depends on the followingquestions.• Do local codes or ordinances requir...
Hotpoint Manuals
-
 Hotpoint RGB745DEP5WH
User Manual
Hotpoint RGB745DEP5WH
User Manual
-
Hotpoint RGB745DEP5WH
Installation Manual
-
 Hotpoint RGB524PEH8CT
User Manual
Hotpoint RGB524PEH8CT
User Manual
-
 Hotpoint RGB508PET1CT
User Manual
Hotpoint RGB508PET1CT
User Manual
-
Hotpoint RGB508PET1CT
Installation Manual
-
Hotpoint HDA2100H55CC
User Manual
-
Hotpoint HDA2100H55CC
Installation Manual
-
 Hotpoint HDA3600D35WW
User Manual
Hotpoint HDA3600D35WW
User Manual
-
Hotpoint HDA3600D35WW
Installation Manual
-
 Hotpoint RGB530DEP1BB
User Manual
Hotpoint RGB530DEP1BB
User Manual
-
Hotpoint RGB530DEP1BB
Installation Manual
-
 Hotpoint HTDX100ED5WW
User Manual
Hotpoint HTDX100ED5WW
User Manual
-
Hotpoint HTDX100ED5WW
Installation Manual
-
Hotpoint RGB790DET2BB
User Manual
-
Hotpoint RGB790DET2BB
Installation Manual
-
 Hotpoint RA820DD1WW
User Manual
Hotpoint RA820DD1WW
User Manual
-
 Hotpoint RB757DP1CT
User Manual
Hotpoint RB757DP1CT
User Manual
-
Hotpoint RB757DP1CT
Installation Manual
-
 Hotpoint HTAP1100F0WW
User Manual
Hotpoint HTAP1100F0WW
User Manual
-
Hotpoint HTAP1100F0WW
Installation Manual