Page 2 - CONTENTS; Thank you for choosing a HOOVER; CONTENU
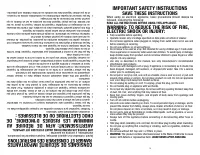
2 CONTENTS Thank you for choosing a HOOVER ® product. Please enter the complete model and Manufacturing Code in the spaces provided. MODEL MFG. CODE Hint: Attach your sales receipt to this owner’s manual. Verification of date of purchase may be required for warranty service of your HOOVER ® product....
Page 3 - CONSIGNES DE SÉCURITÉ IMPORTANTES; RANGER ET CONSERVER CES INSTRUCTIONS; LIRE TOUTES LES INSTRUCTIONS AVANT D’UTILISER CET APPAREIL.; AFIN DE RÉDUIRE AU; IMPORTANT SAFETY INSTRUCTIONS; SAVE THESE INSTRUCTIONS; READ ALL INSTRUCTIONS BEFORE USING THIS APPLIANCE.; ELECTRIC SHOCK OR INJURY:; WASH HANDS AFTER HANDLING.
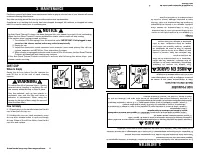
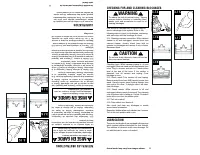
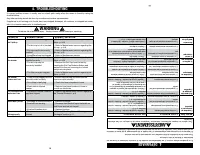
3 CONSIGNES DE SÉCURITÉ IMPORTANTES RANGER ET CONSERVER CES INSTRUCTIONS Durant l’utilisation d’un appareil électrique, toujours respecter les précautions élémentaires, y compris les suivantes : LIRE TOUTES LES INSTRUCTIONS AVANT D’UTILISER CET APPAREIL. AVERTISSEMENT: AFIN DE RÉDUIRE AU MINIMUM LES...
Page 4 - MISE EN GARDE : POUR RÉDUIRE LES; • Do not use sharp objects to clean out hose as they can cause damage.
4 4 • Toujours éteindre cet appareil avant d’installer ou de retirer le tuyau ou le suceur. • Tenir la fiche lors de l’enroulement du cordon afin qu’elle ne cingle pas. • Ne pas utiliser l’aspirateur pour ramasser toute matière qui dégage de la fumée ou qui brûle, comme des cigarettes, des allumette...
Page 5 - CONNECT WAND; ASSEMBLAGE DE L ’ASPIRA; AVERTISSEMENT; CONNECT HOSE; WARNING
5 Actual model may vary from images shown. 5 Le modèle d’aspirateur peut varier de celui illustré. 1.3 Push hand grip (D) firmly into the end of the wand. Twist tool slightly to tighten or loosen connection. Push button on wand (F) to utilize telescopic feature. CONNECT WAND 1.3 1.4 Push the opposit...
Page 6 - CLEANER DESCRIPTION; IMPORTANT; STAIR CLEANING; CAUTION
6 Actual model may vary from images shown. 6 Le modèle d’aspirateur peut varier de celui illustré. 2. UTILISATION DESCRIPTION DE L ’APP AREIL POIGNÉE DE TRANSPORT 2.2 Utiliser la poignée de transport située sur le dessus du couvercle du réservoir pour transp orter l’ aspirateu r d’une pièce à l’autr...
Page 7 - SELECT PROPER TOOL; SUCTION REGULATOR
7 Actual model may vary from images shown. 7 Le modèle d’aspirateur peut varier de celui illustré. 2.6 A C B A. Telescoping Extension Wand: The telescoping extension wand can be lengthened or shortened by pushing the button in and and sliding the wand apart or together as required.B. Dusting Brush: ...
Page 8 - NOTICE; DIRT CUP; MISE EN GARDE
8 Actual model may vary from images shown. 8 Le modèle d’aspirateur peut varier de celui illustré. 3. MAINTENANCE Familiarize yourself with these home maintenance tasks as proper use and care of your cleaner will ensure continued cleaning effectiveness. Any other servicing should be done by an autho...
Page 9 - CYCLONE SEPARATOR; FILTERS; SÉPARA; FIL TRES
9 Actual model may vary from images shown. CYCLONE SEPARATOR How to Clean Remove dirt cup as described in Fig. 3.1.3.3 To remove inner shroud, hold the dirt cup and rotate the shroud clockwise.3.4 Hold the dirt cup and turn the separator counter-clockwise. 3.5 Dirt and debris can be cleaned from the...
Page 11 - CHECKING FOR AND CLEARING BLOCKAGES; RETIRER LES OBSTRUCTIONS; LUBRICATION
CHECKING FOR AND CLEARING BLOCKAGES Low suction or complete lack of suction may be due to a blockage in the system. Refer to the following steps to check for blockages, continuing with each step until the blockage is found:3.14 Checking vacuum connection: While vacuum cleaner is off and unplugged, r...
Page 12 - ANNAGE
12 4. TROUBLESHOOTING If a minor problem occurs, it usually can be solved quite easily when the cause is found by using the checklist below.Any other servicing should be done by an authorized service representative.If appliance is not working as it should, has been dropped, damaged, left outdoors, o...
Page 14 - LIMITED TWO YEAR WARRANTY
the product by the original owner. This warranty does not cover pick up, delivery, transportation or house calls. However, if you mail your product to a Hoover ® Sales and Service Center for warranty service, cost of shipping will be paid one way. This warranty does not apply to products purchased o...
Page 15 - IMPORTANTE: LEA ATENTAMENTE ANTES DE ENSAMBLAR Y USAR.; MANUAL DEL PROPIETARIO; Instrucciones de Funcionamiento y Servicio; ESTA ASPIRADORA PARA PISOS ESTÁ DISEÑADA
© 2014 Techtronic Floor Care Technology Limited. Todos los derechos reservados. Distribudo por Royal Appliance Mfg. Co. Glenwillow, Oh 44139 # 961151923 ID111042-R0 IMPORTANTE: LEA ATENTAMENTE ANTES DE ENSAMBLAR Y USAR. ¿Tiene alguna pregunta o inquietud? Para obtener asistencia, llame al Servicio d...
Page 16 - Gracias por haber elegido un producto HOOVER; ÍNDICE
E2 Gracias por haber elegido un producto HOOVER ® . Anote los números completos de Código de fabricación en los espacios provistos. MODELO CÓDIGO DE FABRICACIÓNConsejo: Adjunte su recibo de compra a este Manual del propietario. Para obtener el servicio de garantía de su producto HOOVER ® puede reque...
Page 17 - SALVAGUARDIAS IMPORTANTES; ¡GUARDE ESTAS INSTRUCCIONES!; incluyendo las siguientes:; LEA TODAS LAS INSTRUCCIONES ANTES DE USAR ESTE APARATO; ADVERTENCIA: PARA REDUCIR EL RIESGO; GARANTÍA LIMITADA DE DOS AÑOS
E3 ¡ SALVAGUARDIAS IMPORTANTES ! ¡GUARDE ESTAS INSTRUCCIONES! Al usar un aparato eléctrico, observe siempre las precauciones básicas, incluyendo las siguientes: LEA TODAS LAS INSTRUCCIONES ANTES DE USAR ESTE APARATO ADVERTENCIA: PARA REDUCIR EL RIESGO DE INCENDIOS, CHOQUES ELÉCTRICOS O LESIONES: • E...
Page 18 - temperaturas por debajo del punto de congelación.
E4 • Siempre apague este aparato antes de conectar o desconectar la manguera o la boquilla. • Sujete el enchufe cuando enrolle el cordón en la bobina. No permita que el enchufe dé latigazos al enrollarlo. • No aspire ningún objeto que se esté quemando o que libere humo, como cigarrillos, fósforos o ...
Page 19 - SOLUCIÓN DE PROBLEMAS; CONECTE LA MANGUERA; ENSAMBLAJE DE LA ASPIRADORA; CONTENIDO DE LA CAJA; ADVERTENCIA
E12 4. SOLUCIÓN DE PROBLEMAS Si ocurre un problema menor, generalmente puede resolverse con bastante facilidad cuando se halla la causa, usando esta lista de verificación.Cualquier otra tarea de mantenimiento debe ser realizada por un representante de mantenimiento autorizado. Si el aparato no está ...
Page 20 - DESCRIPCIÓN DE LA ASPIRADORA; IMPORTANTE; CÓMO LIMPIAR OBSTRUCCIONES; LUBRICACIÓN; PRECAUCIÓN
2.3 A 2.1 3 5 4 6 7 8 8 9 9 10 11 12 2 1 1. Cubierta del filtro enjuagable 2. Línea de llenado máximo 3. Contenedor para polvo 4. Separador de ciclones (ubicado dentro del contenedor para polvo) 5. Entrada de la manguera 6. Contenedor para polvo Asa de transporte 7. Botón de desenganche del contened...
Page 21 - PARA CONECTAR LOS ACCESORIOS; REGULADOR DE SUCCIÓN
2.8 A. El tubo de extensión telescópico se puede alargar o acortar presionando el botón y deslizando el tubo hacia fuera o hacia dentro según se necesite. B. El cepillo para polvo puede usarse para muebles tallados, superficies de las mesas, libros, lámparas, accesorios de iluminación, persianas ven...
Page 22 - DEPÓSITO PARA POLVO; SEPARADOR DE CICLONES
3.1 3.2 E8 El modelo real puede no coincidir con las imágenes que se muestran DEPÓSITO PARA POLVO Para reducir el riesgo de lesiones a perso- nas, desenchufe la aspiradora antes de limpi- arla o de realizar un servicio. No use la aspiradora sin el depósito para polvo ni los filtros colocados en su l...