Page 2 - Instructions générales; CONTENTS; Avvertenze generali
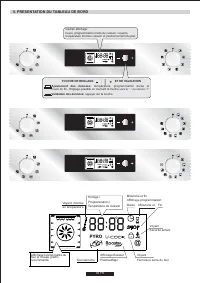
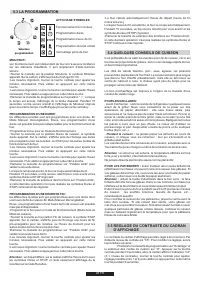
CONTENTS 1. General warnings 1.1 Declaration of compliance1.2 Safety hints1.3 Recommendations1.4 Installation1.5 Electrical connection 2. Pro/Exp’r technology 2.1 Oven equipment2.2 Rotisserie2.3 LED VISION 3. Cleaning the oven4. Service centre5. Description of the display 5.1 Before using the oven f...
Page 3 - cet appareil est équipé d’un cordon d’alimentation
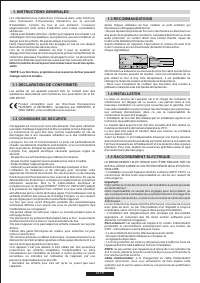
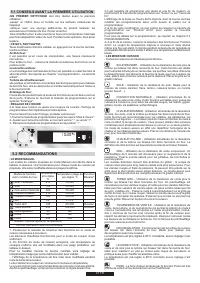
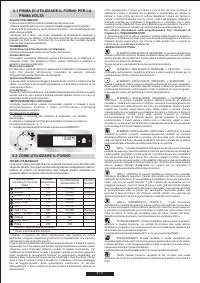
03 FR 1. INSTRUCTIONS GENERALES Lire attentivement les instructions contenues dans cette brochure, elles fournissent d’importantes indications sur la sécurité d’installation, l’emploi du four et son entretien. Conserver soigneusement cette notice d’utilisation pour toutes consultations ultérieures.-...
Page 4 - LED VISION
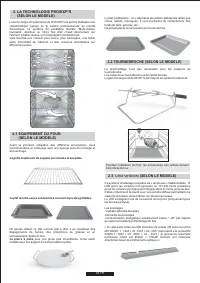
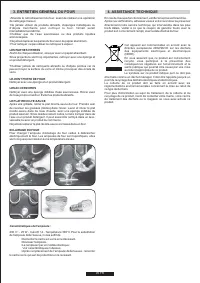
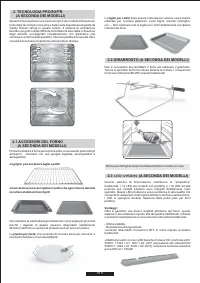
04 FR 2. LA TECHNOLOGIE PRO/EXP’R (SELON LE MODELE) La technologie et l'expérience de HOOVER ont permis d'adapter une caractéristique typique de la cuisine professionnelle au monde domestique. Le système de ventilation latérale “Multi-chaleur tournante” distribue un micro flux d'air chaud directemen...
Page 5 - ENTRETIEN GENERAL DU FOUR; LES PARTIES VITREES; Nettoyer avec une éponge et un produit détergent.; LES ACCESSOIRES; Voir caractéristiques ci-dessus,; ASSISTANCE TECHNIQUE
3. ENTRETIEN GENERAL DU FOUR •Attendre le refroidissement du four, avant de réaliser une opération de nettoyage manuel.•Ne jamais utiliser de produits abrasifs, d’éponges métalliques ou d ’ o b j e t s t r a n c h a n t s p o u r n e t t o y e r l e f o u r, l ’ é m a i l s e r a i t irrémédiablemen...
Page 6 - PRESENTATION DU TABLEAU DE BORD; Ajustement des données:
5. PRESENTATION DU TABLEAU DE BORD Cadran affichage: heure, programmation mode de cuisson, voyants, température fonction cuisson et positionnement du plat. Ajustement des données: température, programmation durée et heure de fin - Réglage possible en tournant la touche vers le “-” ou vers le “+” Val...
Page 7 - CONSEILS AVANT LA PREMIERE UTILISATION; •UN PREMIER NETTOYAGE; La sécurité «enfant»:; • REGLAGE DE L’HEURE
5.1 CONSEILS AVANT LA PREMIERE UTILISATION •UN PREMIER NETTOYAGE doit être réalisé avant la première utilisation :-passer un chiffon doux et humide sur les surfaces extérieures de l'appareil.-nettoyer avec une éponge additionnée de produit lessiviel, les accessoires et l'intérieur du four. Rincer et...
Page 8 - QUELQUES CONSEILS DE CUISSON; Selecteur; STOP
5.3 LA PROGRAMMATION AFFICHAGE SYMBOLES Fonctionnement du minuteur Programmation durée Programmation heure de fin Programmation sécurité enfant Verrouillage porte de four •Le four calcule automatiquement l'heure de départ (heure de fin moins la durée).Lorsque l'heure de fin est atteinte, le four se ...
Page 9 - LA SECURITE ENFANT; MODE PYROLYSE - le four prend en charge le nettoyage du; DEUX CYCLES DE PYROLYSE; - Enlever les débordements importants ou gros déchets; Mise en route du cycle Pyrolyse; Confirmation de votre choix dans 3 secondes.
09 FR 6. PYROLYSE Cette fonction est une sécurité essentielle surtout en présence de jeunes enfants. Elle évite que l'enfant puisse mettre en fonctionnement le four ou modifier les données programmées. Cette sécurité entraîne le verrouillage du tableau de bord à l'arrêt du four comme en cours d'util...
Page 10 - DECLARATION OF COMPLIANCE; Identification plate; ELECTRICAL CONNECTION; Do not forget that the oven may require after-sales service.
1. GENERAL WARNINGS Read the instructions carefully to make the most of your oven. We recommend you keep the instructions for installation and use for later reference, and before installing the oven, note its serial number in case you need to get help from the after-sales service.When you have unpac...
Page 13 - DESCRIPTION OF THE DISPLAY; temperature, programming cooking and end of cooking time -; BUTTON FOR REGULATION AND CONFIRMATION
5. DESCRIPTION OF THE DISPLAY 13 GB Display panel : time, programming of cooking mode,indicator lights, cooking temperature function and shelf positioning Settings: temperature, programming cooking and end of cooking time - Regulated by turning the button towards “ - ” or “ + ” To confirm setting: p...
Page 14 - Confirmation of operation on timer; • CLOCK SETTING; HOW TO USE THE OVEN; •THE MANUAL MODE
5.1 BEFORE USING THE OVEN FOR THE FIRST TIME • PRELIMINARY CLEANING -Clean the oven before using for the first time:-Wipe over external surfaces with a damp soft cloth.-Wash all accessories and wipe inside the oven with a solution of hot water and washing up liquid.-Set the empty oven to the maximum...
Page 15 - THE PROGRAMMATION; DISPLAY SYMBOLS; PROGRAMMING THE COOKING TIME:; Correct preheating is the basis of successful red meat cookery.; GRILLS; • Before loading the grill:; BAKING; ADJUSTING THE DISPLAY CONTRAST
15 GB 5.3 THE PROGRAMMATION DISPLAY SYMBOLS Timer in operation Cooking time programming End of cooking time programming Child safety device operational Locking oven door THE TIMER: The timer works independently of the oven and has no effect on the heating elements. It is simply a reminder.•Turn the ...
Page 16 - PYRO - The oven takes care of the entire inside oven cleaning; TWO PYROLYTIC CYCLE; Remove all accessories from the oven :; At the end of the pyrolytic cycle
7. CHILD SAFETY 16 GB This function is essential, especially when children are around. It prevents children from switching the oven on or altering the preset programmes.This safety system locks the oven control panel while it is operating. There are two levels of safety : LEVEL 1 : Locking selector ...
Page 17 - Targhetta identificativa; COLLEGAMENTI ELETTRICI; COLLEGAMENTO
1. AVVERTENZE GENERALI Per utilizzare in modo ottimale il forno, è consigliabile leggere con attenzione queste istruzioni e conservarle in un luogo sicuro in modo da poterle consultare in caso di bisogno. Prima di installare il forno, prendere nota del numero di serie in modo da poterlo comunicare a...
Page 19 - ASSISTENZA TECNICA; Prima di rivolgersi all'assistenza tecnica:
3. PULIZIA DEL FORNO 4. RISOLUZIONE DEI PROBLEMI •Attendere che il forno si raffreddi prima di effettuare operazioni di pulizia manuali. •Non utilizzare mai detergenti abrasivi, pagliette di ferro o oggetti appuntiti per la pulizia per non danneggiare in modo irreparabile le parti smaltate. •Utilizz...
Page 20 - DESCRIZIONE DEL DISPLAY; temperatura, programmazione del ciclo di cottura e della fine; PULSANTE PER REGOLARE
5. DESCRIZIONE DEL DISPLAY 20 IT Display: orario, programmazione della modalità di cottura, indicatori luminosi, temperatura di cottura e posizionamento delle mensole. Impostazioni: temperatura, programmazione del ciclo di cottura e della fine del ciclo di cottura, regolabile ruotando il selettore v...
Page 21 - COME UTILIZZARE IL FORNO; •MODALITÀ MANUALE
5.1 PRIMA DI UTILIZZARE IL FORNO PER LA PRIMA VOLTA PULIZIA PRELIMINARE -Pulire sempre il forno prima di utilizzarlo per la prima volta: -Pulire le superfici esterne con un panno morbido leggermente inumidito.-Lavare tutti gli accessori e pulire l'interno del forno con del detergente per piatti ed a...
Page 22 - PROGRAMMAZIONE DEL TEMPO DI COTTURA:; Prima di utilizzare il grill; COTTURA DI DOLCI; Evitare di aprire lo sportello durante i primi 20-15 minuti; SUGGERIMENTI PER LA COTTURA
22 IT 5.3 PROGRAMMAZIONE SIMBOLI VISUALIZZATI SUL DISPLAY Timer attivo Programmazione dell'ora di fine cotturaProgrammazione dell'ora di fine cottura Protezione del forno attiva Chiusura dello sportello del forno TIMER: Il funzionamento del timer è indipendente dal forno e non ha alcun effetto sugli...
Page 23 - DISPOSITIVO DI PROTEZIONE; blocco del selettore dei comandi e il pulsante centrale.; Utilizzo del ciclo pirolitico:; Al termine del ciclo pirolitico,
7. DISPOSITIVO DI PROTEZIONE 23 IT Questa funzione deve sempre essere attivata se nell'abitazione ci sono dei bambini, perché impedisce loro di accendere il forno o di modificare i programmi pre-impostati. Questa funzione di sicurezza impedisce l'uso del pannello di controllo mentre il forno è in fu...
Page 24 - Fixing in the location; Use the screws provided to fix the oven.; Fixation dans la niche d'encastrement; Utiliser les vis fournies pour fixer le four.; Oven fitted under worktop; min; FORNO; Forno installato sotto il piano di lavoro; Utilizzare le viti fornite per fissare il forno.; Fissaggio in nicchia; INSTALLAZIONE
1 1.2012 • REV :D • 42806150 INSTALLATION DU FOUR FR INSTALLATION GB FR GB GB Fixing in the location Inside the oven there is a bag with four fixing screws. Fixing: When the oven door is open, holesare accessible, they are located on eachside. Use the screws provided to fix the oven. Le constructeur...