Page 2 - CONTENTS
CONTENTS 1 Important Safety Instructions 1.1 Proper installation 1.2 Basic precautions before use 2 Installation Introduction 3 Features of Your New Dishwasher 3.1 Components 3.2 Filter System 3.3 Smart Wash System 4 Operating Instructions 4.1 Start/Cancel 4.2 Wash Cycle Selections 4.3 Delay 4.4 Dis...
Page 3 - IMPORTANT SAFETY INSTRUCTION; Proper Installation
1 1 IMPORTANT SAFETY INSTRUCTION Please install your dishwasher properly by following the installation guide. • Water supply inlet temperature should be between 120 ° F and 149 ° F. • Dispose of discarded appliances and packing materials properly. • The dishwasher must be properly grounded, or it ca...
Page 4 - SAVE THESE INSTRUCTIONS
2 • Do not let children hit, sit or stand on door or racks of the dishwasher. • Under certain conditions, hydrogen gas may be produced in a hot water system that has not been used for two weeks or more. HYDROGEN GAS IS EXPLOSIVE. If the hot water system has not been used for such a period, before us...
Page 5 - INSTALLATION INTRODUCTION; IMPORTANT
3 2 INSTALLATION INTRODUCTION IMPORTANT Observe all governing codes and ordinances. NOTE TO INSTALLER Be sure to leave these instructions for the consumer’s and local inspector’s use. NOTE TO CONSUMER Keep these instructions with your Owner’s Manual for future reference. SKILL LEVEL Installation of ...
Page 6 - FEATURES OF YOUR NEW DISHWASHER
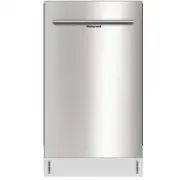
4 3 FEATURES OF YOUR NEW DISHWASHER 3.1 Components Lock Upper Basket Upper Spry Arm Cutlery Basket Lower Basket Heating Element Rinse Aid Dispenser Cup Shelf
Page 7 - water and less energy.; Smart Wash System; clean the dishes and will clean more efficiently every time.; How Your Dishwasher Cleans; spray arms against soiled surfaces.
5 3.2 Filter System Your dishwasher has a multiple Filter System. In the System there are three mesh filters. It can separate soiled water and clean water in different chambers. The multiple filter system helps your dishwasher to get better performance with less water and less energy. 3.3 Smart Wash...
Page 8 - Getting Started; Load the dishwasher. (See Dish Preparation and Loading sections); NOTE; Wash Cycle Selections; handle heavier soil loads.
6 Getting Started 01 Load the dishwasher. (See Dish Preparation and Loading sections) 02 Add detergent. (See Filling the Detergent Dispenser) 03 Add rinse aid. (See Filling the Rinse Aid Dispenser) 04 Select desired CYCLE. (See Cycle Chart) 05 Select desired OPTIONS (See Control Panel). The indicato...
Page 9 - OPERATING INSTRUCTIONS; Control Panel; Touch to select the program, corresponding indicator will be
7 4 OPERATING INSTRUCTIONS Control Panel 4.1 Start/Cancel Open the door to select the desired cycle and options, touch the Start/Cancel button and close the door within 4 seconds to start the cycle or begin the delay countdown. To cancel and reset the program during the cycle, open the door, and tou...
Page 10 - Status Indicators; HEATING DRY
8 4.5 Status Indicators • Rinse Deterfent needs to be refilled. • Program end. • Water failure, faucet is not open. 4.6 Options HEATING DRY When the “Heating Dry” function is selected, the heater will work during the drying processs. The Heating Dry option is not available with “Rinse” cycles. SANIT...
Page 12 - USER MAINTENANCE; Cleaning the Exterior; Cleaning the Interior; the sanitize option. This will keep your dishwasher clean.; Cleaning the Filters; Turn off the dishwasher.
10 5 USER MAINTENANCE Keeping your dishwasher clean improves its performance, reduces unnecessary repairs, and lengthens its life. 5.1 Cleaning the Exterior It’s best to clean spills on the outside of your dishwasher as they occur. Use a soft, damp cloth on the control panel to gently wipe away spil...
Page 13 - insert, and rotate clockwise to the close arrow.
11 02 Rotate the filter insert counterclockwise to unfasten and detach the filter insert. 03 Remove the fine filter. (flat rectangle) 04 Remove any dirt or other remains from the filters, and then rinse them under running water. 05 Reassemble the filters in the reverse order of the dissasembly, repl...
Page 14 - Check whether the nozzle holes are clogged by food particles.
12 Cleaning the Nozzles If your dishwasher does not seem to be cleaning adequately or the nozzles seem clogged, you can clean each of the nozzles. When removing the nozzles, take care as they may break. Lower Nozzle 01 Check whether the nozzle holes are clogged by food particles. 02 If cleaning is n...
Page 15 - TROUBLESHOOTING; Before Calling for Service
13 6 TROUBLESHOOTING Dishwasher won’t start Dishwasher beeps at the end of cycle Rinse Aid light on Dishwasher operates too long Dishes are not clean enough Dishes are not drying enough Possible Cause Problem Solution Before Calling for Service Door may not be closed properlyPower supply or power li...
Page 18 - TECHNICAL INFORMATION
16 Capacity Dimension Power Supply Rated Power Usage Water Feed Pressure 8 place settings 17.6” x 21.7” x 32.4” (W x D x H) 120 volts, 60Hz Wash Motor 100W, Heater 700W 5.8 ~ 145 psi (0.04 ~ 1MPa) 7 TECHNICAL INFORMATION