Page 2 - WELCOME; FOR YOUR SAFETY; Safety Instructions; DANGER
2 WELCOME Congratulations on your selection of a Honda lawn mower! We are certain you will be pleased with your purchase of one of the finest lawn mowers on the market. We want to help you get the best results from your new mower and to operate it safely. This manual contains information on how to d...
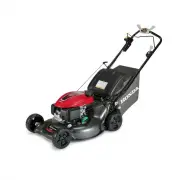
Page 3 - List of Parts
3 PARTS AND CONTROLS INITIAL MOWER SETUP List of Parts With help from an assistant, carefully remove the mower and loose parts from the carton and compare the loose parts against the following list. Contact the authorized Honda dealer from whom you purchased the mower if any of the loose parts shown...
Page 4 - BEFORE EACH OPERATION; WARNING
4 Add Engine Oil The mower is shipped WITHOUT OIL in the engine. Remove the oil filler cap/dipstick and add the entire contents of the included bottle of oil into the oil filler opening. All Honda engines are run at the factory prior to packaging. Most of the oil is removed prior to shipment; howeve...
Page 5 - Clip Director; Mulching; Rear Shield; Inspection; CAUTION
5 Clip Director ® The Clip Director can be adjusted to either the BAG or MULCH position to achieve the desired mowing results. Adjust the Clip Director lever to either the bag (shutter door fully open) or mulch (shutter door fully closed). To adjust the Clip Director, release the lock by pulling it ...
Page 6 - Cutting Height Adjustment; Check the Oil Level; Add Fuel
6 Installation 1. Raise the discharge guard and clean out any grass or debris in the mounting channels with your finger. 2. Hook the grass bag onto the mower deck as shown. 3. Release the discharge guard to secure the grass bag. Removal 1. Raise the discharge guard, grasp the grass bag handle, and r...
Page 7 - OPERATION; Safe Mowing Practices
7 NOTICE If your equipment will be used on an infrequent or intermittent basis, (more than 4 weeks before next use), refer to “AVOIDING FUEL-RELATED PROBLEMS” on page 19 for information regarding fuel deterioration. 1. Turn engine off and let cool before refueling.2. Remove the fuel tank cap.3. Add ...
Page 8 - Avoid Slopes; Avoid Obstacles; Operating the Controls; Throttle Lever; Smart Drive Control; Starting the Engine
8 Avoid Slopes Avoid steep slopes of more than 20 ° . Mow across slopes, not up and down. Be careful when changing direction. Mowing on a slope when the grass is damp or wet could cause you to slip, fall, and lose control of the mower. Never operate the mower in wet grass. NOTICE Mowing on steep slo...
Page 10 - SERVICING YOUR MOWER; Maintenance Safety; Safety Precautions
10 SERVICING YOUR MOWER Proper maintenance is essential for safe, economical, and trouble-free operation. It also helps reduce air pollution. To help you properly care for your mower, the following pages include a maintenance schedule, routine inspection procedures, and simple maintenance procedures...
Page 11 - Maintenance Schedule; O O O O
11 Maintenance Schedule (1) Service more frequently when used in dusty areas.(2) Change engine oil every 25 hours when used under heavy load or in high outside air temperatures.(3) These items should be serviced by an authorized Honda servicing dealer unless you have the proper tools and are mechani...
Page 13 - Oil Change; Engine Oil Recommendations; Air Filter
13 Oil Change Change the oil after the first month or 5 hours of use. Thereafter, change the oil every 6 months or 50 hours of use. Change the oil more frequently when used under heavy load or high outdoor temperatures. See “Engine Oil Recommendations” on this page for recommended oil properties. Dr...
Page 14 - Spark Plug; Smart Drive Cable Adjustment
14 5. Wipe dirt from the inside of the air cleaner housing and cover using a moist rag. Be careful to prevent dirt from entering the air duct that leads to the carburetor. 6. Reinstall the filter and cover. Be sure both tabs are fully locked in place. Spark Plug Replace the spark plug every 2 years ...
Page 15 - Fuel; Oil; Mower Deck; Grass Bag; Storage Location
15 TRANSPORTING If the engine has been running, allow it to cool before loading the mower on the transport vehicle. A hot engine and exhaust system can burn you and can ignite some materials. Turn the fuel valve to the OFF position. This will prevent carburetor flooding and reduce the possibility of...
Page 16 - Removing From Storage; TROUBLESHOOTING; Engine Will Not Start
16 1. Turn the handlebar adjust knobs 90 degrees to release the locating pins . 2. Fold the handlebar forward ; do not pinch or kink the cables. Removing From Storage When unfolding the handlebar, be sure to lock the handlebar adjust knobs to secure the handlebar in the mowing position. Check yo...
Page 17 - TECHNICAL INFORMATION; Serial Number Locations; Emission Control System; Source of Emissions; Problems That May Affect Emissions
17 TECHNICAL INFORMATION Serial Number Locations There are two serial numbers, one for the engine and one for the mower frame. Record the engine and frame serial numbers in the space below. You will need these serial numbers when ordering parts and when making technical or warranty inquiries. Engine...
Page 18 - Air Index; Specifications; Mower Features
18 Air Index An Air Index Information hang tag/label is applied to engines certified to an emission durability time period in accordance with the requirements of the California Air Resources Board.The bar graph is intended to provide you, our customer, the ability to compare the emissions performanc...
Page 19 - AVOIDING FUEL-RELATED PROBLEMS; Follow These Precautions to Prevent Most Fuel-Related Problems
19 AVOIDING FUEL-RELATED PROBLEMS When maintained properly, your Honda lawn mower should provide years of trouble-free operation. This includes the fuel system. However, gasoline can quickly deteriorate, causing starting or running problems and, in some cases, damage to the fuel system. Most fuel-re...
Page 20 - CUSTOMER INFORMATION; Dealer Locator Information
20 CUSTOMER INFORMATION Parts, Accessories, and Service Items Contact an authorized Honda servicing dealer to purchase any of these (or other) Honda Genuine items for your lawn mower. Replacement Parts Accessories Service Items Dealer Locator Information To find an Authorized Honda Servicing Dealer ...
Page 21 - Honda Power Equipment
21 DISTRIBUTOR’S LIMITED WARRANTY Honda Power Equipment This warranty is limited to the following Honda Power Equipment products when distributed by American Honda Motor Co., Inc., Power Equipment Division, 4900 Marconi Drive, Alpharetta, Georgia 30005-8847, purchased at retail or placed in rental s...
Page 23 - PRODUCT REGISTRATION; of these promotions, you must register your mower within 30 days.; M A N A
PRODUCT REGISTRATION Thank you for choosing Honda. To ensure you receive important service information in the event of a product update or recall, please register your lawn mower within 30 days of purchase. From time to time, American Honda conducts sales promotions that require you to register your...
Page 24 - Product Registration; BUSINESS REPLY MAIL
1. Go to PowerEquipment.Honda.com to register your unit. 2. Click on Product Registration. 3. Complete the required information and click Submit. It’s that simple! Power Equipment Division American Honda Motor Co., Inc. 4900 Marconi Dr.Alpharetta, GA 30005-9956 NO POSTAGE NECESSARY IF MAILED IN THE ...