Page 2 - Do not discharge the refrigerant into the atmosphere.; It collects first in low areas but can be circulated by the fans.
2 1. BEFORE YOU BEGIN 1.1 PRODUCT DESCRIPTION Our powerful portable air conditioners are great cooling solutions forsingle rooms, creating a comfortable atmosphere in your space. It alsohas ventilation and dehumidifying function for circulating air and removalof moisture. They're self-contained syst...
Page 3 - Always use a power outlet that is grounded.; WARNING
3 2. FOR YOUR SAFETY Your safety is the most important thing we concerned! 2.1 OPERATIONAL PRECAUTIONS WARNING- to reduce the risk of fire, electric shock or injury topersons or property: If the supply cord is damaged, it must be replaced by themanufacturer, its service agent or similarly qualifie...
Page 6 - for detailed information.
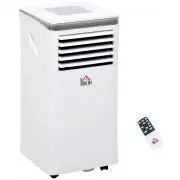
6 3. PRODUCT OVERVIEW 3.1 PRODUCT DIAGRAM 1 Control panel 4 Power cord 6 Air Exhaust 2 Air outlet with adjustable louver 5 Recessed handle 7 Drain opening with sealing plug 3 Air inlet with air filter Note: The appearance is only for reference. Please see the real product for detailed information.
Page 7 - FEATURES
7 3.2 FEATURES High Capacity in a compact size with cooling, heating, dehumidifying and ventilating function. Temperature setting and display LED Digital display Electronic control with built-in timer, sleep mode Self-evaporating system for better efficient Auto shut off when tank full ...
Page 8 - UNPACKING; Unpack the carton and take the appliance and accessories out.
8 4. INSTALLATION 4.1 UNPACKING Unpack the carton and take the appliance and accessories out. Check the device after unpacking for any damage or scratches onit. Accessories: 1. Exhaust hose 2. Hose connector 3. Window kit adapter 4. Remote control 5. Window kit
Page 9 - Choose your location; Never
9 4.2 Choose your location If tipped more than 45°, allow theunit to set upright for at least 24hours before start up. Place the unit on a firm, level surfacein an area with at least 70cm of freespace around it to allow for proper aircirculation. Do not operate in close proximity towalls, curt...
Page 10 - ATTACH THE EXHAUST HOSE; efficiency, even worse shut down the unit due to low backpressure.
10 4.3 ATTACH THE EXHAUST HOSE The air conditioner requires being vented outside so that the exhaust air can escape the room which coming from the appliance contains waste heat and moisture. Do not replace or extend exhaust hose which will result in decreased efficiency, even worse shut down the uni...
Page 11 - Attach the hose connector to the exhaust air outlet of unit.
11 windows kit firmly in place, secure the window kit with duct tape if required. It is recommended that t he gap between the adapter and the sides of the window should be sealed off for maximum efficiency. Step 5: Attach the hose connector to the exhaust air outlet of unit.
Page 13 - OPERATION; CONTROL PANEL AND DISPLAY
Page 14 - REMOTE CONTROL
Page 15 - FUNCTION KEYS AND INDICATORS; Increasing; MINUS; Decreasing; SPEED
15 5.3 FUNCTION KEYS AND INDICATORS 1. POWER Press to switch the machine on or off. 2. ADD Increasing the desired temperature or timer setting. 3. MINUS Decreasing the desired temperature(16 ℃~32 ℃) or timer setting. 4. MODE Mode button Press to switch the operation mode between cool, heat, fan, and...
Page 16 - Operation mode; B. Heating your room(Optional for Heating Function; In ventilation mode the room air is circulated, but not cooled.
16 5.4 SETTINGS 5.4.1. Start-up and Shutdown Press POWER to turn the unit on. The unit runs in in FAN as default. Press MODE button to select the desired operation mode. Press POWER again to turn off the power. 5.4.2. Operation mode The unit has five operation modes: Cool, heat, fan, dry,sleep. A. C...
Page 17 - this function can only be used with a; The sleep mode can be activated when in cool mode and heat mode.; In heat mode; After 1 hour the preset temperature is decreased by 1
17 D. Drying your room Press MODE button on the control panel or remote control, the LED of DRY operation lights up. The fan speed is unable to select. User should connect the hose to the drain outlet at the bottom of the unit. Note: In this mode, the fan speed switches over to low speed and cannot ...
Page 18 - TIMER SETTING; The timer has two ways of operation:; Automatic Defrost; POWER; , the unit restart to cool operating mode.; Overload Protection; Timer
18 5.4.3. TIMER SETTING ( 1hour-24hours ) : The timer has two ways of operation: To turn off (When power on) To turn on (When power off) Cancel timer 5.4.4. Automatic Defrost At low room temperatures, frost may buildup at the evaporator during operation.The unit will automatically start defrosting a...
Page 19 - DRAINAGE; Self- evaporating system; To avoid water spillage:
19 5.5 DRAINAGE Self- evaporating system The self-evaporating system uses the collected water to cool the condenser coils for better efficient performance. It is no need to empty the drainage tank in cooling operation except in heating operation, drying operation and high humidity conditions. The co...
Page 20 - Pic1. Switch off the unit and remove; Do not touch the evaporator surface with bare-hand, or could cause
20 6. CLEANING AND CARE 6.1. CLEANING THE AIR FILTER (every two weeks) Dust collects on the filter and restricts the airflow. The restricted airflow reduces the efficiency of the system and if it becomes blocked it can cause damage to the unit.The air filter requires regular cleaning. The air filter...
Page 23 - Releasing refrigerant into atmosphere is strictly; emove exhaust hose and window kit store with the
23 8. DECOMMISSIONING 8.1. STORAGE Long-Term Storage - If you will not be using the unit for an extended period of time (more than a few weeks) it is best to clean the unit and dry it out completely. Please store the unit per the following steps: 8.2. DISPOSAL WARNING!!! Releasing refrigerant into a...