Page 2 - WHEN USING ELECTRICAL APPLIANCES,; IMPORTANT SAFEGUARDS
2 www.holsteinhousewares.com 1. Read all instructions before using this product. 2. Always unplug the product from the electrical outlet before moving, relocating, servicing, or cleaning it. 3. Always keep hands and utensils out of the product when using. Do not touch hot surfaces. Use an oven mitt,...
Page 3 - FOR HOUSEHOLD USE ONLY
3 www.holsteinhousewares.com 9. Do NOT put any stress on the power cord where it connects to the product, as the power cord could fray and break. 10. Do NOT operate the product if it malfunctions, or if it is dropped or damaged. 11. This product has NO user-serviceable parts. Do NOT attempt to exami...
Page 4 - ADDITIONAL SAFEGUARDS; SAVE THESE INSTRUC TIONS!
4 www.holsteinhousewares.com • EXTENSION CORDS A short power-supply cord is to be provided to reduce the risk resulting from becoming entangled in or tripping over a longer cord. Longer detach-able power-supply cords or extension cords are available and may be used if care is exercised in their use....
Page 5 - HOW TO OPER ATE
5 www.holsteinhousewares.com • POLARIZED PLUGThis product has a polarized plug (one blade is wider than the other). To reduce the risk of electric shock, this plug is intended to fit into a polarized outlet only one way. If plug does not fit fully into the outlet, reverse the plug. If it still does ...
Page 7 - CLEANING
7 www.holsteinhousewares.com an oven mitt to avoid burns from coming in contact with the hot surface. 9. Place dough into the non-stick coated cavities, making sure it does not overflow on to the flat plate surface. 10. Close the lid and let cook for approximately 7-10 minutes or until fully cooked....
Page 8 - STOR AGE
8 www.holsteinhousewares.com Before using the appliance, verify that the domestic supply voltage matches that indicated on the appliance. 120V ~ 60Hz 1200W 1. After following the steps of cleaning and maintenance, collect the power cord and place in the cord storage. 2. Store the appliance in a dry ...
Page 10 - TIPS
10 www.holsteinhousewares.com • Place the arepas on a wire rack to cool down for a few minutes. Do not pile them on top of one another after cooked, otherwise they will soften. • Make sure the arepa dough ball does not overfill the cooking surface because the arepa will not cook all the way through....
Page 11 - Recipe
11 www.holsteinhousewares.com Traditional Arepa Tomato and Cheese Arepa Cream Cheese Arepa Shredded Beef Arepa Arepa with Avocado Salad Recipe
Page 12 - Traditional Arepa
12 www.holsteinhousewares.com Traditional Arepa • Mix your ingredients in a large bowl until dough is smooth. • Form the dough into balls. • Bake for 7-10 minutes or until fully cooked. • Ingredients: • 2 cups white corn flour • 2 cups water • Salt Ingredient s: Steps:
Page 18 - IMPORTANTES INSTRUCCIONES
18 www.holsteinhousewares.com AL USAR ARTEFACTOS ELÉCTRICOS, SIEMPRE DEBEN TOMARSE PRECAUCIONES BÁSICAS DE SEGURIDAD PARA EVITAR EL RIESGO DE INCENDIO, CHOQUE ELÉCTRICO, QUEMADURAS U OTRAS LESIONES O DAÑOS. IMPORTANTES INSTRUCCIONES DE SEGURIDAD 1. Lea todas las instrucciones antes de usar este arte...
Page 20 - NO USE EL ARTEFACTO SI EL CORDÓN ELÉC-
20 www.holsteinhousewares.com PRECAUCIÓN: Durante los primeros minutos de uso inicial, usted puede notar un poco de humo y/o un olor del artefacto. Esto es normal y desapa-recerá. No va a reaparecer después de que el artefacto se haya utilizado un par de veces. • CABLES DE EXTENSIÓNSe provee un cord...
Page 21 - FUNCIONAMIENTO; SÓLO PARA USO DOMÉSTICO
21 www.holsteinhousewares.com FUNCIONAMIENTO SÓLO PARA USO DOMÉSTICO ANTES DEL PRIMER USO: 1. Desempaque cuidadosamente el artefacto y todas las partes. Retire todo los materiales de embalaje, incluyendo las etiquetas. 2. Lea las instrucciones de uso cuidadosamente. 3. Limpie las superficies interio...
Page 23 - LIMPIEZ A Y MANTENIMIENTO
23 www.holsteinhousewares.com 8. Una vez la luz verde se encienda, abra cuidadosamente el artefacto con un guante de cocina para evitar quemaduras al tocar la superficie caliente. 9. Coloque la masa en la horma de la placa inferior de su Arepa Maker. Asegurese de no sobrellenar. 10. Cierre la tapa y...
Page 24 - PRECAUCIÓN: NO SUMERJA EL
24 www.holsteinhousewares.com ALMACENA JE ESPECIFIC ACIONES 120V ~ 60Hz 1200W Antes de utilizar el artefacto, verifique que el voltaje de la red doméstica corresponda con la indicada en el artefacto. 1. Luego de seguir los pasos de limpieza y mantenimiento, Recoja el cordon de alimentacion. 2. Guard...
Page 25 - PARTES
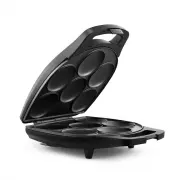
25 www.holsteinhousewares.com PARTES PESTILLO / TAPA PLACA SUPERIOR CON CAPA ANTIADHERENTE PLACA INFERIOR CON CAPA ANTI- ADHERENTE PATAS ANTIRESBALANTES
Page 26 - SÓLO PAR A USO DOMÉSTICO; RECOMENDACIONES
26 www.holsteinhousewares.com SÓLO PAR A USO DOMÉSTICO • Coloque las arepas sobre una rejilla para dejarlas enfriar por unos minu- tos. No apile una encima de la otra ya que se pueden ablandar. • Asegurese de no colocar mas masa de la necesaria, porque no se cocinara completamente. • Si la masa de m...
Page 27 - Recetas
27 www.holsteinhousewares.com Arepa Tradicional Arepa de Tomate y Queso Arepa de Queso Crema Arepa de Carne Mechada Arepa con Ensalada de Aguacate Recetas
Page 28 - Arepa Tradicional
28 www.holsteinhousewares.com Arepa Tradicional • Mezcle los ingredientes en un tazón grande hasta que la masa esté suave. • Forma la masa en pequeñas bolas • Hornear durante 7-10 minutos ó hasta que esté completamente cocido. • Rellena, sirve y disfruta • 2 tazas de harina de maíz • 2 tazas de agua...
Page 40 - WARNING; WARNING
ADVERTENCIA CHOQUE ELÉCTRICO ADVERTENC IA PARA REDUCIR EL RIESGO DE CHOQUE ELÉCTRICO, NUNCA SUMERJA LA BASE, EL CORDÓN ELÉCTRICO O EL ENCHUFE EN AGUA O EN NINGÚN OTRO LÍQUIDO. ESTE ARTEFACTO ESTÁ EQUIPADO CON UN ENCHUFE POLARIZADO (UNA PATA DEL ENCHUFE ES MÁS ANCHA QUE LA OTRA) PARA REDUCIR EL RIESG...