Page 2 - Installation diagram; C o n t e n t s; Indoor unit
Preparation before use 3 Safety Precautions 4 Installation instructions 13 Installation diagram 13 1 Safety instructions C o n t e n t s Remote controller 16 Operation instructions Operation modes 18 Airflow direction control 19 SMART mode 20 SUPER mode 22 ECONOMY mode 23 QUIET mode 22 IFEEL mode 24...
Page 3 - Maintenance; Connecting of the cable; Outdoor unit installation; Wiring diagram
Indoor unit installation 26 Select the installation locations 26 Maintenance 34 35 36 Troubleshooting Protection 29 30 32 Connecting of the cable Outdoor unit installation 33 Air purging Wiring diagram
Page 4 - Safety instructions; use of outdoor unit:
Safety instructions 1. To guarantee the unit work normally, please read the manual carefully beforeinstallation, and try to install strictly according to this manual. 2. Do not let air enter the refrigeration system or discharge refrigerant when moving theair conditioner. 6 . A f t e r i n s t a l l...
Page 5 - 1 . T h e a p p l i a n c e s h a l l n o t b e i n s t a l l e d i n t h e l a u n d r y.
1 8 . I f t h e s u p p l y c o r d i s d a m a g e d , i t m u s t b e r e p l a c e d b y t h e m a n u f a c t u r e r, i t ss e r v i c e a g e n t o r s i m i l a r l y q u a l i f i e d p e r s o n s i n o r d e r t o a v o i d a h a z a r d . 1 7 . I f t h e a p p l i a n c e i s f i x e d w ...
Page 6 - Preparation before use; T h e a i r c o n d i t i o n e r h a s a n A u t o - R e s t a r t f u n c t i o n .; S C R A P P I N G O F A P P L I A N C E; Note
Preparation before use T h e a i r c o n d i t i o n e r h a s a n A u t o - R e s t a r t f u n c t i o n . Each time after the remote control is replaced with new batteries or is energized, auto presetting heat pump.If the air conditioner you purchased is a Cooling Only one, heat pump remote contr...
Page 7 - Safety precautions; Symbols in this Use and Care Manual are interpreted as shown below.; Pay attention to such a situation.
Safety precautions Symbols in this Use and Care Manual are interpreted as shown below. Be sure not to do. Pay attention to such a situation. Grounding is essential. Warning: Incorrect handling could cause a serious hazard, such as death, serious injury, etc. Do not use the power supply circuit break...
Page 8 - The basic installation work procedures; C A U T I O N; C o m p l i a n c e w i t h t h e t r a n s p o r t r e g u l a t i o n s
Safety precautions Precautions for using R32 refrigerant 5 For the multi system, the refrigerant refer to the multi outdoor unit. are the same as the conventional refrigerant (R22 or R410A). However, pay attention to the following points: The basic installation work procedures C A U T I O N 1 . Tr a...
Page 9 - P r e s e n c e o f f i r e e x t i n g u i s h e r
Safety precautions 6 C A U T I O N 6 - 5 P r e s e n c e o f f i r e e x t i n g u i s h e r I f a n y h o t w o r k i s t o b e c o n d u c t e d o n t h e r e f r i g e r a t i o n e q u i p m e n t o r a n ya s s o c i a t e d p a r t s , a p p r o p r i a t e f i r e e x t i n g u i s h i n g e ...
Page 10 - C h e c k s t o e l e c t r i c a l d e v i c e s; I n i t i a l s a f e t y c h e c k s s h a l l i n c l u d e :; R e p a i r s t o s e a l e d c o m p o n e n t s
Safety precautions 7 C A U T I O N w h i c h a r e i n h e r e n t l y r e s i s t a n t t o b e i n g c o r r o d e d o r a r e s u i t a b l y p r o t e c t e d a g a i n s t b e i n g s o c o r r o d e d .6 - 9 C h e c k s t o e l e c t r i c a l d e v i c e s R e p a i r a n d m a i n t e n a n ...
Page 11 - C a b l i n g; f o r t h e r e f r i g e r a n t u s e d .; R e m o v a l a n d e v a c u a t i o n; R e m o v e r e f r i g e r a n t
Safety precautions 8 C A U T I O N l i v e i n t h e p r e s e n c e o f a f l a m m a b l e a t m o s p h e r e . T h e t e s t a p p a r a t u s s h a l l b e a t t h e c o r r e c t r a t i n g . R e p l a c e c o m p o n e n t s o n l y w i t h p a r t s s p e c i f i e d b y t h e m a n u f a c...
Page 12 - C h a r g i n g p r o c e d u r e s
Safety precautions 9 C A U T I O N – E v a c u a t e ; – P u r g e a g a i n w i t h i n e r t g a s ; – O p e n t h e c i r c u i t b y c u t t i n g o r b r a z i n g . T h e r e f r i g e r a n t c h a r g e s h a l l b e r e c o v e r e d i n t o t h e c o r r e c t r e c o v e r y c y l i n d e...
Page 13 - c ) B e f o r e a t t e m p t i n g t h e p r o c e d u r e e n s u r e t h a t :; L a b e l l i n g; o ff v a l v e s i n g o o d w o r k i n g o r d e r.
Safety precautions 10 C A U T I O N c ) B e f o r e a t t e m p t i n g t h e p r o c e d u r e e n s u r e t h a t : – M e c h a n i c a l h a n d l i n g e q u i p m e n t i s a v a i l a b l e , i f r e q u i r e d , f o r h a n d l i n g refrigerant cylinders; – A l l p e r s o n a l p r o t e c...
Page 15 - E x p l a n a t i o n; WA R N I N G
Safety precautions 12 E x p l a n a t i o n o f s y m b o l s d i s p l a y e d o n t h e i n d o o r u n i t o r o u t d o o r u n i t . WA R N I N G T h i s s y m b o l s h o w s t h a t t h i s a p p l i a n c e u s e s a f l a m m a b l e r e f r i g e r a n t .I f t h e r e f r i g e r a n t i ...
Page 16 - Installation instructions
13 Distance from ceiling Distance from wall should be over 50mm Distance from the wall Air intake distance from the wall should be over 250mm Air intake distance from the wall over 250mm air outlet distance from the wall should be over 500mm should be over 200 mm should be over 50mm Distance from fl...
Page 17 - Identification of parts
14 The figures in this manual are based on the external view of a standard model.Consequently, the shape may differ from that of the air conditioner you have selected. Air Intake Air Outlet Air Outlet Louver Vertical Adjustment Louver Horizontal Adjustment Air Filter Remote Controller Connection Cor...
Page 18 - Display introduction; It displays set humidity in humidity mode.; Temperature indicator; It lights up when the AC is running.; Timer indicator; It lights up during set time.; Sleep indicator; It lights up in sleep mode.; D J series; Emergency button; To l e t t h e A C r u n o r s t o p b y p r e s s i n g t h e b u t t o n .
Display introduction 15 Display set temperature.It shows FC after 200 hours of usage as reminder to clean the filter.After filter cleaning press the filter reset button located on the indoor unit behind the frontpanel in order to reset the display. ( optional) It displays set humidity in humidity mo...
Page 19 - POWER; Remote controller; H E AT; Indication symbols on LCD:
Remote controller 1 5 13 13 The remote controller transmits signals to the system. FAN SPEED Used to select fan speed in sequence auto, higher, high, medium, low and lower. SMART (invalid for multi system) Used to enter fuzzy logic operation directly when the unit is on . POWER The appliance will be...
Page 20 - How to Insert the Batteries; C A U T I O N S
Remote controller How to Insert the Batteries How to Use Pry open the battery cover according to the arrow direction. Insert new batteries making sure that the (+) and (-) of battery are matched correctly. Reattach the cover by pressing it back into position. Storage and Tips for Using the Remote Co...
Page 21 - Operation instructions; Selecting mode; Operation modes; Setting temperature; or
Operation instructions The operation modes changed in sequence: The fan speed is changed in sequence: Selecting mode FAN mode Heating mode is NOT available for cooling only air conditioner. At "FAN ONLY" mode, only "Auto" is not available. Some models, such as commercial air conditio...
Page 22 - Turning on; Vertical airflow control (with the remote controller)
Operation instructions Turning on SWING , SMART , SUPER , QUIET, TIMER , ECONOMY , IFEEL , DIMMER , CLOCK , and 8 ℃ HEAT operation modes will be specified in the following pages. SLEEP Changing modes during operation, sometimes the unit does not response at once. Wait 3 minutes. Wait 3 minutes befor...
Page 23 - Heat pump models; H o w t o s e t S M A RT m o d e ?; invalid for multi system
Operation instructions Do not turn the vertical adjustment louvers manually, otherwise malfunction may occur. If that happens, turn off theunit first and cut off the power supply, then restore power supply again. It is better not to let the vertical adjustment louver tilt downward for a long time at...
Page 24 - Your feeling; What you can do in SMART mode?; Button; How to cancel the SMART mode?
Operation instructions SMART button is ineffective in SUPER mode. Your feeling What you can do in SMART mode? Button Adjust Uncomfortable because of unsuitable air flow volume. Uncomfortable because of unsuitable flow direction. Note: Temperature, airflow and direction are controlled automatically i...
Page 25 - SUPER mode; SUPER; How to set SUPER mode?; Cancel; QUIET mode
Operation instructions SUPER mode can be set when the appliance is in operation or energized. Note: The Appliance will continue working in SUPER mode for 15 minutes , if you don't escape from it by pressing any of the buttons mentioned above. SMART button is not available in SUPER mode. SUPER mode S...
Page 26 - Timer mode; ON TIMER; How to cancel ON TIMER ?; ECONOMY mode
Operation instructions Timer mode Note: It is similar to set OFF TIMER , you can make the appliance switch off automatically at your desired time. It is convenient to set the timer on with ON TIMER buttons when you go out in the morning to achieve a comfortable room temperature at the time you get h...
Page 27 - IFEEL mode; DIMMER; CLOCK button
Operation instructions IFEEL mode The temperature sensor built in remote controller is activated.It can sense its surrounding temperature,andtransmit the signal back the unit,the unit can adjust the temperature so as to provide maximum comfort. How to set IFEEL mode ? Note: The default setting is IF...
Page 28 - SLEEP; SLEEP mode
Operation instructions 25 SLEEP mode can be set in COOLING ,HEATING mode. or DRYING This function gives you a more comfortable environment for sleep. The appliance will stop operation automatically after operating for 8 hours. Fan speed is automatically set at low speed. SLEEP mode 8 ℃ H E AT m o d ...
Page 29 - Select the installation locations; Location for Installing Outdoor Unit
Outdoor unit Outdoor unit Indoor unit Indoor unit Pipe length is15 meters Max. Pipe length is15 meters Max. be less than 5m be less than 5m Height should Height should 26 Installation instructions Select the installation locations Location for Installing Outdoor Unit Where it is convenient to instal...
Page 30 - Indoor Unit Pipe Installation; Indoor; Drill a hole on the wall; Indoor unit installation
Pipe direction 1 2 3 4 trough Note: When installing the pipe at the directions 1,2 or 4, saw the corresponding unloading piece off the indoor unit base. Unloadingpiece Saw the unloading piece off along the trough Put the pipes (liquid and gas pipe) and cables through the wall hole from outside or pu...
Page 31 - Pipe Joints Thermal Insulation:; B. Press to hook the pipe fixer onto the base.; Torque Nut width
Installation instructions Pipe Joints Thermal Insulation: Wrap the pipes joints with thermal insulation materials and then wrap with a vinyl tape. Pipes Thermal Insulation: a. Place the drain hose under the pipes.b. Insulation material uses polythene foam over 6mm in thickness. Note: Drain hose is p...
Page 32 - Connecting of the Cable; Cable Specifications; Power connecting cord
29 Connecting of the Cable Outdoor Unit Indoor Unit 1) Remove the access door from the unit by loosening Connect the power cord to the indoor unit by connecting the wires to the terminals on the control board individuallyin accordance with the outdoor unit connection. the screw. Connect the wires to...
Page 33 - Outdoor unit
30 Installation instructions Warning: Before obtaining access to terminals, all supply circuits must be disconnected. Make sure that the color of the wires in the outdoor unit and terminal No. are the same as those of the indoor unit. Wiring diagram Power supply Power connecting cord 1(L) 3(SI) 2(N)...
Page 34 - the chassis of the outdoor unit, then connect a drain hose to the
31 Installation instructions Fix with bolts and nuts tightly on a flat and strong floor.If installed on the wall or roof, make sure to fix the supporter well to prevent itfrom shaking due to serious vibration or strong wind. 3. Outdoor Unit Piping Connection 4. Outdoor Unit Cable Connection (see pre...
Page 35 - How to Purge Air Tubes:; Air purging
(1) Unscrew and remove caps from 2 and 3-way valves. (4) Start vacuum pump for 10-15 minutes until reaching a vacuum of 10 mm Hg absolutes. (6) Open 2-way valve ,1/4 turn, then close it after 10 seconds. Check tightness of all joints using liquid soap or an electronic leak detector. (7) Turn 2 and 3...
Page 36 - Front panel maintenance; Clean and reinstall the air filter.; Reinstall and shut the front panel.; Press the handle of the filter gently; Cut off the power supply
33 Maintenance Maintenance It is necessary to clean the air filterafter using it for about 100 hours. Front panel maintenance Air filter maintenance Never use volatile substance such as gasoline or polishing powder to clean the appliance. Clean and reinstall the air filter. Close the front panel aga...
Page 37 - Protection; Operating condition; The protective device will work at following cases.; Features of HEATING mode; Preheat; HEATING
34 Protection Operating condition Noise pollution Install the air conditioner at a place that can bear its weight in order to operate more quietly. Install the outdoor unit at a place where the air discharged and the operation noise would not annoy your neighbors. Do not place any obstacles in front...
Page 38 - Troubleshooting; Trouble; COOLING
The following cases may not always be a malfunction, please check it before asking for service. 35 Troubleshooting Trouble Analysis Does not run No cooling or heating air Ineffective control Does not operate immediately Peculiar odor A sound of flowing water Cracking sound is heard Spray mist from t...


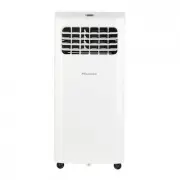 Hisense AP0522CR1W
User Manual
Hisense AP0522CR1W
User Manual
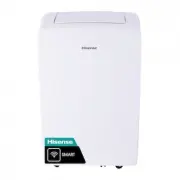 Hisense AP0722CW1W
User Manual
Hisense AP0722CW1W
User Manual
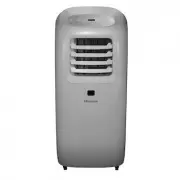
 Hisense AP0822CW1W
User Manual
Hisense AP0822CW1W
User Manual
 Hisense AP1019CR1G
User Manual
Hisense AP1019CR1G
User Manual
 Hisense AP1022CW1G
User Manual
Hisense AP1022CW1G
User Manual
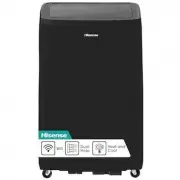 Hisense AP1022HW1GD
User Manual
Hisense AP1022HW1GD
User Manual
 Hisense AP1022TW1GD
User Manual
Hisense AP1022TW1GD
User Manual
 Hisense AP1222CW1W
User Manual
Hisense AP1222CW1W
User Manual
 Hisense HPA27C
User Manual
Hisense HPA27C
User Manual
 Hisense HSA25R
User Manual
Hisense HSA25R
User Manual
 Hisense HSA50R
User Manual
Hisense HSA50R
User Manual
 Hisense HSA71R
User Manual
Hisense HSA71R
User Manual
 Hisense HSA90R
User Manual
Hisense HSA90R
User Manual
 Hisense AS-07UW4RYDDB00
Manual
Hisense AS-07UW4RYDDB00
Manual
 Hisense AS-09UW4RYDDB05
Manual
Hisense AS-09UW4RYDDB05
Manual
 Hisense AS-11UW4RYDDB02
Manual
Hisense AS-11UW4RYDDB02
Manual
 Hisense AS-13UW4RYDDB03
Manual
Hisense AS-13UW4RYDDB03
Manual
 Hisense AS-18UW4RMADB02
Manual
Hisense AS-18UW4RMADB02
Manual
 Hisense AS-24UW4RFBDB00
Manual
Hisense AS-24UW4RFBDB00
Manual