Hampton Bay TX-TF40BR - Manuals
User Manual Hampton Bay TX-TF40BR


Summary
2 Table of Contents Safety Information . . . . . . . . . . . . . . . . . . . . . . . . . . . . . . . . . . 2Warranty . . . . . . . . . . . . . . . . . . . . . . . . . . . . . . . . . . . . . . . . . . 3Pre-Assembly . . . . . . . . . . . . . . . . . . . . . . . . . . . . . . . . . . . . . . 4 Assembl...
3 HAMPTONBAY.COM Please contact 1-855-HD-HAMPTON for further assistance. Safety Information (continued) WARNING: When using an electrical appliance, basic safety precautions should always be followed to reduce the risk of fire, electrical shock, and personal injury. WARNING: To reduce the risk of el...
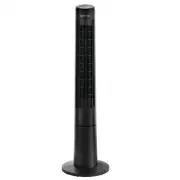
4 Pre-Assembly PACKAGE CONTENTS A G B C D E F Part Description Quantity A Control panel 1 B Fan body 1 C Power cord 1 D Back base 1 E Front base 1 F Lock nut (pre-assembled) 1 G Remote control 1