Page 2 - [ Before You Start; PRODUCT DESCRIPTION; OPERATIONAL PRECAUTIONS
[ Before You Start J �Please read all instructions carefully. 心 Retain instructions for future reference. 心 Separate and count all parts and hardware. 心、 Read through each step carefully and follow the proper order. 心 We recommend that, where possible, all items are assembled near to the area in whi...
Page 3 - PRODUCT DIAGRAM
• Do not operate with wet hands. Prevent water from spilling onto the unit. • Do not immerse or expose the unit to rain, moisture or any other liquid. • Do not leave the unit running unattended. Do not tilt or turn over the unit. • Do not unplug while the unit is operating. • Do not unplug by pullin...
Page 4 - ATTACH THE EXHAUST HOSE; Choose your location
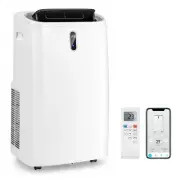
4. INSTALLATION 4.3 ATTACH THE EXHAUST HOSE 4.1 UNPACKING •Unpack the carton and take the appliance and accessories out. •Check the device after unpacking for any damage or scratches on it. •Accessories: 1. Exhaust hose 2. Hose connector 3. Window kit adapter 4. Remote control 。 。 The air conditione...
Page 5 - 三勹巳; 三巨
Step 5: Attach the hose connector to the exhaust air outlet of unit. Step 6: Adjusting the length of the flexible exhaust hose, and avoid bends in the hose. Then place AC near an electrical outlet. Step 7: Adjust the louver at the air outlet, and then switch on the unit. 5.2 FUNCTION KEYS AND INDICA...
Page 8 - CLEANING AND CARE
6. CLEANING AND CARE 6.2. CLEANING UP OF REFRIGERANT 6.1. CLEANING THE AIR FILTER (every two weeks) Dust collects on the filter and restricts the airflow. The restricted airflow reduces the efficiency of the system and if it becomes blocked it can cause damage to the unit. The air filter requires re...
Page 9 - 土STORAGE
7. TROUBLESHOOTING 8. DECOMMISSIONING Symptom Inspection Solution ./ Check the power };;> Insert the power cord connection in securely. securely into the wall outlet. The unit is ./ Check if the water level ;... Empty the drain pan by not indicator lights up? removing the rubber plug. operating. ...