Page 3 - Table of Contents
SECTION 5: ACCESSORIES ......................... 40 SECTION 6: MAINTENANCE ......................... 42 Schedule ...................................................... 42Cleaning & Protecting .................................. 42Lubrication ................................................... 42C...
Page 4 - Contact Info; Manual Accuracy; INTRODUCTION
-2- Model G0592 (Mfd. Since 01/23) We stand behind our machines! If you have ques-tions or need help, contact us with the information below. Before contacting, make sure you get the serial number and manufacture date from the machine ID label. This will help us help you faster. Grizzly Technical Sup...
Page 5 - Identification
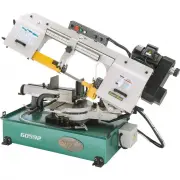
Model G0592 (Mfd. Since 01/23) -3- A. Blade Tension Handle B. Blade Guide Scale C. Control Panel D. Headstock E. Speed Adjustment Knob F. Belt Cover G. Electrical Box H. Vise Lock Handle (1 of 2) I. Spray Gun J. Rotational Degree Scale For Your Own Safety Read Instruction Manual Before Operating Saw...
Page 6 - Components; Headstock
-4- Model G0592 (Mfd. Since 01/23) Controls & Components To reduce your risk of serious injury, read this entire manual BEFORE using machine. A Refer to the following figures and descriptions to become familiar with the basic controls and com-ponents of this machine. Understanding these items an...
Page 7 - Vise Table; Swivel
Model G0592 (Mfd. Since 01/23) -5- Vise Table Figure 5. Vise table components. K. Fixed Vise Jaw: Helps hold workpiece dur- ing cutting operations. L. Work Stop Assembly: Adjusts for repetitive cutting operations. M. Vise Handwheel: Closes and opens vise to clamp workpiece. N. Movable Vise Jaw: Secu...
Page 8 - Control Panel
-6- Model G0592 (Mfd. Since 01/23) P. Coolant Pump Switch: Turns coolant pump ON. Q. Emergency Stop /Off Button: Interrupts power to system and turns motor OFF. Twist button until it pops out to re-energize system. Also works as standard Off button. Note: Bandsaw has automatic shut-off (limit switch...
Page 9 - Machine Data Sheet; MACHINE DATA
Model G0592 (Mfd. Since 01/23) -7- Machine Data Sheet The information contained herein is deemed accurate as of 11/28/2022 and represents our most recent product specifications. Due to our ongoing improvement efforts, this information may not accurately describe items previously purchased. PAGE 1 OF...
Page 11 - NOTICE; Safety Instructions for Machinery
Model G0592 (Mfd. Since 01/23) -9- ELECTRICAL EQUIPMENT INJURY RISKS. You can be shocked, burned, or killed by touching live electrical components or improperly grounded machinery. To reduce this risk, only allow qualified service personnel to do electrical installation or repair work, and always di...
Page 14 - SECTION 2: POWER SUPPLY; Availability
-12- Model G0592 (Mfd. Since 01/23) SECTION 2: POWER SUPPLY Availability Before installing the machine, consider the avail-ability and proximity of the required power supply circuit. If an existing circuit does not meet the requirements for this machine, a new circuit must be installed. To minimize ...
Page 17 - Cleanup
Model G0592 (Mfd. Since 01/23) -15- T23692—Orange Power DegreaserA great product for removing the waxy ship-ping grease from the non-painted parts of the machine during clean up. The unpainted surfaces of your machine are coated with a heavy-duty rust preventative that prevents corrosion during ship...
Page 18 - Site Considerations; Weight Load; Space Allocation
-16- Model G0592 (Mfd. Since 01/23) Site Considerations Figure 11. Minimum working clearances. 72½" 32" Electrical Connection = Weight Load Refer to the Machine Data Sheet for the weight of your machine. Make sure that the surface upon which the machine is placed will bear the weight of the ...
Page 19 - Anchoring to Floor; Anchoring to Concrete Floors
Model G0592 (Mfd. Since 01/23) -17- Lifting & Placing HEAVY LIFT! Straining or crushing injury may occur from improperly lifting machine or some of its parts. To reduce this risk, get help from other people and use a forklift (or other lifting equipment) rated for weight of this machine. Anchori...
Page 20 - Assembly
-18- Model G0592 (Mfd. Since 01/23) Assembly The machine must be fully assembled before it can be operated. Before beginning the assembly process, refer to Needed for Setup and gather all listed items. To ensure the assembly process goes smoothly, first clean any parts that are cov-ered or coated in...
Page 21 - Connecting Plug to Power Cord; Power Connection
Model G0592 (Mfd. Since 01/23) -19- 6. Slide work stop arm onto rod and tighten cap screw shown in Figure 17 to secure. 7. Remove knob from work stop, insert work stop into arm, then secure with knob (see Figure 17). To connect a plug to the power cord, install a 6-20 plug on the end of the power co...
Page 22 - Test Run
-20- Model G0592 (Mfd. Since 01/23) Figure 19. Initial power controls. 6. Twist Emergency Stop/Off button clockwise until it springs out. This resets switch so machine can start. 7. Press Start button to turn machine ON (see Figure 20). Motor should run smoothly and without unusual problems or noise...
Page 24 - SECTION 4: OPERATIONS; Operation Overview
-22- Model G0592 (Mfd. Since 01/23) SECTION 4: OPERATIONS Operation Overview The purpose of this overview is to provide the nov-ice machine operator with a basic understanding of how the machine is used during operation, so the machine controls/components discussed later in this manual are easier to...
Page 25 - Operation Tips; Workpiece
Model G0592 (Mfd. Since 01/23) -23- The following tips will help you safely and effec-tively operate your bandsaw, and help you get the maximum life out of your saw blades. Tips for cutting: • Use work stop to quickly and accurately cut multiple pieces of stock to the same length. • Clamp workpiece ...
Page 26 - Using Vise; Changing Vise Position
-24- Model G0592 (Mfd. Since 01/23) Using Vise The vise on the Model G0592 can be positioned for cutting on either side of the vise base, and consists of a movable vise jaw that can be adjust- ed to match the angle of the workpiece. It also has a ratcheting-type leadscrew that allows for fast movabl...
Page 27 - Selecting Blades; Blade Terminology
Model G0592 (Mfd. Since 01/23) -25- 6. If loosened in Step 5, tighten angle cap screw. Figure 26. Location of angle cap screw and quick-adjustment latch. Selecting the right blade for the cut requires a knowledge of various blade characteristics. A. Kerf: Amount of material removed by blade during c...
Page 29 - Changing Blade
Model G0592 (Mfd. Since 01/23) -27- Changing Blade All saw blades are danger- ous and may cause per- sonal injury. To reduce the risk of being injured, wear leather gloves when handling and uncoiling saw blades. Item (s) Needed Qty Metal Brush or Shop Vacuum ........................... 1Assistant .....
Page 31 - Tensioning Blade
Model G0592 (Mfd. Since 01/23) -29- 12. Apply a light amount of tension to hold blade in place. Work your way around blade to adjust position so back of blade is against shoulder of wheels, as shown in Figure 37. 13. Perform Tensioning Blade procedure that follows this section. 14. Install blade bru...
Page 32 - Blade Breakage
-30- Model G0592 (Mfd. Since 01/23) 3. Using tension indicator and graduated scale as a guide, turn blade tension handle clock-wise to tension blade or counterclockwise to loosen blade (see Figure 39). — For carbon blades, blade tension should be 20,000 PSI. — For bi-metal blades, like the one suppl...
Page 33 - Blade Care
Model G0592 (Mfd. Since 01/23) -31- Changing Blade Speed Model G0592 blade speeds: 98–394 FPM. NOTICE Only change speeds while motor is running. Changing speeds when machine is OFF may result in damage to machine. Always make sure belt guard is in use. To change blade speeds: 1. Turn bandsaw ON and ...
Page 34 - Blade Speed Chart
-32- Model G0592 (Mfd. Since 01/23) The chart in Figure 41 offers blade speed guidelines for various metals, given in feet per minute (FPM) and meters per minute (M/Min). Choose the closest available speed on the machine, then adjust the feed rate as necessary, using the appearance of the chips prod...
Page 35 - Chip Inspection Chart
Model G0592 (Mfd. Since 01/23) -33- Chip Inspection Chart Chip Appearance Chip Description Chip Color Blade Speed Feed Rate / Pressure Other Actions Thin & Curled Silver Good Good Hard, Thick & Short Brown or Blue Increase Decrease Hard, Strong & Thick Brown or Blue Increase Decrease Har...
Page 36 - Adjusting to Angle Other than 0°; Setting Blade Feed
-34- Model G0592 (Mfd. Since 01/23) Adjusting Cutting Angle The headstock can be swiveled to cut angles from 60 ° left to 45 ° right. Adjusting to Angle Other than 0° 1. DISCONNECT MACHINE FROM POWER! 2. Raise headstock all the way, then use feed control dial to keep it from lowering. 3. Flip swivel...
Page 37 - Adjusting Angle To 0°
Model G0592 (Mfd. Since 01/23) -35- 5. Using scale and indicator shown in Figure 46, use headstock handle to swivel headstock as desired, then tighten swivel lock lever to secure. Indicator Headstock Angle Scale Figure 46. Location of headstock angle scale and indicator. Adjusting Angle To 0° 1. DIS...
Page 38 - Adjusting Work Stop
-36- Model G0592 (Mfd. Since 01/23) Adjusting Work Stop The Model G0592 is equipped with a work stop for repetitive cutting operations. The work stop can be installed on either side of the vise and will need to be adjusted any time it is removed or repositioned. To adjust work stop: 1. DISCONNECT MA...
Page 40 - Using Coolant System
-38- Model G0592 (Mfd. Since 01/23) FIRE HAZARD! DO NOT cut magnesium when using oil-water solutions as coolant! Always use coolant intended for magnesium. Water in the solution could cause magnesium-chip fire. This bandsaw has a built-in coolant system that can extend the life of your bandsaw blade...
Page 41 - Using Spray Gun
Model G0592 (Mfd. Since 01/23) -39- IMPORTANT: Monitor the coolant level frequently to keep the system working properly. DO NOT let the coolant level fall out of view of the sight glass shown in Figure 59. The chip screen shown in Figure 60 must also be kept clear so coolant can recycle to the coola...
Page 42 - SECTION 5: ACCESSORIES; order online at
-40- Model G0592 (Mfd. Since 01/23) SECTION 5: ACCESSORIES ACCESSORIES Installing unapproved accessories may cause machine to malfunction, resulting in serious personal injury or machine damage. To reduce this risk, only install accessories recommended for this machine by Grizzly. NOTICE Refer to ou...
Page 43 - Basic Eye Protection
Model G0592 (Mfd. Since 01/23) -41- SB1365—South Bend Way Oil-ISO 68Engineered for the high pressure exerted on horizontal or vertical ways and slides. Protects against rust and corrosion. Ensures stick-free, smooth motion which maximizes finishes and extends the life of your machine. Won’t gum up! ...
Page 44 - Schedule; Protecting; SECTION 6: MAINTENANCE
-42- Model G0592 (Mfd. Since 01/23) To reduce risk of shock or accidental startup, always disconnect machine from power before adjustments, maintenance, or service. For optimum performance from this machine, this maintenance schedule must be strictly followed. OngoingTo minimize your risk of injury ...
Page 45 - Idler Wheel Grease Fitting; Vise Leadscrew
Model G0592 (Mfd. Since 01/23) -43- Blade & Blade Guides Lube Type ............. SB1365 or ISO 68 EquivalentOil Amount ...........................................1–2 DropsLubrication Frequency ................................. Daily Place one or two drops of light machine oil on blade and blade ...
Page 47 - Coolant System; Hazards
Model G0592 (Mfd. Since 01/23) -45- 4. Remove fill cap (see Figure 76). Figure 76. Location of gearbox sight glass and fill cap. Fill Cap Sight Glass 5. With drain pan positioned to catch oil, remove drain plug (see Figure 77). Drain Plug Figure 77. Location of drain plug. 6. When oil is drained, cl...
Page 49 - Storing Machine; Preparing Machine for Storage
Model G0592 (Mfd. Since 01/23) -47- Figure 82. Location of reservoir. 4. Remove reservoir (see Figure 82) from base and empty it. Dispose of coolant per federal, state, and manufacturer requirements. 5. Thoroughly clean reservoir and submerge- portion of pump with hot, soapy water, then rinse with c...
Page 50 - Bringing Machine Out of Storage
-48- Model G0592 (Mfd. Since 01/23) — If machine will be out of service for a long period of time, drain, then completely fill gearbox with recommended gear oil so components above normal oil level do not develop rust. (Make sure to put a tag on controls as reminder to adjust gear oil level before s...
Page 51 - Troubleshooting
Model G0592 (Mfd. Since 01/23) -49- Review the troubleshooting procedures in this section if a problem develops with your machine. If you need replacement parts or additional help with a procedure, call our Technical Support. Note: Please gather the serial number and manufacture date of your machine...
Page 52 - Operation
-50- Model G0592 (Mfd. Since 01/23) Motor & Electrical (Cont.) Symptom Possible Cause Possible Solution Machine stalls or is underpowered. 13. Extension cord too long. 14. Contactor not energized/at fault.15. Centrifugal switch/contact points at fault. 16. Motor or motor bearings at fault. 13. M...
Page 54 - Adjusting Support Bearings
-52- Model G0592 (Mfd. Since 01/23) Adjusting Blade Guide Bearings The support bearings and blade guide bearings come adjusted from the factory, but due to ship-ping and storage, they may need adjustment. Uneven blade wear and crooked cuts may be the result of improper adjustment. Tools Needed Qty H...
Page 55 - Adjusting Blade Guide Bearings
Model G0592 (Mfd. Since 01/23) -53- Figure 85. Location of rear blade guards and fasteners. x 2 x 2 8. Repeat Step 5 on lower blade guide. 9. Adjust blade guide bearings (refer to next sub-section). Lower Rear Blade Guard Upper Rear Blade Guard Adjusting Blade Guide Bearings 1. On upper blade guide,...
Page 59 - Setting Swivel Stop
Model G0592 (Mfd. Since 01/23) -57- Adjusting Angle Stops Figure 95. Location of downfeed stop bolt and jam nut. 3. Loosen jam nut shown in Figure 95, then tighten downfeed stop bolt until blade is just below table surface. 4. Loosen downfeed stop bolt (see Figure 95) until it contacts headstock. 5....
Page 60 - Setting 60° Stops
-58- Model G0592 (Mfd. Since 01/23) — If square does not fit snugly against fixed jaw and blade, disengage swivel stop, then loosen jam nut shown in Figure 98. Thread stop bolt in or out as necessary, then engage swivel stop. Figure 98. Example of swivel stop bolt and jam nut. Stop Bolt Jam Nut Sett...
Page 62 - Wiring Safety Instructions
-60- Model G0592 (Mfd. Since 01/23) SHOCK HAZARD. Working on wiring that is con-nected to a power source is extremely dangerous. Touching electrified parts will result in personal injury including but not limited to severe burns, electrocution, or death. Disconnect the power from the machine before ...
Page 63 - Wiring Diagram
Model G0592 (Mfd. Since 01/23) -61- READ ELECTRICAL SAFETY ON PAGE 60! Wiring Diagram ELECTRICAL BOX MAIN MOTOR 220V CONTROL PANEL Hot Hot 6-20 Plug (as recommended) 220 VAC G COOLANT PUMP MOTOR 220V LIMIT SWITCH CANLIE AZD-1112 X1 X2 POWER LIGHT KEYON KE-22DS 3 4 NHD NPB22-F ON BUTTON 2 1 KEDU HY57...
Page 64 - Electrical Component Photos
-62- Model G0592 (Mfd. Since 01/23) READ ELECTRICAL SAFETY ON PAGE 60! Electrical Component Photos Figure 105. Control panel wiring. Figure 108. Limit switch wiring. Figure 107. Motor junction box wiring. Figure 109. Pump motor wiring. Figure 106. Start capacitor wiring.
Page 66 - Base
-64- Model G0592 (Mfd. Since 01/23) BUY PARTS ONLINE AT GRIZZLY.COM ! Scan QR code to visit our Parts Store. 1-5 3-1 4 3 1-3 8 7 1-4 1-2 10 9 2 12 11 15 14 20 21 1 22 24 23 18 19 1716 29-6 29 29-5 29-8 29-7 1-7 31 28 1-6 27 29-4 29-3 29-2 29-1 1-8 14-1 Base SECTION 9: PARTS We do our best to stock r...
Page 67 - Base Parts List
Model G0592 (Mfd. Since 01/23) -65- BUY PARTS ONLINE AT GRIZZLY.COM ! Scan QR code to visit our Parts Store. REF PART # DESCRIPTION REF PART # DESCRIPTION 1 P0592001 STAND 16 P0592016 LOCK WASHER 6MM 1-2 P0592001-2 STAND COVER 17 P0592017 HEX BOLT M6-1 X 15 1-3 P0592001-3 FLAT WASHER 6MM 18 P0592018...
Page 68 - Swivel Base
-66- Model G0592 (Mfd. Since 01/23) BUY PARTS ONLINE AT GRIZZLY.COM ! Scan QR code to visit our Parts Store. 101 100 104 105 110 108 109 106 107 148 140 136 150 162 157 146 125 115 123 124 103 102 121 120 122 113 112 111 116 114 158 159 117 119 118 126 139 137 129 133 134 154 156 160 155 161 130 131...
Page 69 - Swivel Base Parts List
Model G0592 (Mfd. Since 01/23) -67- BUY PARTS ONLINE AT GRIZZLY.COM ! Scan QR code to visit our Parts Store. REF PART # DESCRIPTION REF PART # DESCRIPTION 100 P0592100 CYLINDER LOWER SUPPORT 133 P0592133 SPANNER NUT 101 P0592101 PIVOT PIN 134 P0592134 EXT TOOTH WASHER 102 P0592102 LOCK WASHER 8MM 13...
Page 70 - Vise
-68- Model G0592 (Mfd. Since 01/23) BUY PARTS ONLINE AT GRIZZLY.COM ! Scan QR code to visit our Parts Store. 207 203 201 200 202 212 213 214 211 208 204 205 206 239 209 240 241 217 215-1 216 221 219 218 220 224 222 223 225 228 226 227 229 250 233 230 232231 235234 236 247 246 242 244 245 243 237 238...
Page 71 - Vise Parts List
Model G0592 (Mfd. Since 01/23) -69- BUY PARTS ONLINE AT GRIZZLY.COM ! Scan QR code to visit our Parts Store. REF PART # DESCRIPTION REF PART # DESCRIPTION 200 P0592200 FIXED SHAFT 225 P0592225 NAME PLATE 201 P0592201 LOCK WASHER 10MM 226 P0592226 RACK HOOK 202 P0592202 CAP SCREW M10-1.5 X 35 227 P05...
Page 73 - Blade Tension & Motor
Model G0592 (Mfd. Since 01/23) -71- BUY PARTS ONLINE AT GRIZZLY.COM ! Scan QR code to visit our Parts Store. 476 475 477 478 481 480 482 479 482-1 474 464 463 467 466 465 454 453 451 452 456 450 459 458 461 457 472 470 471 461-1 462 461-2 460 473 F J 478-2 478-1 478-3 478-4 478-5 478-7 516 499 483 5...
Page 74 - Blade Tension & Motor Parts List
-72- Model G0592 (Mfd. Since 01/23) BUY PARTS ONLINE AT GRIZZLY.COM ! Scan QR code to visit our Parts Store. REF PART # DESCRIPTION REF PART # DESCRIPTION 450 P0592450 COLUMN 482 P0592482 SHAFT 451 P0592451 CAP SCREW M12-1.75 X 20 482-1 P0592482-1 HEX NUT M10-1.5 452 P0592452 SCALE 483 P0592483 BUSH...
Page 75 - Blade Guides
Model G0592 (Mfd. Since 01/23) -73- BUY PARTS ONLINE AT GRIZZLY.COM ! Scan QR code to visit our Parts Store. 583 557 558 553 550-3 550-1 550-2 551-1 556 550 551 552 551-3 551-2 564 556-1 556-2 556-3 556-4 554 555 574 582 565 572 570 571 573 569 568 581 577 576575 578 580 579V2 556-5 560 561 589-1 58...
Page 76 - Blade Guides Parts List
-74- Model G0592 (Mfd. Since 01/23) BUY PARTS ONLINE AT GRIZZLY.COM ! Scan QR code to visit our Parts Store. REF PART # DESCRIPTION REF PART # DESCRIPTION 550 P0592550 BEARING SHAFT ASSY 569 P0592569 KNOB M6-1 X 10 550-1 P0592550-1 EXT RETAINING RING 25MM 570 P0592570 SET SCREW M6-1 X 10 550-2 P0592...
Page 77 - Electrical
Model G0592 (Mfd. Since 01/23) -75- BUY PARTS ONLINE AT GRIZZLY.COM ! Scan QR code to visit our Parts Store. 713-23 713-24 713-22 713-14 713-5 711 713 713-4 713-3 713-16 713-6 713-11 713-28 713-17 713-1 713-10 713-12 713-7 713-18 713-20 713-19 713-21 713-8 713-14 713-2V2 713-9 713-15V2 710 712 713-3...