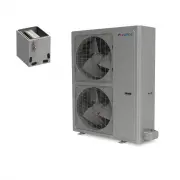
Page 2 - CONTENTS; Safety precautions
CONTENTS Safety precautions ...................................................................................... . 1 -4 .................................................................................................. .... 5 ...........................................................................
Page 3 - Explanation of Symbols; NOTICE; recommendations; Exception Clauses; is
Explanation of Symbols WARNINGCAUTION NOTICE 1. Damage the product due to improper use or misuse of the product; 2. Alter ing , chang ing , maintain ing or us ing the product with other equipment without following the recommendations in manufacturer's instruction manual; 3. After verification, the p...
Page 4 - Installation; equipment
Safety precautions Installation 1 WARNING Installation or maintenance must be performed by qua- lified professionals. The equipment shall be installed in accordance with local and national wiring codes. All wiring, circuit breakers and disconnects must be to code. All wir ing of indoor and outdoor u...
Page 5 - install
Safety precautions Installation 2 CAUTION Instructions for installation and use of this product are provided by the manufac- turer. Select a location which is out of reach for children and far away from animals or plants. If unavoidable, please install a fence for safety. The indoor unit should be i...
Page 6 - Operation
Safety precautions Operation and Maintenance 3 WARNING This equipment can be used by children aged from 8 years and above and persons with reduce d physical, sensory, or mental capabilities or lack of experience and knowledge if they have been given supervision or instruction concerning use of the e...
Page 7 - If
Safety precautions Operation and Maintenance 4 CAUTION To avoid damaging the remote controller, d o not spill water on it. To avoid damage when drying the air filter, do not use a flame or hair dryer. Do not block air outlet or air inlet. It may cause the unit to malfunction. Do not step on or put h...
Page 8 - Parts name; Outdoor Unit; NOTE
5 Parts name Outdoor Unit ● Actual product may be different from above graphics, please refer to actual product. air inlet air outlet NOTE
Page 9 - Installation notice; To ensure safety, please be mindful of the; WARNING; Tools for installation; Leak; When installing or moving this unit, do; an; Safety precautions for installing and
Installation notice Drainage pipe Space to the obstruction At least 20 in Space to the obstruction At least 12 in Space to the obstruction At least 20 in Space to the obstruction At least 78 in Space to the wall At least 12 in 6 ■ ■ ■ ■ ■ 7 ■ To ensure safety, please be mindful of the following prec...
Page 10 - Basic requirement; It’s not allowed to be installed on; Outdoor unit
8. 2. Selection of installation location Requirements for electric connection Basic requirement Installing the unit in the following places may cau- se malfunction. If it is unavoidable, please consu- lt the local dealer: 3. 4. 5. 6. 7. It’s not allowed to be installed on the unstable or motive base...
Page 11 - Installation of outdoor unit; Fix the support of outdoor unit; Connect indoor and outdoor pipes; Install drain joint; OTICE; Fix outdoor unit
Installation of outdoor unit drain vent Drain hose Place the outdoor unit on the support. 2. Fix the foot holes of outdoor unit with bolts. foot holes foot holes at least 3cm above the floor 1. Remove the screw on the right handle of out- handle Remove the screw cap of valve and aim the pipe joint a...
Page 12 - Connect outdoor electric wire; wall; Pipe Neatly; Indoor unit connection; POWER
4. 2. 1. The water outlet can't be placed in water in order to drain smoothly. The drain hose can't be fluctuant 2. Step 5: Connect outdoor electric wire wall U-shaped curve drain hose the drain hose can't raise upwards. The water outlet can't be placed in water The wiring board is for reference onl...
Page 13 - Test and operation; gauge; Check after installation; Preparation of test operation; Items to be checked; Method of test operation
Test and operation 6. Tighten the screw caps of valves and refriger- ant charging vent. Leak detection Use vacuum pump Remove the valve caps on the liquid valve and 1. 1. 2. Reinstall the handle. 7. of liquid valve and gas valve completely with inner hexagon spanner. gauges valve cap Lo Hi liquid va...
Page 14 - ft; Max. length of connection pipe; Pipe expanding method; Configuration of connection pipe; Outdoor unit throttle; Liquid pipe Gas pipe; lg; Additional refrigerant charging amount for
1. 50 Max. length of connection pipe( ft ) 66 82 82 9000Btu/h (2637W) 12000Btu/h (3516W) 18000Btu/h (5274W) 24000Btu/h (7032W) Cooling capacity Max. length of connection pipe Pipe expanding method pipe cutter pipe Configuration of connection pipe A: Cut the pipe 2. 3. leaning uneven burr Standard le...
Page 15 - C: Put on suitable insulating pipe; Max; Working temperature range; Outer diameter; D: Put on the union nut
smooth surface improper expanding shaper downwards the length is equal leaning damaged crack surface C: Put on suitable insulating pipe union pipe pipe expander pipe 26.7/-(80/-) A(mm) Max Min 1.3 0.7 1.6 1.0 ● The operating temperature range (outdoor temper- "A" is different according to th...
Page 16 - HEATING SYSTEM; LIMITED WARRANTY STATEMENT; FOR WARRANTY SERVICE OR REPAIR:; LIMITATIONS OF WARRANTIES:; PRODUCT REGISTRATION; Date of Installation
LIVV12HP230V1ALIVV24HP230V1ALIVV36HP230V1A HEATING SYSTEM L 66129937224 LIMITED WARRANTY STATEMENT FOR WARRANTY SERVICE OR REPAIR: Contact your installing contractor. You may find the installer’s name on the equipment or in your Owner’s packet. Complete product registration below and keep on file fo...
Page 17 - G R E E C O M F O R T . C O M
C AT N O : G R E E _ V I R E O G E N 3 _ I N S T A L L _ 0 9 0 9 2 1 U.S. CONTACT INFORMATION TRADEWINDS, LLC E-mail: [email protected] Contractor Support: 888-850-7928 | Mon-Fri 8 AM - 5 PM EDT G R E E C O M F O R T . C O M