Page 2 - General Care and Safety Guide
Thank you for choosing a Goldair Outdoor Heater. This Goldair appliance has been designedand manufactured to high standards of engineering and with proper use and care, asdescribed in this booklet, will give you years of useful service. Please read these instructionscarefully and keep for future ref...
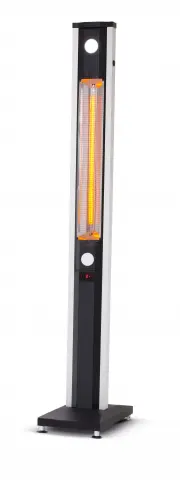
Page 3 - Components; Part name; Base
Components Always choose a safe location for the appliance, keeping in mind the safetyprecautions outlined. Ensure all packaging has been removed from the unit beforeuse. Part name Qty Heater Body 1Cover Panels 2Support Legs 2Base cover 1 Base 1 Part No. 1.2.3.4.5. 1 3 2 5 3 2 4
Page 4 - Components - Continued
Components - Continued Always choose a safe location for the appliance, keeping in mind the safetyprecautions outlined. Ensure all packaging has been removed from the unit beforeuse. Part name Qty M4 X 10 screws 6 Washer 2 ST3.5 x 12 screw 2 M6 x 50 Hexagon head bolts 4 Remote control unit 1 Castor ...
Page 5 - Assembling your heater; ) Attach castors to the base using M4 screws
Assembling your heater 1) Attach castors to the base using M4 screws 2) Attach base foot and foot sheath to the underside of the base by turning the threaded base foot in a clockwise direction into the threaded hole in the base 3) Secure support legs to the top side of base by screwing in M6x50 Bolt...
Page 6 - ) Slide base cover over support legs
Assembling your heater 4) Slide base cover over support legs 5) Slide heater body into the channels of the support legs 6) Secure the heater body to the support legs with the 2x screws as shown in the exploded diagram
Page 7 - through the central hole in the base; Cover panel orientation; Top
Assembling your heater 7) Ensure the power cable is not tangled and is run between the support legs and through the central hole in the base 8) Slide the plastic base cover upwards to the height of the control panel so that it does not interfere or touch the cover panels for the next step. 9) Attach...
Page 9 - Operating your Appliance
Operating your Appliance SAFETY DEVICESThis appliance has two protection devices: 1. Tilt switch - this will automatically turn theappliance off if the appliance is not in theappropriate operating position. 2. Thermal fuse - this disconnects the appliancepermanently in case of overheating. (It is no...
Page 10 - TURN IT OFF AND UNPLUG FIRST; be cool or room temperature before cleaning.
Operating your Appliance Always choose a safe location for the heater, keeping in mind the safety precautionsoutlined. Ensure all packaging has been removed from the unit before use. Thisappliance requires no installation, it should be used solely as a portable appliance. Warning: Always unplug the ...
Page 11 - Control panel; and the LED light are preset to power level 3.
Operating your Appliance Control panel Operation: 1) Plug in the power cable, a “Beep” sound is heard. The heater is now in “Stand By” mode, the ON/OFF indicator light will be green. 2) Press the ON/OFF button, the LED light and heater will turn on. The heating tube and the LED light are preset to p...
Page 12 - Vertical; Only the top LED light will operate.; This is normal; Both LED lights will function
Operating your Appliance This heater can be operated in three different positions.1. Vertical 2. Horizontal 3. Angled In position 1 (vertical) • Only the top LED light will operate. This is normal • The control panel facing in the same direction as the heater element willbe active. In positions 2 an...
Page 13 - Swing metal locking arm into position as shown in diagram
Operating your Appliance • Swing metal locking arm into position as shown in diagram CAUTION: The appliance generates heat during use. Proper precautions must be taken toprevent the risk of burns, scalds, fires or other damage to persons. • GHOR900 Heating arm can work in vertical or horizontal posi...
Page 14 - TECHNICAL SPECIFICATION
Operating your Appliance • Swing metal locking arm into position as shown in diagram SUPPORT AND TECHNICAL ADVICE Goldair – New Zealand Monday – Friday 8am-5pm Phone +64 (0)9 917 4000Phone 0800 232 633[email protected] Goldair – Australia Monday – Friday 8am-5pm Phone +61 (0)3 9365 5100 Phone 1300 4...
Page 15 - Three Year Warranty
Thank you for purchasing this Goldair Platinum product. Your product is warranted against faults and manufacture when used innormal domestic use for a period of three years. In non-domestic use Goldair limits the voluntary warranty to three months. Goldair undertake to repair or replace this product...