Glem Gas GB965GE - Manuals
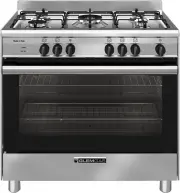
User Manual Glem Gas GB965GE


Summary
INSTALLING THE ADJUSTABLE LEGS The cookers are delivered with adjustable height legs that need to be fitted prior to the cooker installation. On some models the legs easily screw into the underside of the cooker. On other models the legs have a new keying system where the screw on the top of the leg ...
INSTALLING THE ANTI TILT BRACKETS Install the legs to the cooker and adjust the height to the desired level. Make sure that this height is absolutely correct to what you require. 1. On the rear of the cooker there is a covering panel. Accurately measure the distance from the top of this panel to the...
IMPORTANT INFORMATION AND WARNINGS BEFORE USING THE COOKER After the cooker is unpacked make sure that it is not damaged. If unsure please contact Glem Gas Australasia on 1300 307 917. All packaging materials should be disposed of appropriately. Cookers are hot. This cooker meets Australia Standards...
Glem Gas Ovens Manuals
-
 Glem Gas GB534GE
User Manual
Glem Gas GB534GE
User Manual
-
 Glem Gas GB534GG
User Manual
Glem Gas GB534GG
User Manual
-
 Glem Gas GB664GE
User Manual
Glem Gas GB664GE
User Manual
-
 Glem Gas GB664GG
User Manual
Glem Gas GB664GG
User Manual
-
 Glem Gas GB765DOP
User Manual
Glem Gas GB765DOP
User Manual
-
 Glem Gas GB865GE
User Manual
Glem Gas GB865GE
User Manual
-
 Glem Gas GB965GG
User Manual
Glem Gas GB965GG
User Manual
-
 Glem Gas GF64EEI
User Manual
Glem Gas GF64EEI
User Manual
-
 Glem Gas GF64GEI
User Manual
Glem Gas GF64GEI
User Manual
-
 Glem Gas GF64MEI
User Manual
Glem Gas GF64MEI
User Manual
-
 Glem Gas GF65MEI
User Manual
Glem Gas GF65MEI
User Manual
-
 Glem Gas GF69MEI
User Manual
Glem Gas GF69MEI
User Manual
-
 Glem Gas GL53EI
User Manual
Glem Gas GL53EI
User Manual
-
 Glem Gas GL53GI
User Manual
Glem Gas GL53GI
User Manual
-
 Glem Gas GL965EI
User Manual
Glem Gas GL965EI
User Manual
-
 Glem Gas GL965MVI
User Manual
Glem Gas GL965MVI
User Manual
-
 Glem Gas GMF61MVI
User Manual
Glem Gas GMF61MVI
User Manual
-
 Glem Gas GS965GE
User Manual
Glem Gas GS965GE
User Manual
-
 Glem Gas GS965GEN
User Manual
Glem Gas GS965GEN
User Manual
-
 Glem Gas GS965GG
User Manual
Glem Gas GS965GG
User Manual