GE PSB9120SFSS - Manuals
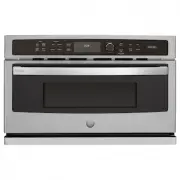
GE PSB9120SFSS Microwave – User Manual, Installation Manual in PDF format online.
Manuals:
User Manual GE PSB9120SFSS
Installation Manual GE PSB9120SFSS
Summary
Safety Information 2 CONTENTS Design Information Models Available ......................................................................2 Product Dimensions and Clearances ............................4 Tools and Parts Required ....................................................4 Parts Supplied .......
Información de seguridad ANTES DE COMENZAR Lea estas instrucciones por completo y con detenimiento. IMPORTANTE ³ Guarde estas instrucciones para el uso de inspectores locales. IMPORTANTE ³ Cumpla con todos los códigos y ordenanzas vigentes. Nota al instalador ³ Asegúrese de dejar estas instruccion...
Design Information 4 PRODUCT DIMENSIONS AND CLEARANCES NOTE: Appearance will vary by model. TOOLS AND PARTS REQUIRED (NOT SUPPLIED ) #2 Phillips screwdriver Hand-held drill High speed drill bit, 3/32 s diameter 3/8 s slot-head screwdriver Level Saw 2 x 4 or 2 x 2 lumber for installing ...
Installation Preparation 5 ELECTRICAL REQUIREMENTS Single Advantium 120 Installation: This product requires a 120-volt, 60 Hz, 15-amp circuit and draws 1.8 kilowatts. This product must be connected to a supply circuit of the proper voltage and frequency. :LUHVL]HPXVWFRQIRUPWRWKHUHTXLUHPHQWVRIWKH Na...
6 Installation Preparation Preparation WITHOUT an Accessory Storage Drawer PREPARE THE OPENING (cont.) Installation over a GE/Monogram Warming Drawer: NOTE: Additional clearances between the cutouts may be required. Check to be sure the oven supports above the Warming Drawer location do not obstruct...
Installation Preparation 7 Preparation WITHOUT an Accessory Storage Drawer PREPARE THE OPENING (cont.) Installation over a GE/Monogram Oven and Warming Drawer: NOTE: Additional clearances between the cutouts may be required. Check to be sure the oven supports above the Warming Drawer location do not...
8 Installation Preparation Preparation WITHOUT an Accessory Storage Drawer PREPARE THE OPENING (cont.) Installation under a GE/Monogram Microwave Oven and over a Warming Drawer: NOTE: Additional clearances between the cutouts may be required. Check to be sure the oven supports above the Warming Draw...
PREPARE THE OPENING (cont.) Installation beside another GE/Monogram Built-in Speedcook Oven: ,I\RXDUHPRXQWLQJRQH8QGHUWKH&RXQWHU GE/Monogram oven beside the other, use the dimensions shown. The middle rail separating the two openings may need to be larger than the 4-1/2 s minimum shown. 25-1/4 s...
10 Installation Preparation Preparation WITH an Accessory Storage Drawer NOTE: MODEL ZSC1201 CAN ONLY BE INSTALLED WITH AN ACCESSORY STORAGE DRAWER IF INSTALLED ABOVE 36-3/4 s . MODEL ZSC1202 CANNOT BE INSTALLED WITH AN ACCESSORY STORAGE DRAWER. SEE INSTALLATION PREPARATION WITHOUT AN ACCESSORY STOR...
PREPARE THE OPENING (cont.) Installation under a GE Profile 30 s or 36 s Cooktop or Countertop: Gas or electric cooktops may be installed over this oven. See cooktop installation instructions for the cutout size. See the label on top of the oven for approved cooktop models. This oven requires a sepa...
1 REMOVE THE PACKAGING AND PARTS 14 Installation Instructions 5HPRYHDOOSDFNLQJPDWHULDODQGWDSH/RFDWHSDUWVSDFNDJHFRQWDLQLQJPRXQWLQJVFUHZV5HPRYHWKHRYHQIURPWKHFDUWRQ'RQRWOLIWXQLW by handle or conduit. Two people are required to lift this oven. 2SHQWKHGRRUDQGUHPRYHDQ\SDFNDJLQJLQRYHQ Owner ’s Manual O...
Installation Instructions 15 3 SLIDE THE OVEN INTO THE CUTOUT CAUTION: Two people are required to lift the oven into the opening. Grasp the bottom at front and rear. DO NOT USE THE HANDLE TO LIFT THE OVEN. DAMAGE WILL OCCUR. PRECAUCIÓN: Se necesitan dos personas para levantar el horno hasta la abert...
16 Installation Instructions 6 INSTALL MOUNTING SCREWS Slide the oven the remaining way into the opening so that the side flanges and control panel are against the cabinet frame. Make sure that the oven is centered in the opening. Open the door, place a turntable tray in the oven and make sure t...
17 GE Consumer & Industrial Appliances Assembly Instructions Advantium ® Built-In Accessory Storage Drawer JX2200, JX2201, ZX2201 NOTE: Appearance will vary by model. BEFORE YOU BEGIN Read these instructions completely and carefully. Read the Installation Instructions for the Advantium 120V or 2...
2 UNDER-THE-COUNTER (UTC) MOUNTING BRACKET INSTALLATION NOTE: For UTC models PSB9120 and ZSC1201 only. A Open the accessory drawer so you have access to the top bracket. B Remove the three screws securing the top bracket. C Install the new UTC mounting bracket using the screws removed previously. D ...
19 ASSEMBLING THE OVEN TO DRAWER (cont.) C Remove the front two bottom screws on each side of the oven and the top center screw on each side of the storage drawer. D Place the side supports into the tabs on the drawer and secure using the screws supplied and the screws removed in Step C. E The oven ...
Información de seguridad 2 CONTENIDOS Información de diseño Modelos disponibles ..............................................................2 Dimensiones y distancias del producto .......................3 Herramientas y piezas requeridas ..................................3 Piezas provistas ..........
Información de diseño 3 DIMENSIONES Y DISTANCIAS DEL PRODUCTO NOTA: La apariencia varía según el modelo. HERRAMIENTAS Y PIEZAS REQUERIDAS (NO PROVISTAS ) Destornillador de estrella #2 Perforadora de mano Broca para perforadora de alta velocidad de 3/32” de diámetro Destornillador para cabeza...
Preparación para la instalación 4 REQUISITOS ELÉCTRICOS Instalación de Advantium de 120V único: Este producto requiere un circuito de 120 voltios, 60 hercios, 15 amperios y consume 1.8 kilovatios. Este producto debe conectarse a un circuito de suministro del voltaje y frecuencia adecuados. (OWDPDxR...
5 Preparación para la instalación Preparación SIN un cajón de almacenamiento de accesorios CÓMO PREPARAR LA ABERTURA (cont.) Instalación sobre un cajón calentador GE/ Monogram: NOTA: Pueden necesitarse espacios adicionales entre los recortes. Verifique que los soportes del horno sobre la ubicación d...
Preparación para la instalación 6 Preparación SIN un cajón de almacenamiento de accesorios CÓMO PREPARAR LA ABERTURA (cont.) Instalación sobre un horno y cajón calentador GE/Monogram: NOTA: Pueden necesitarse espacios adicionales entre los recortes. Verifique que los soportes del horno sobre la ubic...
7 Preparación para la instalación Preparación SIN un cajón de almacenamiento de accesorios CÓMO PREPARAR LA ABERTURA (cont.) Instalación bajo un horno de microondas y sobre un cajón calentador GE/Monogram: NOTA: Pueden necesitarse espacios adicionales entre los recortes. Verifique que los soportes d...
CÓMO PREPARAR LA ABERTURA (cont.) Instalación bajo una estufa o un mostrador de encimera de 30” o 36” GE/Monogram: Pueden instalarse estufas a gas o eléctricas sobre este horno. Ver las instrucciones de instalación de la estufa para el tamaño de la abertura. Ver la etiqueta de la parte superior del ...
9 Preparación para la instalación Preparación CON un cajón de almacenamiento de accesorios NOTA: EL MODELO ZSC1201 SÓLO PUEDE SER INSTALADO CON UN CAJÓN DE ALMACENAMIENTO DE ACCESORIOS SI SE LO INSTALA POR ENCIMA DE 36-3/4 s . EL MODELO ZSC1202 NO PUEDEN INSTALARSE CON UN CAJÓN DE ALMACENAMIENTO DE ...
CÓMO PREPARAR LA ABERTURA (cont.) Instalación bajo una estufa o un mostrador de encimera de 30” o 36” GE Profile: Pueden instalarse estufas a gas o eléctricas sobre este horno. Ver las instrucciones de instalación de la estufa para el tamaño de la abertura. Ver la etiqueta de la parte superior del h...
1 QUITE EL EMPAQUE Y LAS PIEZAS 13 Instrucciones de instalación 4XLWHWRGRHOPDWHULDOGHHPSDTXH\ODFLQWD8ELTXHHOSDTXHWHGHSLH]DVTXHFRQWLHQHWRUQLOORV de montaje. 4XLWHHOKRUQRGHODFDMDGHFDUWyQ1ROHYDQWH la unidad de la manija o conducto. Se necesitan dos personas para levantar este horno. $EUDODSXHUWD\TX...
Instrucciones de instalación 14 3 DESLICE EL HORNO DENTRO DE LA ABERTURA PRECAUCIÓN: Se necesitan dos personas para levantar el horno hasta la abertura. Tómelo de la parte inferior desde el frente y la parte trasera. NO USE LA MANIJA PARA LEVANTAR EL +25126(352'8&,5È1'$³26 . /HYDQWH\VRVWHQJDHOK...
15 Instrucciones de instalación 6 INSTALE LOS TORNILLOS DE MONTAJE Deslice el horno por la distancia que falta dentro de la abertura para que las bridas laterales y el panel de control se encuentren contra el armazón del gabinete. Verifique que el horno esté centrado en la abertura. Abra la puer...
16 GE Consumer & Industrial Appliances Instrucciones de montaje Cajón de almacenamiento de accesorios empotrado Advantium ® JX2200, JX2201, ZX2201 ANTES DE COMENZAR Lea estas instrucciones por completo y con detenimiento. Lea las Instrucciones de instalación del horno Advantium de 120V o 240V po...
2 INSTALACIÓN DE SOPORTE DE MONTAJE BAJO EL MOSTRADOR (BEM) NOTA: Sólo para modelos BEM PSB9120 y ZSC1201. A Abra el cajón de accesorios para tener acceso al soporte superior. B Quite los tres tornillos que fijan el soporte superior. C Instale el nuevo soporte de montaje BEM utilizando los tornillos...
18 CÓMO MONTAR EL HORNO AL CAJÓN (cont.) C Quite los dos tornillos inferiores frontales de cada lado del horno y el tornillo central superior sobre cada lado del cajón de almacenamiento. D Coloque los soportes laterales dentro de las lengüetas del cajón y fíjelos utilizando los tornillos provistos y...
GE Microwaves Manuals
-
GE JEM3072DHBB
User Manual
-
GE JEM3072DHWW
User Manual
-
GE JEM3072SHSS
User Manual
-
GE JES1072DMBB
User Manual
-
GE JES1072DMWW
User Manual
-
GE JES1072SHSS
User Manual
-
GE JES1095DMBB
User Manual
-
GE JES1095DMWW
User Manual
-
GE JES1095SMSS
User Manual
-
GE JES1097SMSS
User Manual
-
GE JES1109RRSS
User Manual
-
GE JES1145DLWW
User Manual
-
GE JES1145DMBB
User Manual
-
GE JES1145SHSS
User Manual
-
GE JES1145SHSS
Installation Manual
-
GE JES1460DSBB
User Manual
-
GE JES1460DSWW
User Manual
-
GE JES1657BMTS
User Manual
-
GE JES1657DMBB
User Manual
-
GE JES1657DMWW
User Manual