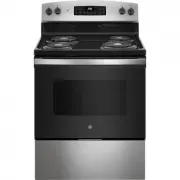
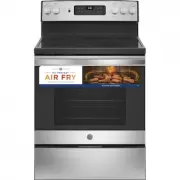
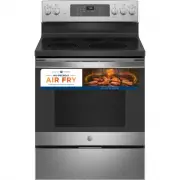
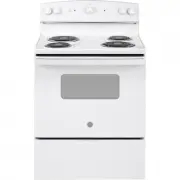
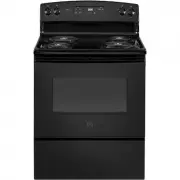
Page 2 - THANK YOU FOR MAKING GE APPLIANCES A PART OF YOUR HOME.; card included in the packing material.
2 49-2000995 Rev. 2 THANK YOU FOR MAKING GE APPLIANCES A PART OF YOUR HOME. Whether you grew up with GE Appliances, or this is your first, we’re happy to have you in the family. We take pride in the craftsmanship, innovation and design that goes into every GE Appliances product, and we think you wil...
Page 3 - READ ALL INSTRUCTIONS BEFORE USING THE APPLIANCE; SAFETY; WARNING; WARNING; GENERAL SAFETY INSTRUCTIONS; CAUTION
49-2000995 Rev. 2 3 READ AND SAVE THESE INSTRUCTIONS IMPORTANT SAFETY INFORMATION READ ALL INSTRUCTIONS BEFORE USING THE APPLIANCE SAFETY INFORMA TION ANTI-TIP DEVICE To reduce the risk of tipping the range, the range must be secured by a properly installed anti-tip bracket. See installation instruc...
Page 4 - KEEP FLAMMABLE MATERIALS AWAY FROM THE RANGE; IN THE EVENT OF A FIRE, TAKE THE FOLLOWING
4 49-2000995 Rev. 2 SAFETY INFORMA T ION READ AND SAVE THESE INSTRUCTIONS IMPORTANT SAFETY INFORMATION READ ALL INSTRUCTIONS BEFORE USING THE APPLIANCE WARNING KEEP FLAMMABLE MATERIALS AWAY FROM THE RANGE Failure to do so may result in fire or personal injury. Ŷ 'RQRWVWRUHRUXVHIODPPDEOHPDWHULDOVLQDQ...
Page 5 - COOKTOP SAFETY INSTRUCTIONS; RADIANT COOKTOP SAFETY INSTRUCTIONS
49-2000995 Rev. 2 5 SAFETY INFORMA TION READ AND SAVE THESE INSTRUCTIONS IMPORTANT SAFETY INFORMATION READ ALL INSTRUCTIONS BEFORE USING THE APPLIANCE WARNING COOKTOP SAFETY INSTRUCTIONS Ŷ Never leave the surface units unattended. Boilovers cause smoking and greasy spillovers that may ignite. Ŷ 1HYH...
Page 6 - PROPER DISPOSAL OF YOUR APPLIANCE; SELF-CLEANING OVEN SAFETY INSTRUCTIONS; OVEN SAFETY INSTRUCTIONS
6 49-2000995 Rev. 2 SAFETY INFORMA T ION READ AND SAVE THESE INSTRUCTIONS IMPORTANT SAFETY INFORMATION READ ALL INSTRUCTIONS BEFORE USING THE APPLIANCE PROPER DISPOSAL OF YOUR APPLIANCE Dispose of or recycle your appliance in accordance with Federal and Local Regulations. Contact your local authorit...
Page 7 - How to Remove Protective Shipping Film and Packaging Tape
49-2000995 Rev. 2 7 How to Remove Protective Shipping Film and Packaging Tape Carefully grasp a corner of the protective shipping film with your fingers and slowly peel it from the appliance surface. Do not use any sharp items to remove the film. Remove all of the film before using the appliance for...
Page 8 - Surface Units; How to Set; Dual and Triple Surface Units and Control Knobs (on some models)
8 49-2000995 Rev. 2 WARNING FIRE HAZARD: Never leave the range unattended with the cooktop on medium or high settings. Keep flammable items away from the cooktop. Turn off all controls when done cooking. Failure to follow these instructions can result in fire, serious injury or death. USING THE RANG...
Page 10 - Cookware for Radiant Glass Cooktop; Recommended; Stainless Steel; Avoid/Not Recommended; For Best Results
10 49-2000995 Rev. 2 Cookware for Radiant Glass Cooktop USING THE RANGE: Cookware for Radiant Glass Cooktop The following information will help you choose cookware which will give good performance on glass cooktops. NOTE: Follow all cookware manufacturer’s recommendations when using any type of cook...
Page 11 - Oven Controls; Cooking
49-2000995 Rev. 2 11 USING THE RANGE: Oven Controls Oven Controls z sGjGGGoGZGz 1. Traditional Cooking Modes: Your oven has the following traditional cooking modes: Bake and %URLO+L/R6HHWKH&RRNLQJ0RGHVVHFWLRQIRU more information. 2. Self Clean: See the Cleaning the Oven sec...
Page 12 - Special Features; Adjust the Oven Temperature; End of Timer Signals
12 49-2000995 Rev. 2 Special Features USING THE RANGE: Special Features There are several different special features on your range. To change the settings of these special features: Ŷ 3UHVVWKH Bake and Broil pads at the same time and hold for three seconds. Ŷ ³6)´ZLOODSSHDULQWKHGLVSOD\Ŷ 6HOHFWWKHIHD...
Page 13 - Oven Racks; Flat Racks; Cookware; Cookware Guidelines; Aluminum Foil and Oven Liners
49-2000995 Rev. 2 13 USING THE RANGE: 2YHQ5DFNV $OXPLQXP)RLODQG2YHQ/LQHUV&RRNZDUH Oven Racks Your oven has seven rack positions. Recommended rack positions for various types of foods are provided in the Cooking Guide. Adjusting rack position is one way to impact cooking results. For example, if ...
Page 14 - Broil Hi; Cooking Modes
14 49-2000995 Rev. 2 Your new oven has a variety of cooking modes to help you get the best results. These modes are described below. Refer to the Cooking Guide section for recommendations for specific foods. Remember, your new oven may perform differently than the oven it is replacing. Baking Mode W...
Page 15 - Cooking Guide
49-2000995 Rev. 2 15 Cooking Guide USING THE RANGE: Cooking Guide FOOD TYPE RECOMMENDED MODE(S) RECOMMENDED RACK POSITION(S) ADDITIONAL SUGGESTIONS Baked Goods Layer cakes, sheet cakes, bundt cakes, muffins, quick breads on a Single Rack Bake 4 8VHVKLQ\FRRNZDUH Layer cakes* on Multiple Racks Bake 3 ...
Page 16 - Cleaning the Range – Exterior
16 49-2000995 Rev. 2 Cleaning the Range – Exterior CARE AND CLEANING: Cleaning the Range – Exterior WARNING If your range is removed for cleaning, servicing or any reason, be sure the anti-tip device is reengaged properly when the range is replaced. Failure to take this precaution could result in ti...
Page 17 - Cleaning the Range – Interior; Manual Cleaning; Self Clean Mode
49-2000995 Rev. 2 17 CARE AND CLEANING: Cleaning the Range – Interior Cleaning the Range – Interior The interior of your new oven can be cleaned manually or by using Steam Clean or Self Clean modes. Spillage of marinades, fruit juices, tomato sauces and basting liquids containing acids may cause dis...
Page 18 - Normal Daily Use Cleaning; Cleaning the Glass Cooktop
18 49-2000995 Rev. 2 Normal Daily Use Cleaning To maintain and protect the surface of your glass cooktop, follow these steps: 1. Before using the cooktop for the first time, clean it with ceramic cooktop cleaner. This helps protect the glass cooktop and makes cleanup easier. 2. Regular use of cerami...
Page 20 - CARE AND; Oven Light
20 49-2000995 Rev. 2 CARE AND CLEANING: Oven Light WARNING SHOCK OR BURN HAZARD: Before replacing oven light bulb, disconnect the electrical power to the range at the main fuse or circuit breaker panel. Failure to do so may result in electric shock or burn. CAUTION BURN HAZARD: The glass cover and b...
Page 21 - Oven Door; WRUDJH
49-2000995 Rev. 2 21 The door is very heavy. Be careful when removing and lifting the door. Do not lift the door by the handle. To remove the door: 1. Fully open the door. 2. Pull the hinge locks down toward the door frame, to the unlocked position. A tool, such as a small flat-blade screwdriver, ma...
Page 22 - Before you call for service; Problem; TROUBLESHOOTING TIPS
22 49-2000995 Rev. 2 Troubleshooting Tips ... Before you call for service Save time and money! Review the charts on the following pages first and you may not need to call for service. Check out self-help videos and FAQ at GEAppliances.com/support. Problem Possible Cause What To Do Surface units will...
Page 26 - What GE Appliances will not cover:; LIMITED W; EXCLUSION OF IMPLIED WARRANTIES; Warrantor: GE Appliances, a Haier company
26 49-2000995 Rev. 2 Staple your receipt here. Proof of the original purchase date is needed to obtain service under the warranty . GEAppliances.com All warranty service is provided by our Factory Service Centers, or an authorized Customer Care ® technician. To schedule service online, visit us at G...
Page 27 - ACCESSORIES; Looking For Something More?; Accessories; Parts
49-2000995 Rev. 2 27 ACCESSORIES Looking For Something More? GE Appliances offers a variety of accessories to improve your cooking and maintenance experiences! Refer to the Consumer Support page for phone numbers and website information. The following products and more are available: Accessories Acc...
Page 28 - Consumer Support
28 49-2000995 Rev. 2 3ULQWHGLQWKH8QLWHG6WDWHV Consumer Support CONSUMER SUPPORT GE Appliances Website Have a question or need assistance with your appliance? Try the GE Appliances Website 24 hours a day, any day of the year! You can also shop for more great GE Appliances products and take advantage ...
Page 29 - ESTUFAS; Eléctricas con Deslizables y Empotrables
MANUAL DEL PROPIETARIO Escriba los números de modelo y de serie aquí: Nº de Modelo ____________ Nº de Serie ______________ Los encontrará en una etiqueta detrás de la puerta o del cajón. ESTUFAS Eléctricas con Deslizables y Empotrables Estufa Deslizable JS630 de 30” Estufa Empotrable JD630 de 30” GE...
Page 30 - GRACIAS POR HACER QUE GE APPLIANCES SEA PARTE DE SU HOGAR.; tenerlo en la familia.
2 49-2000995 Rev. 2 GRACIAS POR HACER QUE GE APPLIANCES SEA PARTE DE SU HOGAR. Ya sea que haya crecido usando GE Appliances, o que ésta es su primera vez, nos complace tenerlo en la familia. Sentimos orgullo por el nivel de arte, innovación y diseño de cada uno de los electrodomésticos de GE Applian...
Page 31 - DISPOSITIVO ANTI-VOLCADURAS; LEA Y GUARDE ESTAS INSTRUCCIONES; LEA TODAS LAS INSTRUCCIONES ANTES DE USAR ESTE ELECTRODOMÉSTICO; INFORMACIÓN DE SEGURIDAD; ADVERTENCIA; ADVERTENCIA; INSTRUCCIONES GENERALES DE SEGURIDAD; PRECAUCIÓN
49-2000995 Rev. 2 3 DISPOSITIVO ANTI-VOLCADURAS Para reducir el riesgo de volcar la estufa, ésta debe sujetarse mediante un soporte anti-volcaduras con una adecuada instalación. Ver las instrucciones de instalación enviadas con el soporte para obtener detalles completos antes de iniciar la instalaci...
Page 32 - MANTENGA LOS MATERIALES INFLAMABLES ALEJADOS DE LA COCINA; EN CASO DE INCENDIO, SIGA LOS SIGUIENTES PASOS
4 49-2000995 Rev. 2 LEA Y GUARDE ESTAS INSTRUCCIONES INFORMACIÓN DE SEGURIDAD INFORMACIÓN IMPORTANTE DE SEGURIDAD LEA TODAS LAS INSTRUCCIONES ANTES DE USAR ESTE ELECTRODOMÉSTICO ADVERTENCIA INSTRUCCIONES GENERALES DE SEGURIDAD (Cont.) Ŷ 6yORXVHDJDUUDGHUDVVHFDVODVDJDUUDGHUDVK~PHGDV o mojadas colocada...
Page 33 - INSTRUCCIONES DE SEGURIDAD DE LA ESTUFA; INSTRUCCIONES DE SEGURIDAD DE LA SUPERFICIE DE
49-2000995 Rev. 2 5 LEA Y GUARDE ESTAS INSTRUCCIONES INFORMACIÓN DE SEGURIDAD INFORMACIÓN IMPORTANTE DE SEGURIDAD LEA TODAS LAS INSTRUCCIONES ANTES DE USAR ESTE ELECTRODOMÉSTICO ADVERTENCIA INSTRUCCIONES DE SEGURIDAD DE LA ESTUFA Ŷ 1XQFDGHMHGHVDWHQGLGDVODVXQLGDGHVGHODVXSHUILFLH Los hervores excesivo...
Page 34 - FORMA ADECUADA DE DESCARTAR SU ELECTRODOMÉSTICO; INSTRUCCIONES DE SEGURIDAD DEL HORNO CON LIMPIEZA; INSTRUCCIONES DE SEGURIDAD DEL HORNO
6 49-2000995 Rev. 2 LEA Y GUARDE ESTAS INSTRUCCIONES INFORMACIÓN DE SEGURIDAD INFORMACIÓN IMPORTANTE DE SEGURIDAD LEA TODAS LAS INSTRUCCIONES ANTES DE USAR ESTE ELECTRODOMÉSTICO FORMA ADECUADA DE DESCARTAR SU ELECTRODOMÉSTICO Descarte o recicle su electrodoméstico de acuerdo con las Regulaciones Fed...
Page 36 - QLGDGHVGHVXSHUILFLH; Unidades de superficie; Cómo Configurar
8 49-2000995 Rev. 2 USO DE LA ESTUF A: 8QLGDGHVGHVXSHUILFLH Unidades de superficie ADVERTENCIA RIESGO DE INCENDIO: Nunca pierda de vista la estufa cuando la estufa esté en las configuraciones medio o alto. Mantenga los ítems inflamables alejados de la estufa. Apague todos los controles cuando finali...
Page 37 - Consejos para Productos Enlatados en el Hogar; Limitador de Temperatura en Estufas de Vidrio Radiante; USO DE LA
49-2000995 Rev. 2 9 Consejos para Productos Enlatados en el Hogar Asegúrese que el producto enlatado se encuentre sobre la unidad superficial. Asegúrese de que el producto enlatado sea plano en su parte inferior. Para evitar quemadoras de vapor o calor, tenga cuidado al enlatar el producto. 8VHUHFHW...
Page 38 - WHQVLOLRSDUD3ODFDGH&RFFLyQSDUD9; Recomendado; Acero inoxidable; Evitar/No se recomienda; Para mejores resultados
10 49-2000995 Rev. 2 Utensilio para Placa de Cocción para Vidrio Radiante USO DE LA ESTUF A: 8WHQVLOLRSDUD3ODFDGH&RFFLyQSDUD9 LGULR5DGLDQWH La siguiente información lo ayudará a elegir los recipientes de cocción que brindan un buen desempeño en estufas de vidrio. Ver el folleto sobre recipientes...
Page 39 - Light; Controles del Horno
49-2000995 Rev. 2 11 z sGjGGGoGZGz 1. Traditional Cooking Modes (Modos de Cocción Tradicionales): Su horno cuenta con ORVVLJXLHQWHVPRGRVGHFRFFLyQWUDGLFLRQDOHV%DNH+RUQHDU\%URLO+L/RDVDUDOWREDMR3DUDPiV información, consulte la sección de Modos de Cocción. 2. Self Clean (Limpieza A...
Page 40 - Funciones Especiales; Ajuste de la Temperatura del Horno; Pantalla del Reloj
12 49-2000995 Rev. 2 Funciones Especiales USO DE LA ESTUFA: Funciones Especiales Su estufa cuenta con varias funciones especiales diferentes. Para modificar las configuraciones de estas funciones especiales: Ŷ 0DQWHQJDSUHVLRQDGDVODVWHFODV Bake (Hornear) y Broil (Asar) al mismo tiempo durante tres se...
Page 41 - Estantes Planos; WHQVLOLRV; Estantes del Horno; Utensilios; Pautas de Uso de Utensilios; Papel de Aluminio y Cobertores del Horno
49-2000995 Rev. 2 13 El horno cuenta con siete posiciones de estantes. En la Guía de Cocción, se brindan recomendaciones de posiciones de los estantes para diferentes tipos de comidas. Se ajusta un estante en una dirección para afectar los resultados de cocción. Por ejemplo, si se prefieren partes s...
Page 42 - Modos de Horneado; Precalentamiento; Modos de Cocción
14 49-2000995 Rev. 2 USO DE LA ESTUFA: Modos de Cocción Su nuevo horno posee una variedad de modos de cocción para que pueda obtener los mejores resultados. Estos modos se describen a continuación. Para acceder a recomendaciones para comidas específicas, consulte la sección de la Guía de Cocción. Re...
Page 43 - Guía de Cocción
49-2000995 Rev. 2 15 Guía de Cocción USO DE LA ESTUFA: Guía de Cocción TIPO DE COMIDA MODO(S) RECOMENDADO(S) POSICIÓN(ES) DE ESTANTES RECOMENDADA SUGERENCIAS ADICIONALES Productos Horneados Tortas con capas, tortas rectangulares, roscas, panecillos, pan rápido en un Solo Estante Hornear 4 8VHXWHQVLO...
Page 44 - Limpieza de la Estufa - Exterior
16 49-2000995 Rev. 2 Limpieza de la Estufa - Exterior CUIDADO Y LIMPIEZA: Limpieza de la Estufa - Exterior ADVERTENCIA Si se quita la estufa para efectuar una limpieza, reparaciones o cualquier otra razón, verifique que el dispositivo anti-volcaduras se coloque de manera adecuada cuando vuelva a ins...
Page 45 - CUIDADO Y; Limpieza de la Estufa - Interior; Limpieza Manual; Modo de Limpieza Automática
49-2000995 Rev. 2 17 CUIDADO Y LIMPIEZA: Limpieza de la Estufa - Interior Limpieza de la Estufa - Interior El interior de su nuevo horno puede ser limpiado de forma manual o utilizando los modos Steam Clean (Limpieza con Vapor) o Self Clean (Limpieza Automática). El derrame de adobo, jugos de fruta,...
Page 46 - Limpieza normal de uso diario; Residuos pegados; Residuos pegados rebeldes; Limpieza de la Placa de Cocción de Vidrio
18 49-2000995 Rev. 2 Limpieza de la Placa de Cocción de Vidrio Limpieza normal de uso diario Para mantener y proteger la superficie de su estufa de vidrio, siga estos pasos: 1. Antes de usar la estufa por primera vez, límpiela con el limpiador de estufas cerámicas. Esto ayuda a proteger la estufa y ...
Page 47 - Marcas de metal y rayones; Sellado de la estufa (en algunos modelos)
49-2000995 Rev. 2 19 Marcas de metal y rayones 1. Tenga cuidado de no deslizar ollas y sartenes a través de su estufa. Dejará marcas de metal sobre la superficie de la estufa. Estas marcas se pueden eliminar utilizando un limpiador para superficies de cocción de cerámica con una almohadilla de limpi...
Page 48 - Reemplazo de la bombilla del horno (en algunos modelos); Reemplazo de la bombilla del horno (en algunos modelos); Reemplazo de la bombilla del horno (en algunos modelos)
20 49-2000995 Rev. 2 Luz del Horno ADVERTENCIA PELIGRO DE DESCARGA ELÉCTRICA O QUEMADURAS: Antes de reemplazar la bombilla del horno, desconecte la alimentación de energía al horno desde el panel principal de fusibles o del interruptor de circuitos. No hacerlo puede provocar una descarga eléctrica o...
Page 49 - Puerta del Horno; GHO
49-2000995 Rev. 2 21 La puerta es muy pesada. Tenga cuidado al retirar y levantar la puerta. No levante la puerta usando la manija. Para retirar la puerta: 1. Abra la puerta totalmente. 2. Empuje los bloqueos de la bisagra hacia abajo en dirección a la estructura de la puerta, hasta la posición desb...
Page 50 - Antes de solicitar el servicio técnico; CONSEJOS PARA LA SOLUCIÓN DE PROBLEMAS
22 49-2000995 Rev. 2 ¡Ahorre tiempo y dinero! Primero revise los cuadros que aparecen en las siguientes páginas y es posible que no necesite solicitar reparaciones. Acceda a los videos de ayuda y preguntas frecuentes (FAQ) a través de GEAppliances.com/support. Consejos para la Solución de Problemas....
Page 54 - Garantía Limitada de la Estufa Eléctrica de GE Appliances; GARANTÍA; Qué no cubrirá GE Appliances:; EXCLUSIÓN DE GARANTÍAS IMPLÍCITAS
26 49-2000995 Rev. 2 Garantía Limitada de la Estufa Eléctrica de GE Appliances GARANTÍA LIMIT ADA Abroche su recibo aquí. Para acceder al servicio técnico de acuerdo con la garantía deberá contar con la prueba de la fecha original de compra. GEAppliances.com Todo el servicio de garantía es provisto ...
Page 55 - Accesorios
49-2000995 Rev. 2 27 ACCESORIOS ¿Busca Algo Más? ¡GE Appliances ofrece una variedad de accesorios para mejorar sus experiencias de cocción y mantenimiento! Para acceder a números telefónicos e información de sitios Web, consulte la página de Soporte para el Consumidor. Estos y otros productos están ...


 GE JAS640RMSS
User Manual
GE JAS640RMSS
User Manual
 GE JB256DMBB
User Manual
GE JB256DMBB
User Manual
 GE JB256DMWW
User Manual
GE JB256DMWW
User Manual
 GE JB256RTSS
User Manual
GE JB256RTSS
User Manual
 GE JB258DMWW
User Manual
GE JB258DMWW
User Manual
 GE JB480DTBB
User Manual
GE JB480DTBB
User Manual
 GE JB625DKBB
User Manual
GE JB625DKBB
User Manual
 GE JB625DKWW
User Manual
GE JB625DKWW
User Manual
 GE JB625RKSS
User Manual
GE JB625RKSS
User Manual
 GE JB645DKBB
User Manual
GE JB645DKBB
User Manual
 GE JB645DKWW
User Manual
GE JB645DKWW
User Manual
 GE JB645RKSS
User Manual
GE JB645RKSS
User Manual
 GE JB655SKSS
User Manual
GE JB655SKSS
User Manual
 GE JB655YKFS
User Manual
GE JB655YKFS
User Manual
 GE JB700EJES
User Manual
GE JB700EJES
User Manual
 GE JB735SPSS
User Manual
GE JB735SPSS
User Manual
 GE JBS160DMBB
User Manual
GE JBS160DMBB
User Manual
 GE JBS160DMWW
User Manual
GE JBS160DMWW
User Manual
 GE JBS360DMBB
User Manual
GE JBS360DMBB
User Manual