Page 2 - CONTENTS
CONTENTS 2 3 Precautions to avoid possible exposure to excessive microwave energy: . . . . . . . . . . . . . . . . . . . . . . . . . . . . . . . . . 3 Important Safety Instructions . . . . . . . . . . . . . . . . . . . . . . . . . . . . . . . . . . . . . . . .. . . . . . . . . . . . . . . . . . . . ...
Page 3 - IMPORTANT SAFETY INSTRUCTIONS; SAVE THESE INSTRUCTIONS
IMPORTANT SAFETY INSTRUCTIONS 3 Precautions to avoid possible exposure to excessive microwave energy: 1 Do not attempt to operate this microwave with the door open because this can result in harmful exposure to microwave energy. It is important not to defeat or tamper with the safety interlocks. 2 D...
Page 4 - Unpacking instructions; GROUNDING INSTRUCTIONS; Electrical requirements
IMPORTANT SAFETY INSTRUCTIONS SAVE THESE INSTRUCTIONS 4 13 Cooking utensils may become hot because of heat transferred from the heated food. Potholders may be needed to handle the utensil. 14 Do not cover or block any openings on the appliance. 15 Do not store or use this appliance outdoors. Do not ...
Page 5 - Radio or TV interference
IMPORTANT SAFETY INSTRUCTIONS SAVE THESE INSTRUCTIONS 5 a) The marked electrical rating of the cord set or extension cord should be at least as great as the electrical rating of the appliance. b) The extension cord must be a grounding-type 3-wire cord, and the longer cord should be arranged so that ...
Page 6 - Cookware and cooking materials; Materials you can use
IMPORTANT SAFETY INSTRUCTIONS SAVE THESE INSTRUCTIONS 6 Cookware and cooking materials Warning Personal Injury Hazard Tightly-closed containers could explode. Closed containers should be opened and plastic pouches should be pierced before cooking. Cookware and other materials must fit on the turntab...
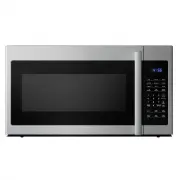
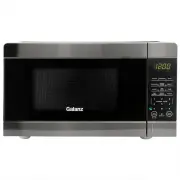
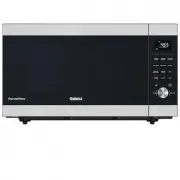
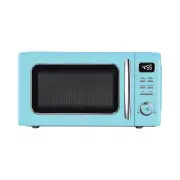
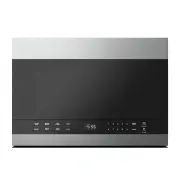
Page 7 - FEATURES; Features; Package contents; Microwave oven
FEATURES 7 Features • 9 auto-cook settings • 10 variable power levels • 1000 watts of power • 30-second express cooking • Energy saving (eco) mode • Exhaust fan with two speeds • Hidden vent • Task lighting • Child lock • 12.4-inch glass turntable Package contents • 1.6 cu. ft. over-the-range microw...
Page 8 - CONTROL PANEL
CONTROL PANEL 8 # ITEM DESCRIPTION 1 Display In standby mode, displays the time. In cooking mode, displays cooking time, weight, and other information. 2 Auto menu Press one of these buttons to automatically cook the item indicated. See 3 1LB Defrost Quickly defrost one pound (16 oz.) of food. See 4...
Page 9 - SETTING UP YOUR MICROWAVE OVEN; Setting up your microwave oven; Installing the turntable
SETTING UP YOUR MICROWAVE OVEN 9 Setting up your microwave oven See the Installation Guide (included in your box) to install and set up your microwave. Installing the turntable Hub (underside) Glass turntable Turntable ring Turntable shaft Notes • Never place the glass tray upside down. The glass tr...
Page 10 - OPERATION INSTRUCTION; Cooking in your microwave; Setting the clock; Defrosting by weight
OPERATION INSTRUCTION 10 Cooking in your microwave 1 Press Time Cook , then use the number pad to enter the cooking time that you want. Note For example, to enter 3 minutes and 15 seconds, press 3 , 1 , and then 5 . 2 Press Power Level , then enter the power level that you want (0-10). LEVEL 10 9 8 ...
Page 11 - Defrosting by time; Quickly defrosting one pound; Cooking with the auto menu; Cheese or butter
OPERATION INSTRUCTION 11 Defrosting by time 1 Press Time Defrost. The display shows “00:00” and “DEF.” 2 Use the number pad to enter the defrosting time you want. The time range must be between 00:01 and 99:99. 3 Press Start to start defrosting. The remaining cooking time is displayed. Note While de...
Page 12 - Beverage; Cooking kids’ meals; Hot dogs or frozen sandwiches; Checking the time and power level while cooking; Using the light; Using the vent fan
OPERATION INSTRUCTION 12 Beverage 1 Press Beverage . 2 Use the number pad (1-6) to enter the amount from1-6 cups (7.0 oz./cup). 3 Press Start . Cooking kids’ meals Hot dogs or frozen sandwiches When cooking one serving of hot dogs or frozen sandwiches: 1 Press Kids Meals . 2 Use the number pad to en...
Page 13 - CLEAN AND CARE; Using the child lock; Using the turntable; Cleaning the outside of your microwave; Cleaning the inside of your microwave
CLEAN AND CARE 13 • When the fan automatically starts, you can press Vent to switch to high speed. The fan runs at high speed for eight minutes, then returns to its low speed. • If you turned the fan on, it doesn't turn off automatically when cooking is finished. Press Vent/2 Speed to turn it off. U...
Page 14 - Cleaning and replacing the filters; Cleaning the grease filters; BOTTOM
CLEAN AND CARE 14 Cleaning and replacing the filters Cleaning the grease filters Clean the filters at least once a month. Never use the fan or microwave without the filters in place. 1 Pull down slightly on the tab toward the front of the microwave to remove the filter. Repeat for the other filter. ...
Page 15 - Changing the light bulbs
CLEAN AND CARE 15 4 Replace the charcoal filter. Make sure that the wire mesh is visible from the front. Charcoal filter 5 Carefully push the louver back into place and replace the louver mounting screws. Louver Changing the light bulbs Countertop light (exterior) 1 Disconnect power to the microwave...
Page 17 - TROUBLESHOOTING; Specifications
TROUBLESHOOTING 17 If you have a problem with your microwave, review the following chart for a possible solution. If the microwave still does not work properly, contact the nearest authorized service center. PROBLEM POSSIBLE CAUSE POSSIBLE SOLUTION Microwave will not start The electrical cord is not...
Page 18 - PRODUCT WARRANTY; Please save your receipt as proof of purchase is required to make a
PRODUCT WARRANTY PRODUCT WARRANTY This warranty applies to products sold by Galanz Americas in the U.S. This warranty is in lieu of any other warranty and expressly applies to the individual product only.Galanz product is warrantied for one year following purchase for defects in material and wor...
Page 19 - WARRANTY REGISTRATION; OPERA; PLEASE PRINT CLEARLY.
WARRANTY REGISTRATION OPERA TION INSTRUCTIONS Please mail this warranty card to the address below within 30 days of purchase. Galanz Americas, 55 Challenger Road, Suite 503, Ridgefield Park, NJ 07660. Name Address City State ZIP Phone Email Model Number Purchase Location PLEASE PRINT CLEARLY. Serial...
Page 20 - ©2020 Galanz Americas Limited Company