Fulgor Milano SBQ 100 G X - Manuals
User Manual Fulgor Milano SBQ 100 G X
1

2

3
4
5
6
7
8
9
10
11

12
13
14
15
16
17
18
19
20
21
22
23
24
25
26
27
28
29
30
31
32
33
34
35
36
37
38
39
40
41

42
43
44
45
46
47
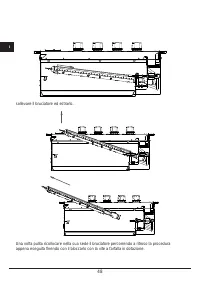
48
49
50
51

52

53
54
55
56
57
58

59
60
61
62

63
64
65
66
67
68
69
70
71
72
73
74
75

76
77

78
79
80
81
82
83
84
85
86
87
88
89
90
91
92
93
94
95
96
97
98
99

100
101

102

103

104

Summary
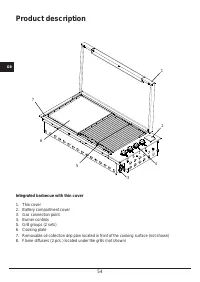
Page 4 - Descrizione del prodotto; Barbecue integrato con coperchio sottile
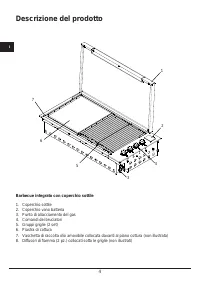
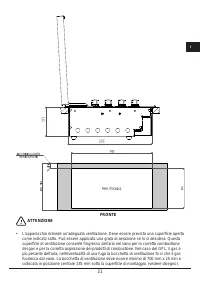
4 5 I Descrizione del prodotto 2 1 4 3 5 6 7 Barbecue integrato con coperchio sottile 1. Coperchio sottile2. Coperchio vano batteria3. Punto di allacciamento del gas4. Comandi dei bruciatori5. Gruppi griglie (2 set)6. Piastra di cottura7. Vaschetta di raccolta olio amovibile collocata davanti al pia...
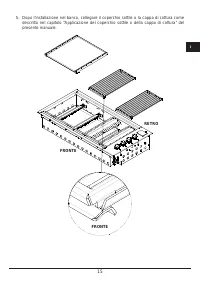
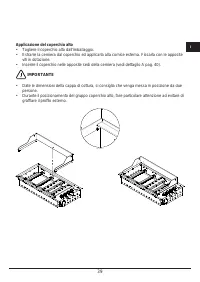
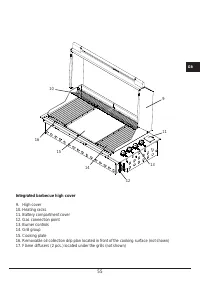
Page 5 - Barbecue integrato coperchio alto
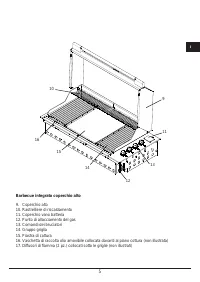
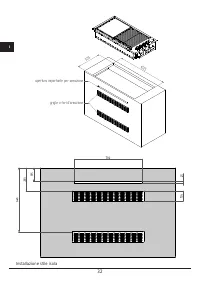
4 5 I Barbecue integrato coperchio alto 9. Coperchio alto10. Rastrelliere di riscaldamento11. Coperchio vano batteria12. Punto di allacciamento del gas13. Comandi dei bruciatori14. Gruppo griglia15. Piastra di cottura16. Vaschetta di raccolta olio amovibile collocata davanti al piano cottura (non il...
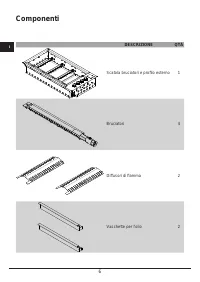
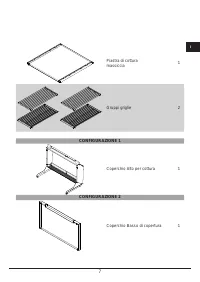
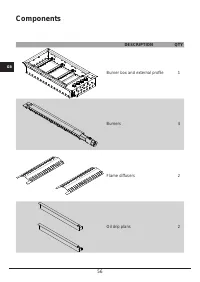
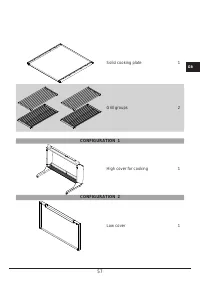
Page 6 - Componenti
6 7 I DESCRIZIONE QTÀ Scatola bruciatori e profilo esterno 1 Bruciatori 4 Diffusori di fiamma 2 Vaschette per l’olio 2 Componenti