Frigidaire PRMC2285AF - Manuals
Frigidaire PRMC2285AF Refrigerator – User Manual, Installation Manual, Manual, Troubleshooting Guide in PDF format online.
User Manual Frigidaire PRMC2285AF


Summary
INTRODUCTION Doors Handles are secure and tight Door seals completely to cabinet on all sides Leveling Refrigerator is level side-to-side and slightly elevated in front to assist with door and drawer closing (front should be higher than back) Cabinet is setting solid on all corners Electrica...
WARNING WARNING indicates a potentially hazardous situation which, if not avoided, could result in death or serious injury. IMPORTANT IMPORTANT indicates installation, oper- ation or maintenance information which is important but not hazard-related. DANGER DANGER indicates an imminently hazardous si...
4 IMPORTANT SAFETY INFORMATION Safety Instructions • DO NOT store or use gasoline, or other flammable liquids in the vicinity of this or any other appliance. Read product labels for warnings regarding flammability and other hazards. • DO NOT operate the refrigerator in the presence of explosive fume...
Installation Manual Frigidaire PRMC2285AF


Manual Frigidaire PRMC2285AF


Troubleshooting Guide Frigidaire PRMC2285AF


Summary
INTRODUCTION Doors Handles are secure and tight Door seals completely to cabinet on all sides Leveling Refrigerator is level side-to-side and slightly elevated in front to assist with door and drawer closing (front should be higher than back) Cabinet is setting solid on all corners Electrica...
WARNING WARNING indicates a potentially hazardous situation which, if not avoided, could result in death or serious injury. IMPORTANT IMPORTANT indicates installation, oper- ation or maintenance information which is important but not hazard-related. DANGER DANGER indicates an imminently hazardous si...
4 IMPORTANT SAFETY INFORMATION Safety Instructions • DO NOT store or use gasoline, or other flammable liquids in the vicinity of this or any other appliance. Read product labels for warnings regard- ing flammability and other hazards. • DO NOT operate the refrigerator in the presence of explosive fu...
Frigidaire Refrigerators Manuals
-
 Frigidaire EFR749
User Manual
Frigidaire EFR749
User Manual
-
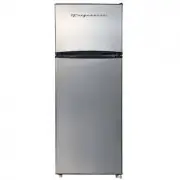
 Frigidaire EFR753-BLACK
User Manual
Frigidaire EFR753-BLACK
User Manual
-
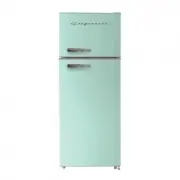 Frigidaire EFR753-MINT
User Manual
Frigidaire EFR753-MINT
User Manual
-
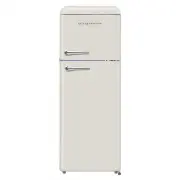 Frigidaire EFR756-CREAM
User Manual
Frigidaire EFR756-CREAM
User Manual
-
 Frigidaire FFET1022UB
User Manual
Frigidaire FFET1022UB
User Manual
-
Frigidaire FFET1022UB
Manual
-
 Frigidaire FFET1022UV
User Manual
Frigidaire FFET1022UV
User Manual
-
Frigidaire FFET1022UV
Manual
-
Frigidaire FFET1022UV
Installation Manual
-
Frigidaire FFET1022UW
User Manual
-
Frigidaire FFET1022UW
Manual
-
 Frigidaire FFET1222UB
Manual
Frigidaire FFET1222UB
Manual
-
 Frigidaire FFET1222UV
User Manual
Frigidaire FFET1222UV
User Manual
-
Frigidaire FFET1222UV
Manual
-
 Frigidaire FFET1222UW
User Manual
Frigidaire FFET1222UW
User Manual
-
 Frigidaire FFHT1425VB
User Manual
Frigidaire FFHT1425VB
User Manual
-
Frigidaire FFHT1425VB
Installation Manual
-
Frigidaire FFHT1425VB
Manual
-
 Frigidaire FFHT1425VV
User Manual
Frigidaire FFHT1425VV
User Manual
-
Frigidaire FFHT1425VV
Installation Manual