Frigidaire GRSS2652AF - Manuals
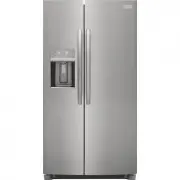
Frigidaire GRSS2652AF Refrigerator – User Manual, Installation Manual, Troubleshooting Guide, Manual in PDF format online.
User Manual Frigidaire GRSS2652AF


Summary
2 INTRODUCTION Doors Handles are secure and tight Door seals completely to cabinet on all sides Doors are level with each other. Leveling Appliance is level side-to-side and tilted ¼ " (6 mm) front-to-back Toe grille is properly attached. Cabinet is level on the floor. Electrical Pow...
3 WARNING WARNING indicates a potentially haz- ardous situation which, if not avoided, could result in death or serious injury. IMPORTANT IMPORTANT indicates installation, oper- ation or maintenance information which is important but not hazard-related. DANGER DANGER indicates an imminently haz- ard...
4 IMPORTANT SAFETY INFORMATION WARNING These guidelines must be followed to ensure that safety mechanisms in this unit will operate properly. Proper Disposal of your Appliance Risk of child entrapment Child entrapment and suffocation are not problems of the past. Junked or abandoned appliances are s...
Installation Manual Frigidaire GRSS2652AF


Summary
I M A G E / V I D E O Refrigerator Water Filter Model Compatibility – HDFPPWFU01 Frigidaire Professional Models Frigidaire Gallery Models Frigidaire Models PRFS2883AF GRSC2352AF FRFN2823AS PRFG2383AF GRSC2352AD FRSS2623AB PRFC2383AF GRSS2352AF FRSS26L3AW FPRU19F8WF GRFS2853AF FRSS26L3AF GRFS2853AD F...
I M A G E / V I D E O Refrigerator Water Filter Model Compatibility – EPTWFU01 Frigidaire Professional Models Frigidaire Gallery Models Frigidaire Models FPBC2277RF FGHB2868TF FFHB2750TS FPBG2277RF FGHD2368TD FFHD2250TS FPBS2777RF FGHD2368TF FFHG2250TS FPSC2277RF FGHB2868TE FFHB2750TE FPSS2677RF FGH...
I M A G E / V I D E O Refrigerator Water Filter Model Compatibility – WFCB Frigidaire 6-Month Push-In Refrigerator Water Filter PureSource Plus THD Item 1003955600 / 308000660Frigidaire Model WFCB • Filters out up to 99% of contaminants: reduces chlorine taste and odor,lead, mercury, pharmaceuticals...
Troubleshooting Guide Frigidaire GRSS2652AF


Summary
2 INTRODUCTION Doors Handles are secure and tight Door seals completely to cabinet on all sides Doors are level with each other. Leveling Appliance is level side-to-side and tilted ¼ " (6 mm) front-to-back Toe grille is properly attached. Cabinet is level on the floor. Electrical Pow...
3 WARNING WARNING indicates a potentially haz- ardous situation which, if not avoided, could result in death or serious injury. IMPORTANT IMPORTANT indicates installation, oper- ation or maintenance information which is important but not hazard-related. DANGER DANGER indicates an imminently haz- ard...
4 IMPORTANT SAFETY INFORMATION WARNING These guidelines must be followed to ensure that safety mechanisms in this unit will operate properly. Proper Disposal of your Appliance Risk of child entrapment Child entrapment and suffocation are not problems of the past. Junked or abandoned appliances are s...
Manual Frigidaire GRSS2652AF


Frigidaire Refrigerators Manuals
-
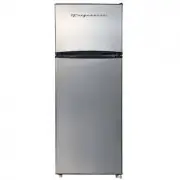 Frigidaire EFR749
User Manual
Frigidaire EFR749
User Manual
-
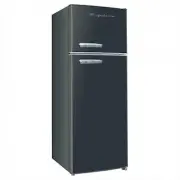 Frigidaire EFR753-BLACK
User Manual
Frigidaire EFR753-BLACK
User Manual
-
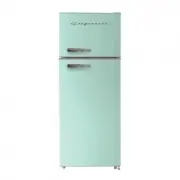 Frigidaire EFR753-MINT
User Manual
Frigidaire EFR753-MINT
User Manual
-
 Frigidaire EFR756-CREAM
User Manual
Frigidaire EFR756-CREAM
User Manual
-
 Frigidaire FFET1022UB
User Manual
Frigidaire FFET1022UB
User Manual
-
Frigidaire FFET1022UB
Manual
-
 Frigidaire FFET1022UV
User Manual
Frigidaire FFET1022UV
User Manual
-
Frigidaire FFET1022UV
Manual
-
Frigidaire FFET1022UV
Installation Manual
-
Frigidaire FFET1022UW
User Manual
-
Frigidaire FFET1022UW
Manual
-
 Frigidaire FFET1222UB
Manual
Frigidaire FFET1222UB
Manual
-
 Frigidaire FFET1222UV
User Manual
Frigidaire FFET1222UV
User Manual
-
Frigidaire FFET1222UV
Manual
-
 Frigidaire FFET1222UW
User Manual
Frigidaire FFET1222UW
User Manual
-
 Frigidaire FFHT1425VB
User Manual
Frigidaire FFHT1425VB
User Manual
-
Frigidaire FFHT1425VB
Installation Manual
-
Frigidaire FFHT1425VB
Manual
-
 Frigidaire FFHT1425VV
User Manual
Frigidaire FFHT1425VV
User Manual
-
Frigidaire FFHT1425VV
Installation Manual