Frigidaire GRQC2255BF - Manuals
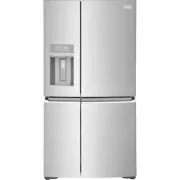
Frigidaire GRQC2255BF Refrigerator – User Manual, Manual in PDF format online.
Manuals:
User Manual Frigidaire GRQC2255BF


Summary
2 INTRODUCTION Doors Door seals completely to cabinet on all sides Leveling Refrigerator is level side-to-side and slightly elevated in front to assist with door and drawer closing (front should be higher than back) Cabinet is setting solid on all corners Electrical Power House power turned ...
3 WARNING WARNING indicates a potentially hazardous situation which, if not avoided, could result in death or serious injury. IMPORTANT IMPORTANT indicates installation, oper- ation or maintenance information which is important but not hazard-related. DANGER DANGER indicates an imminently hazardous ...
4 IMPORTANT SAFETY INFORMATION IMPORTANT CFC/HCFC Disposal Some old refrigerators may have a cool- ing system that used CFCs or HCFCs (chlorofluorocarbons or hydrochloro- fluorocarbons). CFCs and HCFCs are believed to harm stratospheric ozone if released to the atmosphere. Other re- frigerants may a...
Manual Frigidaire GRQC2255BF


Frigidaire Refrigerators Manuals
-
 Frigidaire EFR749
User Manual
Frigidaire EFR749
User Manual
-
 Frigidaire EFR753-BLACK
User Manual
Frigidaire EFR753-BLACK
User Manual
-
 Frigidaire EFR753-MINT
User Manual
Frigidaire EFR753-MINT
User Manual
-
 Frigidaire EFR756-CREAM
User Manual
Frigidaire EFR756-CREAM
User Manual
-
 Frigidaire FFET1022UB
User Manual
Frigidaire FFET1022UB
User Manual
-
Frigidaire FFET1022UB
Manual
-
 Frigidaire FFET1022UV
User Manual
Frigidaire FFET1022UV
User Manual
-
Frigidaire FFET1022UV
Manual
-
Frigidaire FFET1022UV
Installation Manual
-
Frigidaire FFET1022UW
User Manual
-
Frigidaire FFET1022UW
Manual
-
 Frigidaire FFET1222UB
Manual
Frigidaire FFET1222UB
Manual
-
 Frigidaire FFET1222UV
User Manual
Frigidaire FFET1222UV
User Manual
-
Frigidaire FFET1222UV
Manual
-
 Frigidaire FFET1222UW
User Manual
Frigidaire FFET1222UW
User Manual
-
 Frigidaire FFHT1425VB
User Manual
Frigidaire FFHT1425VB
User Manual
-
Frigidaire FFHT1425VB
Installation Manual
-
Frigidaire FFHT1425VB
Manual
-
 Frigidaire FFHT1425VV
User Manual
Frigidaire FFHT1425VV
User Manual
-
Frigidaire FFHT1425VV
Installation Manual