Frigidaire FCWM3027AD - Manuals
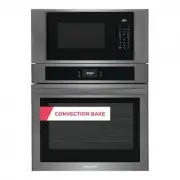
Frigidaire FCWM3027AD Oven – User Manual, Installation Manual, Manual in PDF format online.
Manuals:
User Manual Frigidaire FCWM3027AD


Installation Manual Frigidaire FCWM3027AD


Summary
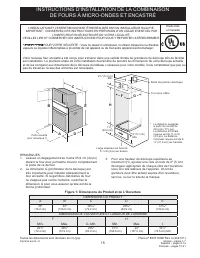
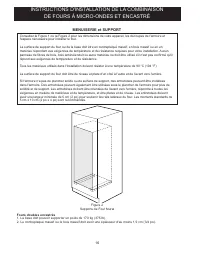
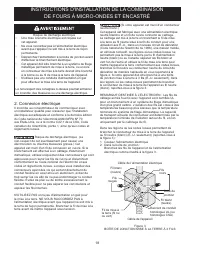
2 MICROWAVE/WALL OVEN COMBINATION INSTALLATION Microwave Combination 1. Base must be capable of supporting 375 pounds (170 kg). 2. Solid plywood or solid wood must be at least ¾” (1.9 cm) thick. CARPENTRY and SUPPORT Refer to Figure 1 for the dimensions of your appliance and the cabinet cutouts and ...
3 MICROWAVE/WALL OVEN COMBINATION INSTALLATION Important Notes to the Installer 1. Read all instructions contained in these installation instructions before installing the wall oven. 2. Remove all packing material from the oven compartments before connecting the electrical supply to the wall oven. 3...
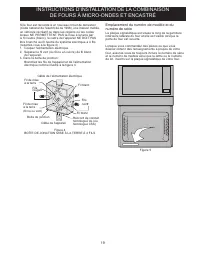
4 MICROWAVE/WALL OVEN COMBINATION INSTALLATION In cold weather shipping and storage conditions, make sure that oven is in final location at least three (3) hours before switching on power. Switching on power while oven is still cold may damage the oven controls. 2. Electrical connection It is the re...
Manual Frigidaire FCWM3027AD


Frigidaire Ovens Manuals
-
 Frigidaire FCWD2727AB
User Manual
Frigidaire FCWD2727AB
User Manual
-
Frigidaire FCWD2727AB
Manual
-
 Frigidaire FCWD2727AS
User Manual
Frigidaire FCWD2727AS
User Manual
-
Frigidaire FCWD2727AS
Manual
-
 Frigidaire FCWD2727AW
User Manual
Frigidaire FCWD2727AW
User Manual
-
Frigidaire FCWD2727AW
Manual
-
 Frigidaire FCWD3027AB
User Manual
Frigidaire FCWD3027AB
User Manual
-
Frigidaire FCWD3027AB
Manual
-
 Frigidaire FCWD3027AD
User Manual
Frigidaire FCWD3027AD
User Manual
-
Frigidaire FCWD3027AD
Manual
-
 Frigidaire FCWD3027AS
User Manual
Frigidaire FCWD3027AS
User Manual
-
Frigidaire FCWD3027AS
Manual
-
 Frigidaire FCWD3027AW
User Manual
Frigidaire FCWD3027AW
User Manual
-
Frigidaire FCWD3027AW
Manual
-
 Frigidaire FCWD302LAF
User Manual
Frigidaire FCWD302LAF
User Manual
-
 Frigidaire FCWM2727AB
User Manual
Frigidaire FCWM2727AB
User Manual
-
Frigidaire FCWM2727AB
Manual
-
 Frigidaire FCWM2727AS
User Manual
Frigidaire FCWM2727AS
User Manual
-
Frigidaire FCWM2727AS
Manual
-
 Frigidaire FCWM3027AB
User Manual
Frigidaire FCWM3027AB
User Manual