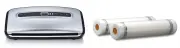
FoodSaver VS0420VS7850 - Manuals
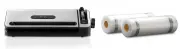
FoodSaver VS0420VS7850 Vacuum Sealer Machine – User Manual in PDF format online.
Manuals:
User Manual FoodSaver VS0420VS7850


Summary
2 • Read carefully and save all the instructions provided with an appliance. • Always turn the power off at the power outlet before you insert or remove a plug. Remove by grasping the plug - do not pull on the cord. • Turn the power off and remove the plug when the appliance is not in use and before...
4 Product Features Latch Control Panel Bag Cutter Retractable Accessory Adaptor Accessory Button Upper Foam Gasket Roll Cutter Bar Extra-Wide Sealing Strip Removable Drip Tray Vacuum Channel Marinate Button Roll Storage Lower Foam Gasket Appliance Lid Upper Seal Profile Bag Cutter Cutter Stabilizer ...
5 Accessory Button Latch Ac Moist Food Setting Button 7 Marinate Button 9 8 10 Vacuum & Seal Button 5 Seal Button 3 Seal Indicator Light 2 Power Indicator Light 1 Vacuum/Seal Indicator Light 4 Moist Food Indicator Light 6 1 Power Light Illuminates when Latch is in On position. Shuts off automati...
FoodSaver Vacuum Sealer Machines Manuals
-
 FoodSaver VS0310VS4500
User Manual
FoodSaver VS0310VS4500
User Manual
-
 FoodSaver VS0500VS4500
User Manual
FoodSaver VS0500VS4500
User Manual
-
 FoodSaver VS0520VS6100
User Manual
FoodSaver VS0520VS6100
User Manual
-
 FoodSaver VS0645VS4500
User Manual
FoodSaver VS0645VS4500
User Manual
-
 FoodSaver VS1300
User Manual
FoodSaver VS1300
User Manual
-
 FoodSaver VS2198
User Manual
FoodSaver VS2198
User Manual
-
 FoodSaver VS3198
User Manual
FoodSaver VS3198
User Manual
-
 FoodSaver VS4500
User Manual
FoodSaver VS4500
User Manual
-
 FoodSaver VS6100
User Manual
FoodSaver VS6100
User Manual
-
 FoodSaver VS7850
User Manual
FoodSaver VS7850
User Manual
-
 FoodSaver VS9000
User Manual
FoodSaver VS9000
User Manual