Fisher & Paykel RS60RDWX1 - Manuals
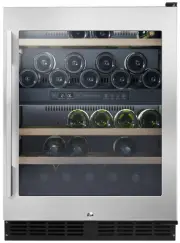
User Manual Fisher & Paykel RS60RDWX1


Summary
1 CONTENTS Introduction 3 Safety and warnings 4 Installation instructions 8 Moving or storing your appliance 12 Operating instructions – Internal control panel 13 Operating instructions – Special functions 14 Interior and exterior features 15 Storing your wine 16 Loading your wine bottles 17 Cleanin...
3 INTRODUCTION Thank you for purchasing a Fisher & Paykel Wine Cabinet to store your treasured wine, you’ve made a great choice. Having purchased our dual-zone cabinet you can rest assured that your red and white wines are well cared for, over short term and long term periods. Wine generally mat...
4 SAfETy AND wARNINGS ! wARNING! Electric Shock Hazard Read and follow the safety and warnings outlined in this user guide before operating this appliance. failure to do so can result in death, electric shock, fire or injury to persons. R600a This wine Cabinet contains flammable refrigerant isobutan...
Fisher & Paykel Refrigerators Manuals
-
 Fisher & Paykel C270LW
User Manual
Fisher & Paykel C270LW
User Manual
-
 Fisher & Paykel C270RS
User Manual
Fisher & Paykel C270RS
User Manual
-
 Fisher & Paykel C270RW
User Manual
Fisher & Paykel C270RW
User Manual
-
 Fisher & Paykel E249TLS
User Manual
Fisher & Paykel E249TLS
User Manual
-
 Fisher & Paykel E249TLW
User Manual
Fisher & Paykel E249TLW
User Manual
-
 Fisher & Paykel E249TRS
User Manual
Fisher & Paykel E249TRS
User Manual
-
 Fisher & Paykel E249TRW
User Manual
Fisher & Paykel E249TRW
User Manual
-
 Fisher & Paykel E308LW1
User Manual
Fisher & Paykel E308LW1
User Manual
-
 Fisher & Paykel E308RW1E373LW1
User Manual
Fisher & Paykel E308RW1E373LW1
User Manual
-
 Fisher & Paykel E331TRT3
User Manual
Fisher & Paykel E331TRT3
User Manual
-
 Fisher & Paykel E372BRE4
User Manual
Fisher & Paykel E372BRE4
User Manual
-
 Fisher & Paykel E373LW1
User Manual
Fisher & Paykel E373LW1
User Manual
-
 Fisher & Paykel E373R
User Manual
Fisher & Paykel E373R
User Manual
-
 Fisher & Paykel E373RW1
User Manual
Fisher & Paykel E373RW1
User Manual
-
 Fisher & Paykel E381TLT3
User Manual
Fisher & Paykel E381TLT3
User Manual
-
 Fisher & Paykel E381TRT3
User Manual
Fisher & Paykel E381TRT3
User Manual
-
 Fisher & Paykel E388LXFD1
User Manual
Fisher & Paykel E388LXFD1
User Manual
-
 Fisher & Paykel E402BRXFD5
User Manual
Fisher & Paykel E402BRXFD5
User Manual
-
 Fisher & Paykel E411TLT3
User Manual
Fisher & Paykel E411TLT3
User Manual
-
 Fisher & Paykel E411TLX3
User Manual
Fisher & Paykel E411TLX3
User Manual