Page 2 - • Do not attempt to operate this microwave
! WARNING! Precautions to avoid possible exposure to excessive microwave energy • Do not attempt to operate this microwave with the door open. This can result in harmful exposure to microwave energy. It is important not to damage or tamper with the safety interlocks. • Do not place any object betwee...
Page 3 - CONTENTS; Registration
3 CONTENTS Safety and warnings 5 Before you begin 10 Control panel 11 Accessories 12First use 13 Using the oven light 17 Using the timer 18 Cooking guide 19 Automatic cooking 22 Microwave cooking 24 Recipes 26Event logs 29 Troubleshooting 30Warranty and service 32 Registration To register your produ...
Page 5 - SAFETY AND WARNINGS; Electric Shock Hazard; Cut Hazard; Failure to use caution could result in injury.; Fire Hazard; Failure to follow this advice may result in
5 SAFETY AND WARNINGS ! WARNING! Electric Shock Hazard Failure to follow this advice may result in electric shock or death. • Before carrying out any work on the electrical section of the appliance, it must be disconnected from the mains electricity supply. • Connection to a good ground wiring syste...
Page 6 - Installation; READ AND SAVE THIS GUIDE
6 SAFETY AND WARNINGS WARNING! To reduce the risk of fire, electrical shock, injury to persons or damage when using the appliance, follow the important safety instructions listed below. Read all the instructions before use. Use only for its intended purpose as described in these instructions. Instal...
Page 7 - Food safety
7 SAFETY AND WARNINGS z During and after use, do not touch, or let clothing or other flammable materials contact any interior area of the oven; allow sufficient time for cooling first. z In case of fire, smother the flame or use a dry chemical or foam type extinguisher. z Use only dry oven mitts or ...
Page 8 - Microwave cooking
8 SAFETY AND WARNINGS z Do not spray water or use a steam cleaner to clean any part of the oven. Use only slightly damp cloths. Microwave cooking z Do not operate microwave functions while the oven is empty. z Do not operate microwave functions without the turntable in place. The turntable must be u...
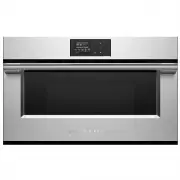
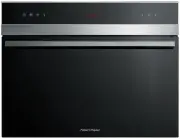
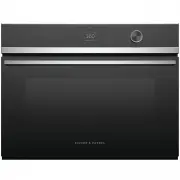
Page 10 - BEFORE YOU BEGIN; Oven features and accessories
10 BEFORE YOU BEGIN z Ensure the installer has completed the ‘Final checklist’ in the Installation instructions. z Read this guide, taking special note of the 'Safety and warnings' section. z Remove all internal and external packaging and dispose of it responsibly. Recycle items that you can. z Cond...
Page 11 - CONTROL PANEL; Control panel features; COOKING
11 CONTROL PANEL Control panel features 1 Display 2 Keypad 3 Cancel 4 Navigation arrow 5 Power 6 Confirm 7 Timer 8 Cavity light Using the touch controls Your oven is operated using a touch keypad and display. To use the keypad to navigate between functions and settings, use the ball of your finger, ...
Page 12 - ACCESSORIES
12 Wire shelf To remove, pull towards you and then lift. To insert, slide the shelf at a 45° angle until it locks. Then lower and push the shelf all the way to the end of the broil track. Turntable wire stand Slide the broil rack into the oven at a 45° angle ensuring it locks into place. Gently lowe...
Page 13 - FIRST USE
13 FIRST USE When using your oven for the first time, you will be prompted to: z change the time z change the clock format (12 hours or 24 hours) z change the units for temperature and weight z adjust the volume of audio feedback z change the language of the display These settings can be modified at...
Page 14 - After conditioning; Conditioning accessories; Conditioning the oven
14 After conditioning There will be a distinctive smell and a small amount of smoke during the conditioning process as manufacturing residue is burnt off. This is normal. Once cooled, wipe out the oven with a damp cloth and mild detergent, and dry thoroughly. Conditioning accessories Before using th...
Page 15 - Selecting and using a function
15 FIRST USE Selecting and using a function Enter the function menu by locating and pressing PM FRIDAY 20/11/2018 04:26 to select. 1 11:00 am COOKING Navigate to the desired cooking mode and press PM FRIDAY 20/11/2018 04:26 to select. 2 Use the PM FRIDA Y 20/11/2018 04:26 PM FRIDA Y 20/11/2018 04:26...
Page 16 - Editing or cancelling cooking; Cancelling cooking; Changing the function
16 FIRST USE Editing or cancelling cooking 11:00 am DEFROST BY WEIGHT 500g Cancelling cooking To cancel cooking, press PM FRIDAY 20/11/2018 04:26 then PM FRIDAY 20/11/2018 04:26 at any time. Changing the temperature Press PM FRIDAY 20/11/2018 04:26 then PM FRIDAY 20/11/2018 04:26 . Select and change...
Page 17 - Press; USING THE OVEN LIGHT; Turning the oven light; ON; or; OFF
17 Press PM FRIDAY 20/11/2018 04:26 at any time, or open the door. The oven lights will turn on automatically when the door is opened or a cooking mode has started. During cooking, the lights will automatically dim after three minutes. USING THE OVEN LIGHT Turning the oven light ON or OFF 1 11:00 a...
Page 18 - USING THE TIMER; Editing or cancelling the timer; and set the desired time; Press and hold
18 USING THE TIMER Editing or cancelling the timer Press PM FRIDAY 20/11/2018 04:26 and set the desired time using PM FRIDAY 20/11/2018 04:26 PM FRIDAY 20/11/2018 04:26 . To switch between hours and minutes use PM FRIDAY 20/11/2018 04:26 PM FRIDAY 20/11/2018 04:26 . To confirm, press PM FRIDAY 20/11...
Page 19 - COOKING GUIDE
19 COOKING GUIDE All oven functions default to the recommended temperature, these can be altered at any time. CONVECTION FUNCTION DEFAULT TEMPERATURE TEMPERATURE RANGE °C °C FAN HEAT 165 50 – 230 FAN HEAT + GRILL 210 50 – 230 TURBO GRILL + BASE HEAT 165 50 – 230 GRILL 230 50 – 230 MICROWAVE FUNCTION...
Page 20 - COVERINGS
20 COOKING GUIDE UTENSILS & COVERINGS MICROWAVE CONVECTION GRILL, SLOW COOK HIGH MIX/ROAST LOW MIX/BAKE Aluminum foil Yes Keep foil at least 25mm from walls of oven. No No Aluminum containers Yes . Can be used if 3/4 filled with food. Keep 25mm away from walls and do not cover with foil. Yes . G...
Page 22 - AUTOMATIC COOKING; Setting automatic cooking; When the end time is reached
22 AUTOMATIC COOKING To use automatic cooking modes ensure the clock is displaying the correct time. Refer to 'First use' for setting the time. Use the automatic cooking function to set the oven to turn off after a set length of time. Setting automatic cooking Select the cooking mode and temperature...
Page 23 - Editing or cancelling automatic cooking; Changing the cook time; Changing the end time
23 AUTOMATIC COOKING Editing or cancelling automatic cooking Changing the cook time Press PM FRIDAY 20/11/2018 04:26 and change the desired cook time using PM FRIDAY 20/11/2018 04:26 PM FRIDAY 20/11/2018 04:26 . Press PM FRIDAY 20/11/2018 04:26 to confirm. Changing the end time Press PM FRIDAY 20/11...
Page 24 - MICROWAVE COOKING; Setting defrost by time; Using; Set the defrost time by using
24 MICROWAVE COOKING Setting defrost by time Microwave cooking functions can be selected from the home screen. During microwave cooking a countdown will show on the display. Press (up down arrows) at any point to adjust the cook time. Using PM FRIDAY 20/11/2018 04:26 PM FRIDAY 20/11/2018 04:26 , sel...
Page 25 - Setting defrost by weight
25 MICROWAVE COOKING Setting defrost by weight Using PM FRIDAY 20/11/2018 04:26 PM FRIDAY 20/11/2018 04:26 , select Press PM FRIDAY 20/11/2018 04:26 to confirm. Press to select a food type. Set the weight by using PM FRIDAY 20/11/2018 04:26 PM FRIDAY 20/11/2018 04:26 . Press PM FRIDAY 20/11/2018 04:...
Page 26 - Using recipes; RECIPES
26 The recipe function has been designed to help achieve optimal oven conditions for cooking a particular food type. When in use, the function, temperature and time are set automatically and any additional details are displayed on screen. Recipes can be added to a personal recipe list for quick acce...
Page 27 - When recipe is complete
27 RECIPES Press PM FRIDAY 20/11/2018 04:26 PM FRIDAY 20/11/2018 04:26 to refine food selection. Press PM FRIDAY 20/11/2018 04:26 to confirm. MEAT WHOLE PIECES 4 Select a recipe by pressing PM FRIDAY 20/11/2018 04:26 PM FRIDAY 20/11/2018 04:26 . Press PM FRIDAY 20/11/2018 04:26 to confirm. MEAT STUF...
Page 28 - Saving a recipe; Removing a personalized recipe
28 RECIPES Saving a recipe Commonly used recipes can be adjusted and saved for quick access. These can be found under PERSONAL recipes. Use PM FRIDAY 20/11/2018 04:26 to navigate to weight or cook time. Press PM FRIDAY 20/11/2018 04:26 to confirm. STUFFED PORK ROAST Start Save Rectangular gridLevel ...
Page 29 - EVENT LOGS
29 EVENT LOGS Select and press PM FRIDAY 20/11/2018 04:26 to confirm. Select and press PM FRIDAY 20/11/2018 04:26 to confirm. Press PM FRIDAY 20/11/2018 04:26 PM FRIDAY 20/11/2018 04:26 choose from the available options. Press PM FRIDAY 20/11/2018 04:26 to confirm. 2 3 The system menu allows access ...
Page 30 - TROUBLESHOOTING; PROBLEM
30 TROUBLESHOOTING If there is a problem with your oven, please check the following, before contacting a Fisher & Paykel trained and supported service technician or Customer Care. PROBLEM POSSIBLE CAUSES / SOLUTION Food browns unevenly. Oven is not preheated. Aluminum foil on oven rack or oven b...
Page 32 - WARRANTY AND SERVICE; To access your Warranty and Service Guide; NZ; Complete and keep for safe reference:
32 WARRANTY AND SERVICE To access your Warranty and Service Guide Scan the QR code with your smartphone to access your warranty and book a service, or view online at https://www.fisherpaykel.com/nz/help-and-support/warranty-information This product has been designed for use in a domestic (residentia...