Page 3 - CONTENTS; SAVE THESE INSTRUCTIONS; Registration
1 CONTENTS IMPORTANT! SAVE THESE INSTRUCTIONS The models shown in this user guide may not be available in all markets and are subject to change at any time. For current details about model and specification availability in your country, please go to our local website listed on the back cover or cont...
Page 5 - SAFETY AND WARNINGS; IMPORTANT SAFETY INSTRUCTIONS
3 SAFETY AND WARNINGS ! WARNING! Electric Shock Hazard All electrical work must be done in accordance with local and/or national electrical codes as applicable. If you are unfamiliar with methods of installing electrical wiring, employ the services of a qualified electrician. Turn off power at servi...
Page 7 - Contents of packaging
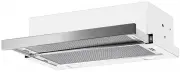
5 INSTALLATION INSTRUCTIONS Contents of packaging Screw M6 x 40 mm (incl. washer)(4) Rangehood (1) Installation instructions User guide manual(1) Spacer Rear (2) Spacer Lateral (2) Ducting adapter – rear extraction (1) Duct hole covers (2) Ducting adapter – top extraction (1) Built-in Slideout Range...
Page 9 - Panel heights; top of cooktop to base of rangehood)
7 INSTALLATION INSTRUCTIONS Height of rangehood Please read the entire instructions BEFORE installing the rangehood. ● ● Ascertain the desired installation height of the rangehood. ● ● When installing the rangehood, the lower edge of the unit must be a minimum of 600 mm above electric cooktop surfac...
Page 10 - Venting options; Ducted
8 INSTALLATION INSTRUCTIONS Venting options Attention should be given to ensure that any applicable regulations concerning the discharge of exhaust air are fulfilled. Ducted We recommend rangehoods be vented outside, recirculating installation is recommended only when vented installation is not poss...
Page 11 - Failure to install the screws or; Preparing the rangehood for installation:; Fig.2 Mounting to underside of cabinetry; Fig.1 Preparing for install
9 INSTALLATION INSTRUCTIONS WARNING! Failure to install the screws or fixing device in accordance with these instructions may result in electrical hazards. Installation 1 Preparing the rangehood for installation: ● ● Before commencement, unpack the rangehood and check that it functions correctly. ● ...
Page 12 - Control panel features; Left hand side; Operating instructions; extension so as to optimise the extraction capacity.; II; High speed; OPERATING INSTRUCTIONS
10 Control panel features Fig.5 Light switch Light switch: the light can be operated independently from the fan. Left hand side Fig.6 Fan switch Fan switch: the fan can be run at different speeds depending on the cooking requirements. Right hand side Operating instructions 1 Pull out the front panel...
Page 13 - CLEANING AND MAINTENANCE; Never use abrasive or oil based cleaners.; Aluminium filter
11 CLEANING AND MAINTENANCE WARNING! Unplug or disconnect the appliance from the power supply before servicing or cleaning. IMPORTANT! ● ● Never use abrasive or oil based cleaners. ● ● Wear gloves to protect against sharp edges. General maintenance The manufacturer is not liable for any damage cause...
Page 14 - Carbon filter for all recirculating installations; C B; Fig.7 carbon filter replacement; Light bulb replacement
12 CLEANING AND MAINTENANCE WARNING! When replacing the bulb, let the bulb cool, and assure that power to the rangehood has been turned off. Use new bulbs according to that indicated on the rangehood nameplate. Carbon filter for all recirculating installations (Optional: HS60LXW4, HS60XW4, HS90X4)(W...
Page 15 - PARTS AND ACCESSORIES; ACCESSORY; Recirculation charcoal filter x2
13 PARTS AND ACCESSORIES ACCESSORY PART NUMBER Replacement aluminium filter x2 (HS60) 792391 Replacement aluminium filter x2 (HS90) 792392 Recirculation charcoal filter x2 792390 Halogen bulb 792461 Ducting kit 125 mm (eaves) PD-RHK125E Ducting kit 125 mm (wall) PD-RHK125W Ducting kit 125 mm (roof) ...
Page 16 - MANUFACTURER’S WARRANTY; This Manufacturer’s Warranty DOES NOT cover
MANUFACTURER’S WARRANTY 14 You automatically receive a 2 year Manufacturer’s Warranty with the purchase of this Slideout rangehood covering parts and labour for servicing within the country of purchase. Fisher & Paykel undertakes to: Repair or, at its option, replace without cost to the owner ei...
Page 17 - For Australian customers; Please keep this user guide in a safe place.
15 MANUFACTURER’S WARRANTY For Australian customers This Manufacturer’s Warranty is an extra benefit and does not affect your legal rights. Our goods come with guarantees that cannot be excluded under the Australian Consumer Law. You are entitled to a replacement or refund for a major failure and fo...
Page 18 - CUSTOMER CARE; Your product is correctly installed.; In New Zealand if you need assistance...*; If you need service...*; In Australia if you need assistance...*; Fisher & Paykel Appliances Ltd, PO Box 798, Cleveland QLD 4163
16 CUSTOMER CARE Before you call for service or assistance... Check the things you can do yourself. Refer to your user guide and check that: 1 Your product is correctly installed. 2 You are familiar with its normal operation. If after checking these points you still need assistance or parts, please ...
Page 19 - Complete and keep for safe reference:
17 Complete and keep for safe reference: Model Serial No. Purchase Date Purchaser Dealer Suburb Town Country CUSTOMER CARE