Page 2 - Contents Page; Important; Your; Installation; Preparation; Operating; Maintenance and cleaning; Troubleshooting
Contents Page 1. Important i nstructions for safety and environment 1.1 1.1.1 1.1.2 1.2 1.3 1.4 1.5 1.6 1.7 1.8 General SafetyElectrical Safety Product Safety Stacking over a washing machine Intended UseChild Use Compliance with the WE E E regulations and disposing of the waste product Compliance wi...
Page 3 - Please read this user manual first!; Explanation of symbols; NOTE
Please read this user manual first! Dear Customer, Thank you for preferring a Euromaid product. We hope that your product which has been manufactured with high quality and technology will give you the best results. We advise you to read through this manual and the other accompanying documentation ca...
Page 4 - Important instructions for safety and environment; Authorised Service Agent.; For the products with a steam
4 Dryer / User Manual 1 Important instructions for safety and environment C NOTE • This section contains safety instructions that will help protect from risk of personal injury or property damage. Failure to follow these instructions shall void any warranty. 1.1 General safety A WARNING! • This appl...
Page 5 - Points to be taken into
5 1.1.1 Electrical safety B DANGER! • Electrical safety instructions should be followed while electrical connection is made during the installation. • The appliance must not be supplied through an external switching device, such as a timer,or connected to a circuit that is regularly switched on and ...
Page 8 - cm
8 Dryer / User Manual Installation Table for Washing Machine and Dryer Dryer Depth Washing Machine Depth 62 cm 60 cm 54 cm < 50 cm 54 cm Can be installed Cannot be installed 60 cm Can be installed Cannot be installed 1.3 Intended use • Dryer has been designed for domestic use. It is not suitable ...
Page 9 - Technical Specifications; Width; Max. height: Height with adjustable feet are
9 1.8 Technical Specifications EN Height (Min. / Max.) 84,6 cm / 86,6 cm* Width 59,7 cm Depth 56,8 cm Capacity (max.) 7 kg** Net weight (± %10) 44 kg Voltage See type label*** Rated power inputModel code * Min. height: Height with adjustable feet are closed. Max. height: Height with adjustable feet ...
Page 10 - Your Dryer; Installation
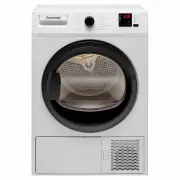
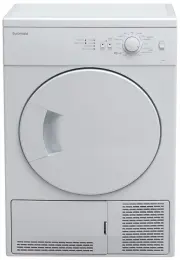
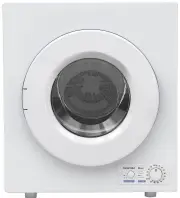
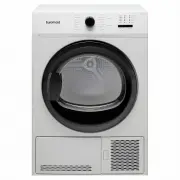
1 0 Dryer / User Manual 2 Your Dryer 11 10 1 2 3 4 5 6 7 8 9 2.1 Overview 1. Top panel 2. Control panel 3. Loading door 4. Kick plate opening button 5. Ventilation grids 6. Adjustable legs 7. In models where the tank is placed below, the water tank is inside the toe board 8. Type label 9. Lint filte...
Page 11 - It is hazardous for anyone other than; Removing the transportation; Connecting the water drain hose
1 1 • The rear surface of the tumble dryer shall be placed against a wall. B DANGER! Do not place the dryer on the power cable. * Ignore following warning if your product’s system does not contains R290. DANGER! • Dryer contains R290 refrigerant.* • R290 is an environment-friendly, but flammable ref...
Page 13 - Preparation
1 3 4 Preparation the condenser once in a month or after every 30 operations regularly. • Clean the filter periodically.Read the Maintenance and cleaning of filters for detalied information. • For models with flue unit: comply with the flue connection instructions and clean the flue. • During the dr...
Page 14 - Operating the product; ryness; Pause; Delay Start
1 4 Dryer / User Manual 5 Operating the product 5.1 Control Panel 4. D ryness 5. Alarm Duration Select the desired program using the On/Off/ Program selection knob, the machine will turn on. C NOTE • Selecting a program using the On/Off/ Program selection button does not mean that the program starte...
Page 15 - Program selection and consumption chart
1 5 5.4 Program selection and consumption chart EN Programmes Programme Description Capacity (kg) Spin speed in washing machine (rpm) Drying Time (minutes) Cottons Iron Dry You may dry your cotton laundry to be ironed in this program to have them slightly damp for ease of ironing. (Shirt, T-shirt, t...
Page 17 - Changing the delay start time; Filter cleaning; Level
1 7 Changing the delay start time If you want to change the duration during the countdown: Cancel the program by turning the On/Off/ Program selection knob. Select the program you want and repeat the Delay Start s election process. Cancelling the end time function If you want to cancel the Delay Sta...
Page 20 - Maintenance and cleaning; Door Inner Surface
2 0 Dryer / User Manual 6 Maintenance and cleaning Service life of product extends and frequently experienced problems will be reduced if it is cleaned at regular intervals. A WARNING! • Please unplug your product before performing maintenance and cleaning instructions. (eg control panel, body, etc....
Page 24 - Manufacturee Guarantee
This warranty is provided in Australia by Glen Dimplex Australia Pty Limited ABN 69 118 275 460 (Phone number 1300 556 816) and in New Zealand by Glen Dimplex New Zealand Limited NZBN 9429000069823 (Phone number 09 274 8265) in respect of the Euromaid product. 1. Euromaid Express Warranty Subject to...
Page 28 - designs of their products.; Glen Dimplex Australia Pty Ltd
READ THE INSTRUCTION BOOKLET BEFORE INSTALLING AND USING THE APPLIANCE . The manufacturer will not be responsible for any damage to property or to persons caused by incorrect installation or improper use of the appliance.The manufacturer is not responsible for any inaccuracies, due to printing or tr...