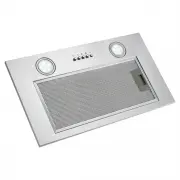
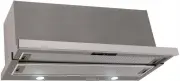
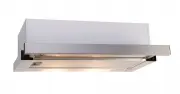
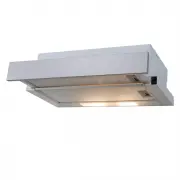
Euro Appliances ERB120SS - Manuals
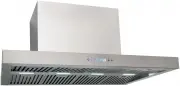
User Manual Euro Appliances ERB120SS


Summary
1 CONTENT 2……………………………………….Notice 3………………………………………..Installation 5………………………………………..Notice of installation 6…………………………………………Use 7………………………………………..Safety Warning 8…………………………………………Maintenance 10…………………………………………Abnormity and Solution
2 NOTICE 1. Thank you for choosing our cooker hood. Please read the instruction manual carefully before use. 2. The installation work must be undertaken by a qualified and competent fitter. 3. The manufacturer disclaims all liability for any damage or injury caused as a result of not following instr...
3 (1) INSTALLATION 1. The cooker hood should be placed at a distance of 65-75cm (26-30inch) from the cooking surface for the best effect. 2. After deciding the installation height of the hood, drill 6 x Φ 8 holes according to pic 2 . 3. Put the plugs into the 2 bracket holes and 2 safety holes, and ...
Euro Appliances Range Hoods Manuals
-
 Euro Appliances EA60STRS
User Manual
Euro Appliances EA60STRS
User Manual
-
 Euro Appliances EA60XR
User Manual
Euro Appliances EA60XR
User Manual
-
 Euro Appliances EA90STRS
User Manual
Euro Appliances EA90STRS
User Manual
-
 Euro Appliances EAF600WH
User Manual
Euro Appliances EAF600WH
User Manual
-
 Euro Appliances EAGL90SX
User Manual
Euro Appliances EAGL90SX
User Manual
-
 Euro Appliances EBB900SS
User Manual
Euro Appliances EBB900SS
User Manual
-
 Euro Appliances EBB900SS2
User Manual
Euro Appliances EBB900SS2
User Manual
-
 Euro Appliances EM70UMS
User Manual
Euro Appliances EM70UMS
User Manual
-
 Euro Appliances EP52UMS2
User Manual
Euro Appliances EP52UMS2
User Manual
-
 Euro Appliances EP900ISX2
User Manual
Euro Appliances EP900ISX2
User Manual
-
 Euro Appliances EP900SWSX
User Manual
Euro Appliances EP900SWSX
User Manual
-
 Euro Appliances EP900UMS
User Manual
Euro Appliances EP900UMS
User Manual
-
 Euro Appliances ERH85UMS
User Manual
Euro Appliances ERH85UMS
User Manual
-
 Euro Appliances ERH900HSL
User Manual
Euro Appliances ERH900HSL
User Manual
-
 Euro Appliances ERH900HSL2
User Manual
Euro Appliances ERH900HSL2
User Manual
-
 Euro Appliances ERH900SLX
User Manual
Euro Appliances ERH900SLX
User Manual
-
 Euro Appliances ERH900SLX2
User Manual
Euro Appliances ERH900SLX2
User Manual
-
 Euro Appliances ES602SS
User Manual
Euro Appliances ES602SS
User Manual
-
 Euro Appliances ES602SS2
User Manual
Euro Appliances ES602SS2
User Manual
-
 Euro Appliances EVR60FVSS
User Manual
Euro Appliances EVR60FVSS
User Manual