Euro Appliances EMEO60SX - Manuals
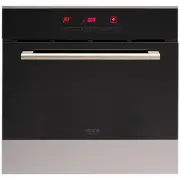
User Manual Euro Appliances EMEO60SX
1

2

3

4

5

6

7

8

9

10

11

12

13

14

15

16

17

18

19

20

21

22

23

24

25

26

27

28

Summary
Page 4 - GENERAL WARNINGS - INSTALLATION / REPAIRS; GENERAL WARNINGS - FIRST TIME THE OVEN IS USED -
GENERAL WARNINGS - INSTALLATION / REPAIRS THE MANUFACTURER DECLINES ALL RESPONSIBILITY FOR ANY DAMAGE TO PEOPLE OR ITEMS CAUSED BY INCORRECT INSTALLATION OR IMPROPER, WRONG OR ABSURD USE OF THE APPLIANCE. o Warning: earth connection is required by law. o HOOK-UP : check that the operating specificat...
Page 5 - CONNECTION TO MONO-PHASE ELECTRICITY
o Do not touch the appliance with damp or wet hands or feet. o Do not pull on the power supply cable, or the appliance itself, to remove the plug from the mains power socket. o Hot grease and fat catch fire easily. Be careful. Never try to put out burning oil or fat with water (danger of explosion);...
Page 7 - Installation scheme:
Euro Appliances Ovens Manuals
-
 Euro Appliances ECSH900AN
User Manual
Euro Appliances ECSH900AN
User Manual
-
 Euro Appliances ECSH900BG
User Manual
Euro Appliances ECSH900BG
User Manual
-
 Euro Appliances ECSH900SX
User Manual
Euro Appliances ECSH900SX
User Manual
-
 Euro Appliances EFS900DTSX
User Manual
Euro Appliances EFS900DTSX
User Manual
-
 Euro Appliances EFS900EETSX
User Manual
Euro Appliances EFS900EETSX
User Manual
-
 Euro Appliances EFS900GX
User Manual
Euro Appliances EFS900GX
User Manual
-
 Euro Appliances EFS900LDX
User Manual
Euro Appliances EFS900LDX
User Manual
-
 Euro Appliances EFS90GFSX
User Manual
Euro Appliances EFS90GFSX
User Manual
-
 Euro Appliances EMCM45SX
User Manual
Euro Appliances EMCM45SX
User Manual
-
 Euro Appliances EMD900FAN
User Manual
Euro Appliances EMD900FAN
User Manual
-
 Euro Appliances EMD900FBG
User Manual
Euro Appliances EMD900FBG
User Manual
-
 Euro Appliances EMD900FX
User Manual
Euro Appliances EMD900FX
User Manual
-
 Euro Appliances EMEO45SX
User Manual
Euro Appliances EMEO45SX
User Manual
-
 Euro Appliances EMPY60SX
User Manual
Euro Appliances EMPY60SX
User Manual
-
 Euro Appliances EMST45SX
User Manual
Euro Appliances EMST45SX
User Manual
-
 Euro Appliances EO604SX
User Manual
Euro Appliances EO604SX
User Manual
-
 Euro Appliances EO608SX
User Manual
Euro Appliances EO608SX
User Manual
-
 Euro Appliances EO60MXS
User Manual
Euro Appliances EO60MXS
User Manual
-
 Euro Appliances EO8060DX
User Manual
Euro Appliances EO8060DX
User Manual
-
 Euro Appliances EO900MX
User Manual
Euro Appliances EO900MX
User Manual