Page 5 - Technical specifications; This product meets the requirements of all applicable; Important Note for User:For softcopy of this user manual,
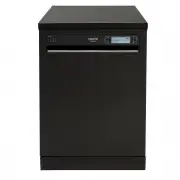
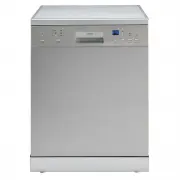
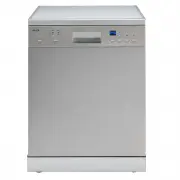
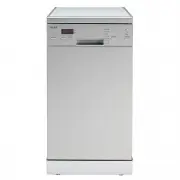
4 Capacity 1 5 place settings Height 8 50 mm Height (without worktop) 8 20 mm Width 59 8 mm Depth 598 mm Net Weight 50 kg Electricity input 220-240 V, 50 Hz Total Power 19 00 W Heating Power 18 00 W Pump Power 100 W Drain Pump Power 30 W Water supply pressure 0.03 MPa (0,3 bar) -1 MPa (10 bar) Curre...
Page 6 - SAFETY INFORMATION AND RECOMMENDATIONS; Recycling; The points to pay attention during machine installation
5 SAFETY INFORMATION AND RECOMMENDATIONS Recycling • Certain components and the packaging of your machine have been produced from recyclable materials. • Plastic parts are marked with international abbreviations: (>PE< , >PS< , >POM<, >PP<, ) • Cardboard parts have been produ...
Page 7 - - Staff kitchen areas in shops, offices and other working; - Staff kitchen areas in shops, offices and other working
6 • Check whether the indoor electrical fuse system is connected according to the regulations. • All electrical connections must match the values indicated on the rating plate. • Pay special attention and be sure that the machine does not stand on the electricity supply cable. • Never use an extensi...
Page 11 - INSTALLING THE MACHINE
10 Position the machine close to a water tap or drain. You need to site your machine, taking into consideration that its connections will not be altered once they are made. Do not grip the machine by its door or panel in order to move it. Take care to leave a certain clearance from all sides of the ...
Page 12 - Water inlet hose; old machine,if any. Use the new water inlet; NOTE: Aquastop water spout is used; Be sure that the indoor plumbing is suitable for installing a
11 Water inlet hose Do not use the water inlet hose of your old machine,if any. Use the new water inlet hose supplied with your machine instead. If you are going to connect a new or long - unused water inlet hose to your machine ,run water through it for a while before making the connection. Connect...
Page 13 - Water outlet hose; or to the sink outlet spigot. Using a
12 Water outlet hose The water drain hose can be connected either directly to the water drain hole or to the sink outlet spigot. Using a special bent pipe (if available), the water can be drained directly into the sink via hooking the bent pipe over the edge of the sink. This connection should be at...
Page 14 - Electrical connection; Your machine is set according to 220-240 V. If the mains
13 Electrical connection The earthed plug of your machine should be connected to an earthed outlet supplied by suitable voltage and current. If there is no earthing installation, have a competent electrician carry out an earthing installation. In case of usage without earthing installed, our company...
Page 15 - worktop which are located at the rear of the machine then
1 4 Fitting the machine undercounter If you wish to fit your machine undercounter, check whether you have sufficient space under your countertop and whether the wiring-plumbing is suitable to do so. 1 If you decide that the space under the countertop is suitable for fitting your machine, remove the ...
Page 16 - Warning: After removal of worktop, the machine should be; placed in such a closed place of which dimensions are shown
1 5 Adjust the machine feet according to the slope of the floor. 3 Fit your machine by pushing it undercounter without letting the hoses get crushed or bent. 4 Warning: After removal of worktop, the machine should be placed in such a closed place of which dimensions are shown at fig. H Without Ins...
Page 17 - PREPARING THE MACHINE FOR USE
Prior to using the machine for the first time • Check whether the electricity and supply water specifications match the values indicated by the installation instructions for the machine. • Remove all packaging materials inside the machine. • Fill the rinse aid compartment. 1 6 Detergent usage Use a ...
Page 20 - LOADING YOUR DISHWASHER
1 9 If you properly place your dishes into the machine, you will be using it in the best way in terms of energy consumption, washing and drying performance. There are two separate baskets for you to load your dishes into your machine. You can load into the lower basket such round and deep items as p...
Page 25 - PROGRAM DESCRIPTIONS
18 1 38 50 113 0.57 0, 65 1,2 1 1, 3 3 7,7 12,2 10,7 7 15,4 15 0,02 4,2 121 46 93 0, 62 1,2 1 1, 28 12,2 10, 7 11,1 0,74 10,9 30 Program Period ( minutes ) Power Consumption (kW hour) Water Consum- ption (liters) 79- 91 0, 70-0,89 10,6-17,7 15 0,02 4,2 18 0.57 7,7 0,74 10,9 30 62- 79 0,67- 0,8 6 9,9...
Page 26 - Selection of Program and Starting of the Machine; a b c d
2 5 Selection of Program and Starting of the Machine 2 7 6 5 4 3 8 1-On/Off 2-Door Handle 3-Confirmation Button 4-Option Button 5-Delay Button 6-Start/Pause button 7-Up Selection Button 8-Down Selection Button 9-Extra Hygiene Indicator 10-Tablet Indicator 11-Half Load Indicator 12-Extra Fast Indicat...
Page 27 - BUTTONS
2 6 1 2 3 4 5 6 7 8 9 10 11 Power On/Off Button When you press the on/off button, the machine is energized and the display shows the last used program; in the off position, the L C D on the display are off. Door Handle Please use the door handle to open-close the door of your machine. Confirmation B...
Page 28 - Silent Function; Extra Drying function
2 7 12 13 14 1 5 Extra Fast Function Washes the dishes with more pressure, thus shortens the time of the selected program and provides economical water usage. Extra Silent Function Washes the dishes with less pressure, thus provides more sensitive and silent washing. Extra Drying function With extra...
Page 29 - “Program Activated”
2 8 Selection of Program and Starting of the Machine 1- Press Power On/Off switch. Note: Select your washing program appropriate for your dishes by the help of the program items page in the user guide. 2- You may select the washing program by using up/down (7,8) selection buttons. Note: You may foll...
Page 32 - Changing the Program; Cancelling the Program
3 1 Options Delay Start Half Load ( 3 modes ) Tablet Child Lock Extra Fast Extra Hygiene Extra Silent Extra Drying Delay Start OK OK OK OK OK OK OK Half Load ( 3 modes ) OK OK OK OK OK OK OK Tablet OK OK OK OK OK OK OK Child Lock OK OK OK OK OK OK OK Extra Fast OK OK OK OK - - OK Extra Hygiene OK OK...
Page 34 - Child Lock
3 3 4- Brightness level You may adjust the level of your machine’s display brightness here After entering the menu, select the “4- Brightness” by using the selection buttons. Here you will see “brightness :X” (X:L1,L2,L3 ). L1 is the lowest, L3 is the highest brightness level. select the desired bri...
Page 35 - Changing the programme or function on delay; If you want to cancel the delay setting; Warning Messages
3 4 Delayed Start:(Snooze) You may delay the starting time of the selected programme up to 24 hours. You can not make a delay setting after the programme starts. In order for you to be able to make a delay setting, the selected programme needs not to be in operation.1- Press the delay button (5) 2- ...
Page 36 - MAINTENANCE AND CLEANING
Cleaning the machine in regular intervals prolongs the machine’s service life. Oil and lime may accumulate in the machine’s washing section. In case of such accumulation -Fill the detergent compartment without loading any dishes into the machine, select a programme that runs at high temperature, and...
Page 40 - PRACTICAL AND USEFUL INFORMATION
If the dishes won't dry up • A programme without a dry operation selected. • Rinse aid dosage set too low • Dishes unloaded too f ast. If there are rust stains on the dishes • Stainless-steel quality of the dishes washed is insufficient. • Unhealthy mains grounding. Call an authorised service if the...
Page 41 - Two Year Warranty On Euro Appliances
521 9XXXX R2 3 Head Office Eurostyle Group Pty Ltd 6 Pattinson Road Newton S.A. 5074 Ph. 1800 440 335 Ph (08) 8165 1012 Fax: (08) 8165 1018 Two Year Warranty On Euro Appliances Warranty Subject to the exclusions and limitations set out below we warrant to you that if you purchase Euro Appliances fro...