Page 3 - ASSISTANCE AND SPARE PARTS; on the label affixed to the packing box.; IMPORTANT NOTICE; accessible surface near by the appliance for easy reference.; DOMESTIC USE ONLY; CONTENTS
3 ASSISTANCE AND SPARE PARTS Before this appliance left the factory it was tested and set by specialized, expert personnel in order to guarantee the best functioning results.Any subsequent repairs or adjustments that may be necessary must be done with the maximum of care and attention by authorised ...
Page 7 - PRESENTATION; Our cooker is fitted with a fully gas; Our cookers are fitted with a electric; DESCRIPTION OF THE APPLIANCE; do not attempt to repair; following accessories:; • 2 x safety anti tip shelves. Ensure
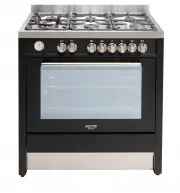
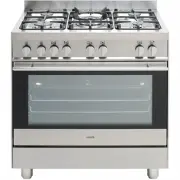
7 461308373 01/2015 PRESENTATION Our cooker is fitted with a fully gas hotplate. This innovative burner hotplate offers you more scope and versatility in hotplate cooking than ever before. The round burners are graduated in their size and output to provide the exact heat required for every style of ...
Page 8 - DESCRIPTION OF THE CONTROLS; RED WARNING LIGHT
8 DESCRIPTION OF THE CONTROLS HOB GAS BURNER KNOB (A) By rotating the knob in an anticlockwise direction, the following symbols appear: = Closed position= “Full on” position= “Reduced rate or Low” position OVEN ELECTRIC THERMOSTAT KNOB (C) By turning the oven knob clockwise we will find the differen...
Page 9 - icon
9 ANALOGIC PROGRAMMER GENERAL OPERATION Pushing on the knob, you can: adjust the time, pro- gram the start time and end of cooking, set the alarm (Minute Minder). SETTING THE TIME OF DAY To adjust the clock press the knob briefly 4 times until you get the flashing of the “ CLOCK” icon.Hence to incre...
Page 10 - INSTRUCTIONS FOR THE USER; HOB: GENERAL NOTES ON SAFETY
10 INSTRUCTIONS FOR THE USER HOB: GENERAL NOTES ON SAFETY • When using the burners, do not leave the appliance unsupervised. Ensure that children and the infirm do not play with the appliance. In particular, make sure that pan handles are positioned correctly and supervise the cooking of foods which...
Page 11 - • When grilling always put a little water in the grill; • WARNING - During and after use, the oven
11 INSTRUCTIONS FOR THE USER 6 8 5 7 • Never cover the base of the oven or the oven shelf with aluminium foil or other materials, as this creates a fire hazard. • When grilling always put a little water in the grill pan. The water prevents the grease from burning and from giving off bad smells and s...
Page 12 - OVEN: GENERAL SAFETY INSTRUCTIONS
12 INSTRUCTIONS FOR THE USER OVEN: GENERAL SAFETY INSTRUCTIONS • Do not leave the oven unsupervised during use. Ensure that children and the infirm do not play with the appliance. • Do not spray aerosols in the vicinity of this appliance while it is operating. • Always grip the centre of the oven do...
Page 13 - HOW TO USE THE MULTIFUNCTION OVEN
13 HOW TO USE THE MULTIFUNCTION OVEN DEFROSTING AT ROOM TEMPERATURE Turn the selector knob to the symbol and place the food you want to defrost inside the oven. The length of time required depends on the quantity and type of food. Selecting this function will only activate the fan. Mild air circulat...
Page 14 - TIME AND TEMPERATURE CHART; • Remenber to remove grill tray from oven before baking in oven.; RETAIN THIS CHART FOR EASY REFERENCE; size of the meat and the other foods to be cooked at the same time.
14 INSTRUCTIONS FOR THE USER TIME AND TEMPERATURE CHART The above table gives guidelines for cooking a range of different foods, individual food, or personal preferences may slightly vary the oven position, temperature and cooking time from those suggested. Please note that: • All cooking temperatur...
Page 15 - USEFUL COOKING TIPS
15 INSTRUCTIONS FOR THE USER USEFUL COOKING TIPS Cakes and bread: • Heat the oven for at least 15 minutes before you start cooking bread or cakes. • Do not open the door during baking because the cold air would stop the yeast from rising. • When the cake is cooked turn the oven off and leave it in f...
Page 16 - CLEANING AND MAINTENANCE; burners and the relative burner caps, are; OVEN CAVITY; To allow for a better cleaning of the side grids,
16 9 INSTRUCTIONS FOR THE USER CLEANING AND MAINTENANCE HOT PLATEThe burner caps and burner heads need to be cleaned after each time they are used with warm soapy water, rinsed and then dried well to keep them in good condition.WARNINGS:• After cleaning, check that the heads burners and the relative...
Page 18 - TECHNICAL INFORMATION; UNPACKING YOUR COOKER; TROUBLESHOOTING
18 TECHNICAL INFORMATION • The installations, conversions and maintenance operations listed in this part must only be carried out by authorised personnel. The manufacturer cannot be held responsible for any damage to persons or property resulting from an incorrect installation of the appliance. • If...
Page 19 - INSTRUCTIONS FOR THE INSTALLER; LEVELLING THE COOKER
19 14 INSTRUCTIONS FOR THE INSTALLER POSITION (fig. 14) The appliance should be positioned in good light and free from draughts. Any adjoining wall surface situated within 200 mm from the edge of any hob burner must be a suitable non-combustible material for a height of 150 mm for the entire length ...
Page 21 - INSTRUCTION FOR STABILIZING THE COOKER; Fix the bracket on the cooker.; WARNING; must be installed as indicated below.
21 INSTRUCTION FOR STABILIZING THE COOKER Fix the bracket on the cooker. One for each side. Align the cooker with the surrounding cupboard. Measure the distance from the floor and from the fixing point of the bracket.( X ) WARNING : In order to prevent the cooker tipping forwards in the event of chi...
Page 22 - Hose Restraint Chain; Mark it the same dis
22 Drill two holes in the wall for each bracket according to the fig. 2 and fix the bracket. Hose Restraint Chain The installer must fit a chain, no more than 80% of the hose length to ensure that there is no strain on the hose when the cooker is pulled forward. Attach one end of the chain as close ...
Page 23 - GAS CONNECTION; Installation for Natural gas
23 INSTRUCTIONS FOR THE INSTALLER 18 18B GAS CONNECTION This appliance shall be installed only by authorised personnel and in accordance with the manufacturer’s installation instructions, local gas fitting regulations, municipal building codes, water supply regulations, electrical wiring regulations...
Page 24 - ELECTRICAL CONNECTION
24 INSTRUCTIONS FOR THE INSTALLER ELECTRICAL CONNECTION The electrical connection must be carried out in accordance with the current standards and laws in force and by an authorised electrician. • Warning this appliance must be earthed. • Connection to the electricity supply must be made by an autho...
Page 25 - GAS CONVERSIONS
25 INSTRUCTIONS FOR THE INSTALLER Hot Plate Ignition Failure • Check alignment of burner holes to electrode. • Check aeration sleeve for adjustment for gas type, location and ambient conditions. • No spark, check ignition box failure or power supply. Before Leaving • Check all connections for gas le...
Page 26 - MAINTENANCE; Prior to any maintenance work or changing; Proceed in the following way when replacing a tap •
26 INSTRUCTIONS FOR THE INSTALLER MAINTENANCE Prior to any maintenance work or changing parts, disconnect the appliance from the gas and electricity power sources. Servicing must only be carried out by authorised personnel. REPLACING THE TAPS Proceed in the following way when replacing a tap • Remov...
Page 28 - TECHNICAL FEATURES; BURNER DISPOSITION AND BURNER TECHNICAL DATA TABLE; Central; ELECTRICAL COMPONENTS; NOMINAL DATA; TECHNICAL DATA; GAS; Operating pressure gas
28 TECHNICAL FEATURES BURNER DISPOSITION AND BURNER TECHNICAL DATA TABLE N. BURNER GAS OPERATING DIAMETER INJECTORS 1/100 mm RATING DENOMINATION PRESSURE kPa MJ/h 2 Large U-LPG Natural 2.75 88 10.0 Central front 1.00 142 10.0 3 Medium Rear U-LPG Natural 2.75 73 7.2 1.00 120 7.2 4 Small U-LPG Natural...
Page 33 - SPACE FOR DATA LABEL


 Euro Appliances EFS900EETSX
User Manual
Euro Appliances EFS900EETSX
User Manual
 Euro Appliances EMCM45SX
User Manual
Euro Appliances EMCM45SX
User Manual
 Euro Appliances EMEO45SX
User Manual
Euro Appliances EMEO45SX
User Manual
 Euro Appliances EO604SX
User Manual
Euro Appliances EO604SX
User Manual
 Euro Appliances EO900MX
User Manual
Euro Appliances EO900MX
User Manual
 Euro Appliances ESG800GUSX
User Manual
Euro Appliances ESG800GUSX
User Manual
 Euro Appliances ESM60SOTSX
User Manual
Euro Appliances ESM60SOTSX
User Manual
 Euro Appliances EV60M8SX
User Manual
Euro Appliances EV60M8SX
User Manual